Pool Filter
An in-line pool filter

Note: All photographs appearing on this page are freely usable for any purpose. Links to high-resolution versions of the pictures appear below each picture.
 Left High-resolution image shot with a Canon EOS 5D MII
Right High-resolution image shot with a Canon EOS 5D MII
Pool Filter Project
I typically operate with four separate filters on my pool: an in-line canister filter connected to the pool sweeper (floating in the water), a small basket filter in the skimmer, another basket filter immediately before the pump, and then a DE filter after the pump. 95% of the big stuff (that is, leaves, sticks, trash, and other junk) gets trapped by the in-line canister filter which I typically empty every week or two. The skimmer filter and pre-pump filter typically get cleaned about every six months as the stuff they normally catch has already been caught by the in-line canister filter.
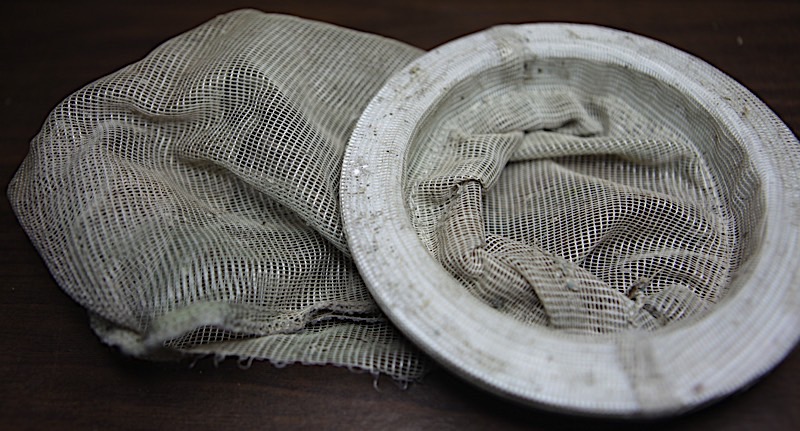
I've used several types of in-line canister filters (large and small). Typically they come in two types: one with netting inside the canister to catch debris and one with a small plastic basket to catch debris.
 High-resolution image shot with a Canon EOS 5D MII
 High-resolution image shot with a Canon EOS 5D MII
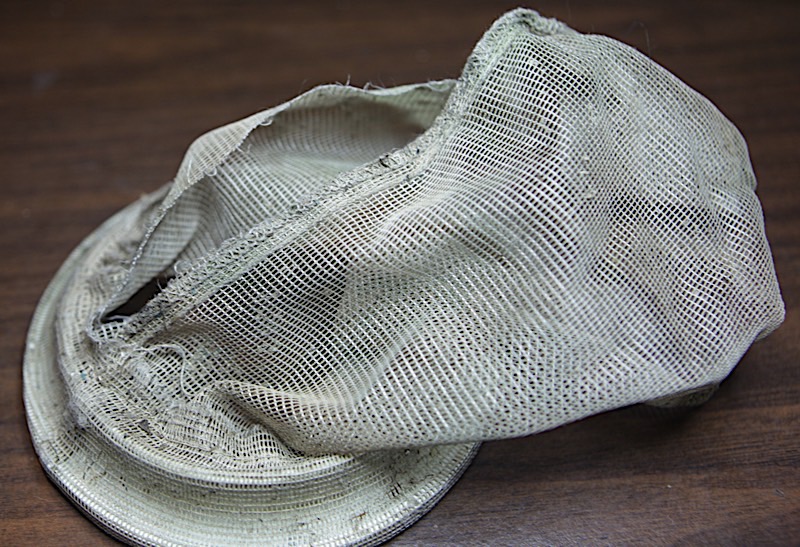
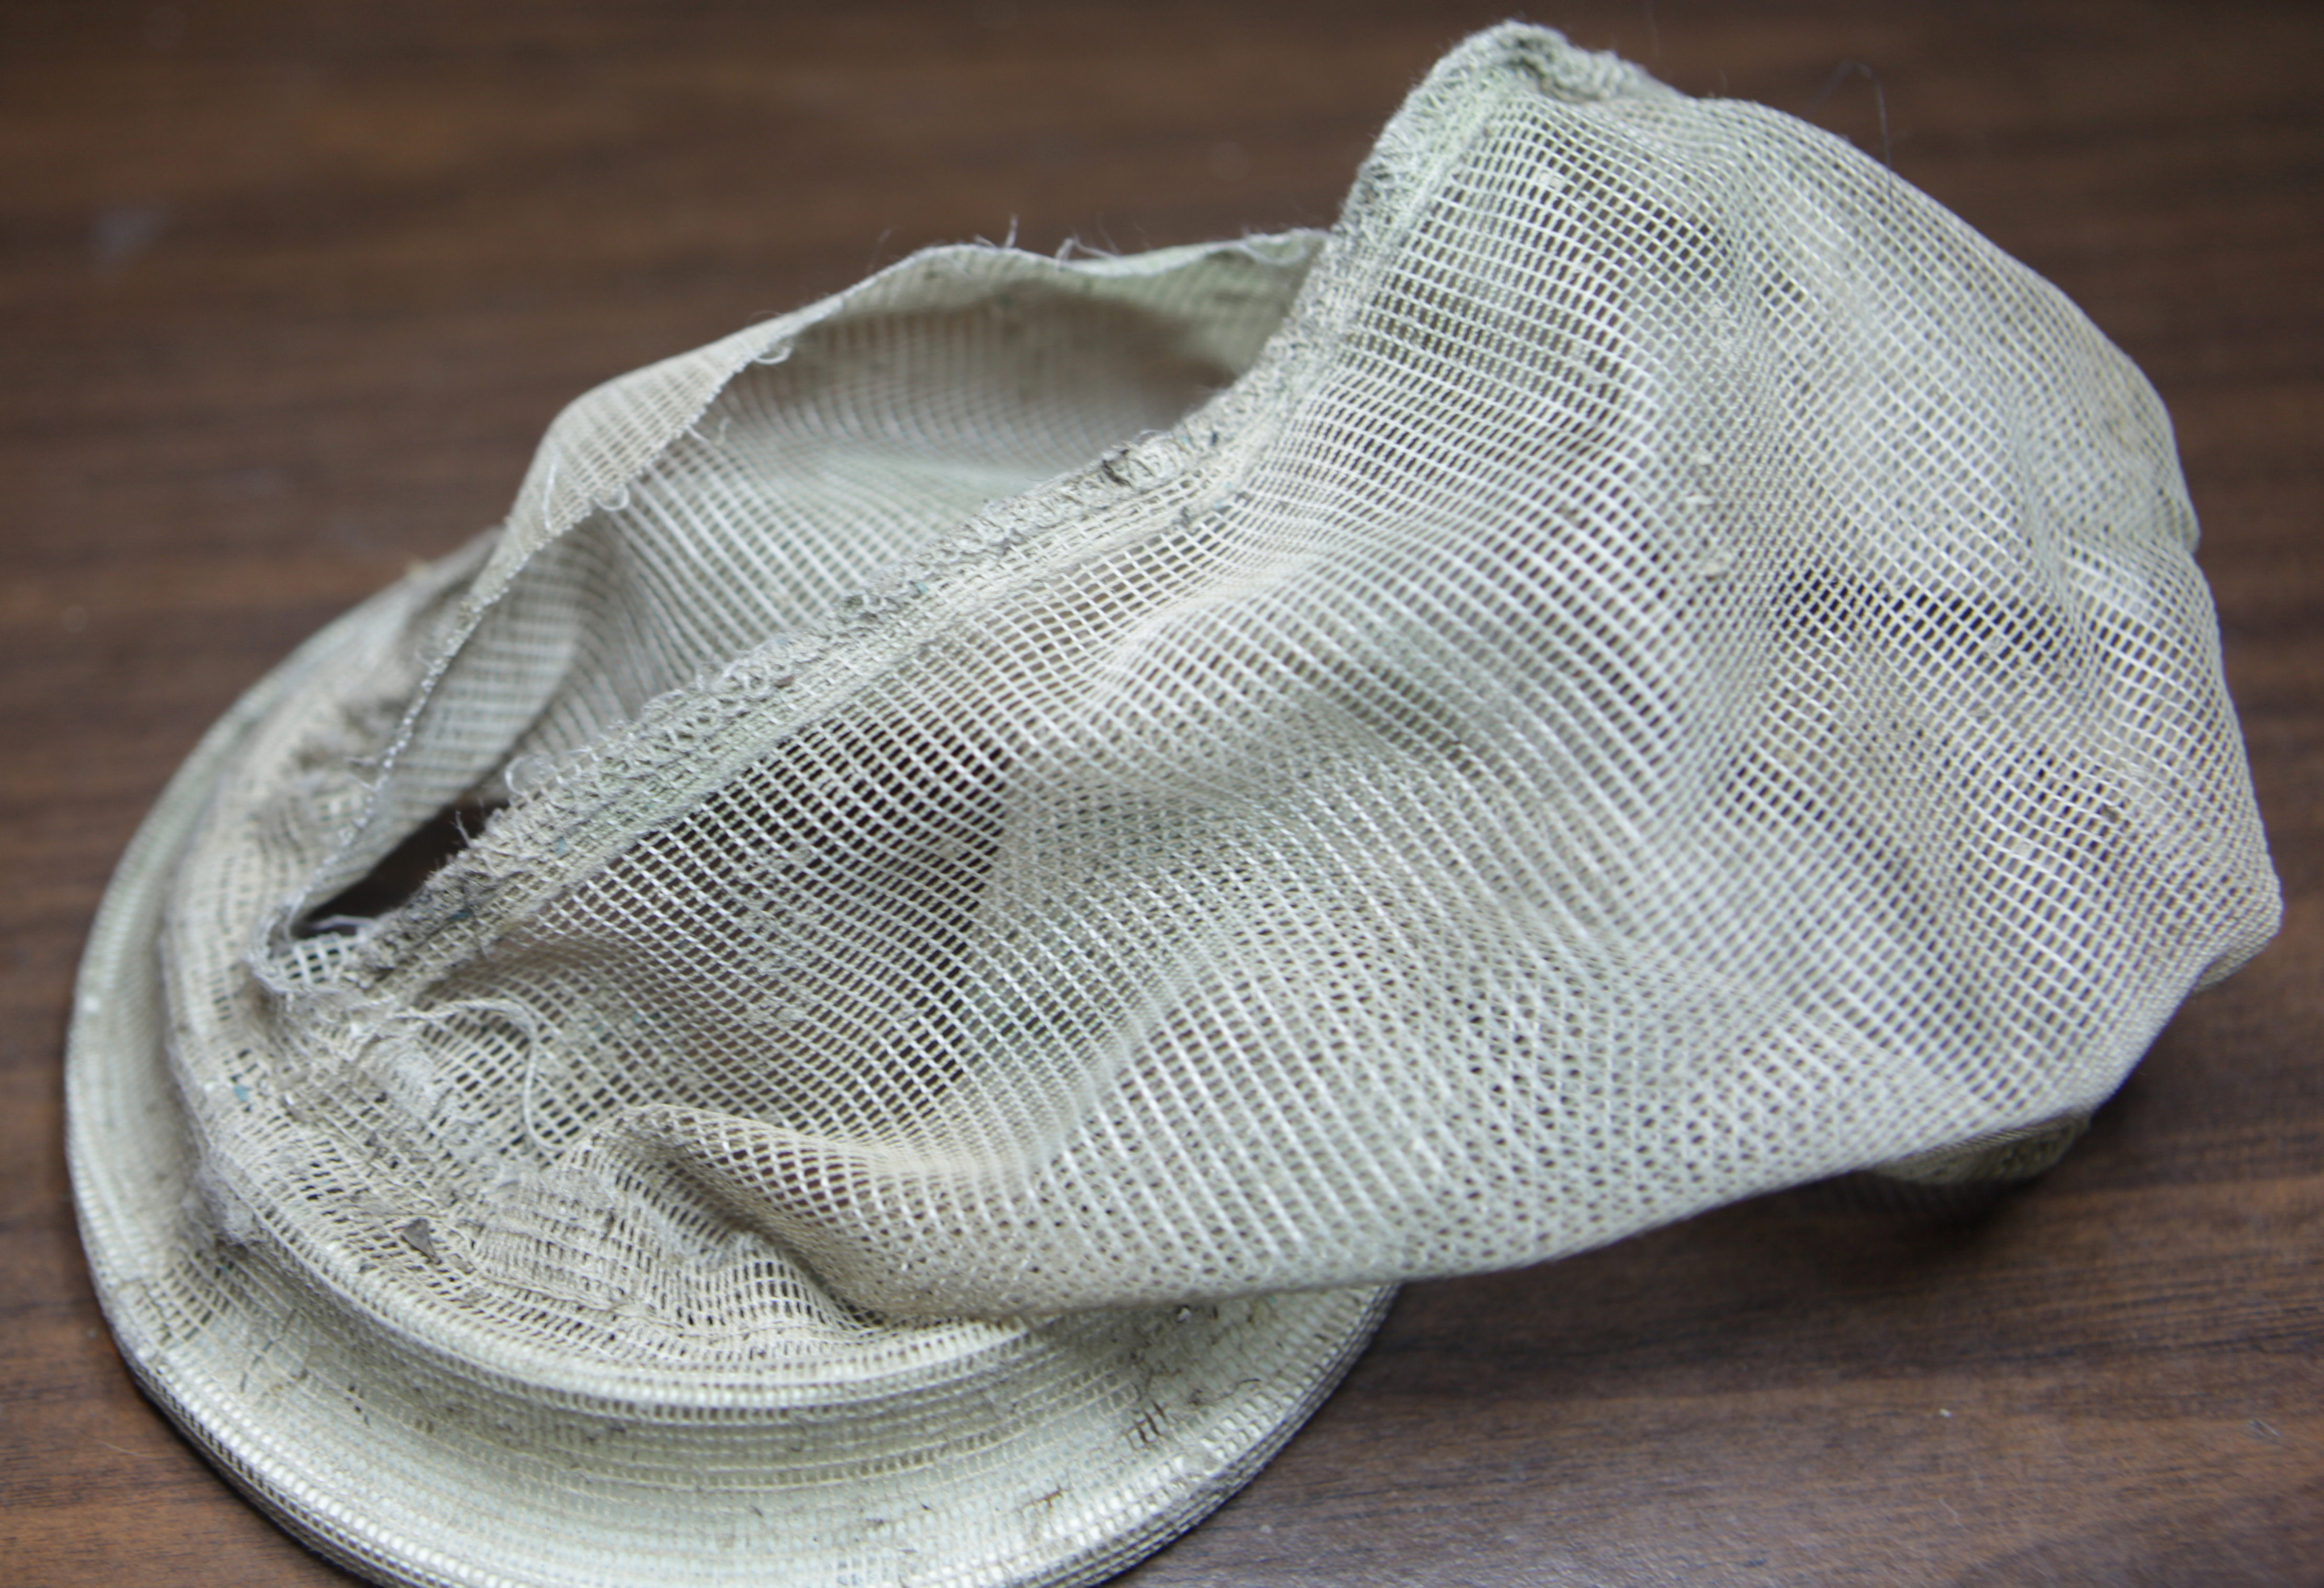
Unfotunately both filter types tend to self-destruct after a relatively short period. The net filter tends to rip along the seams within 3-6 months (depending on the amount of debris picked up by the sweeper and how often you empty the filter):
 High-resolution image shot with a Canon EOS 5D MII
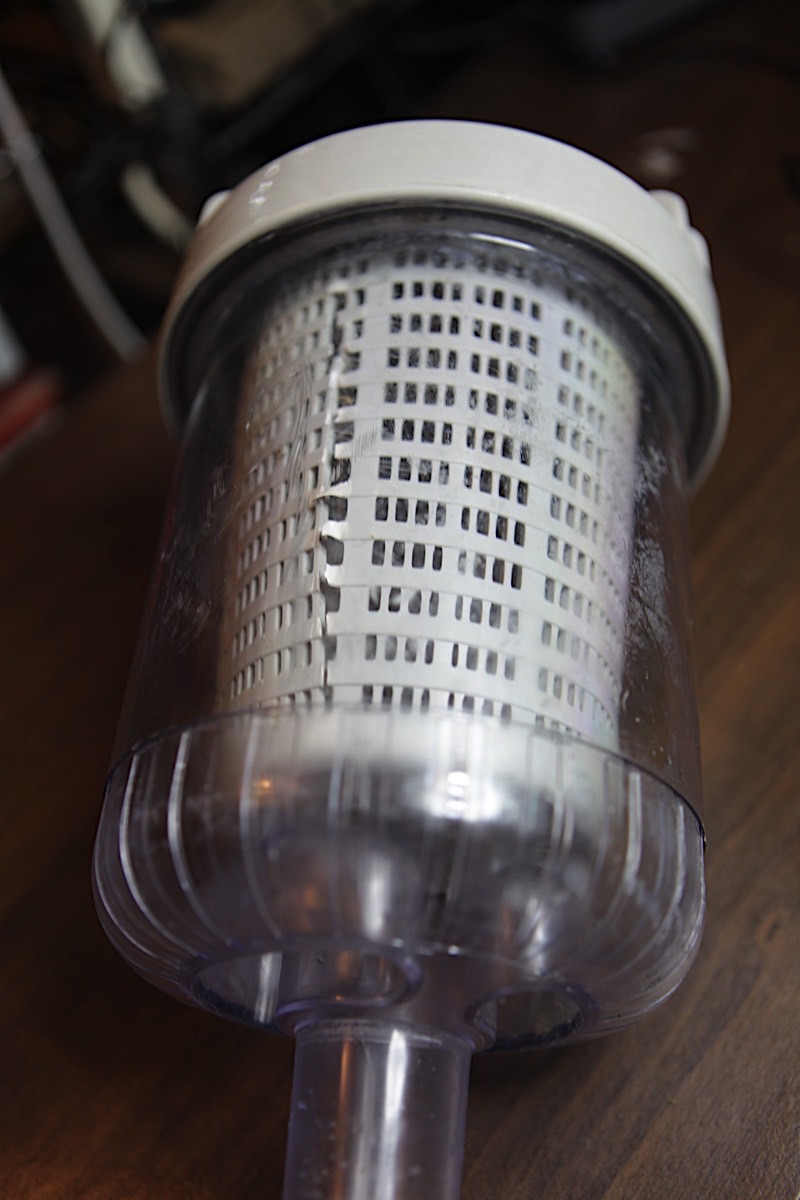
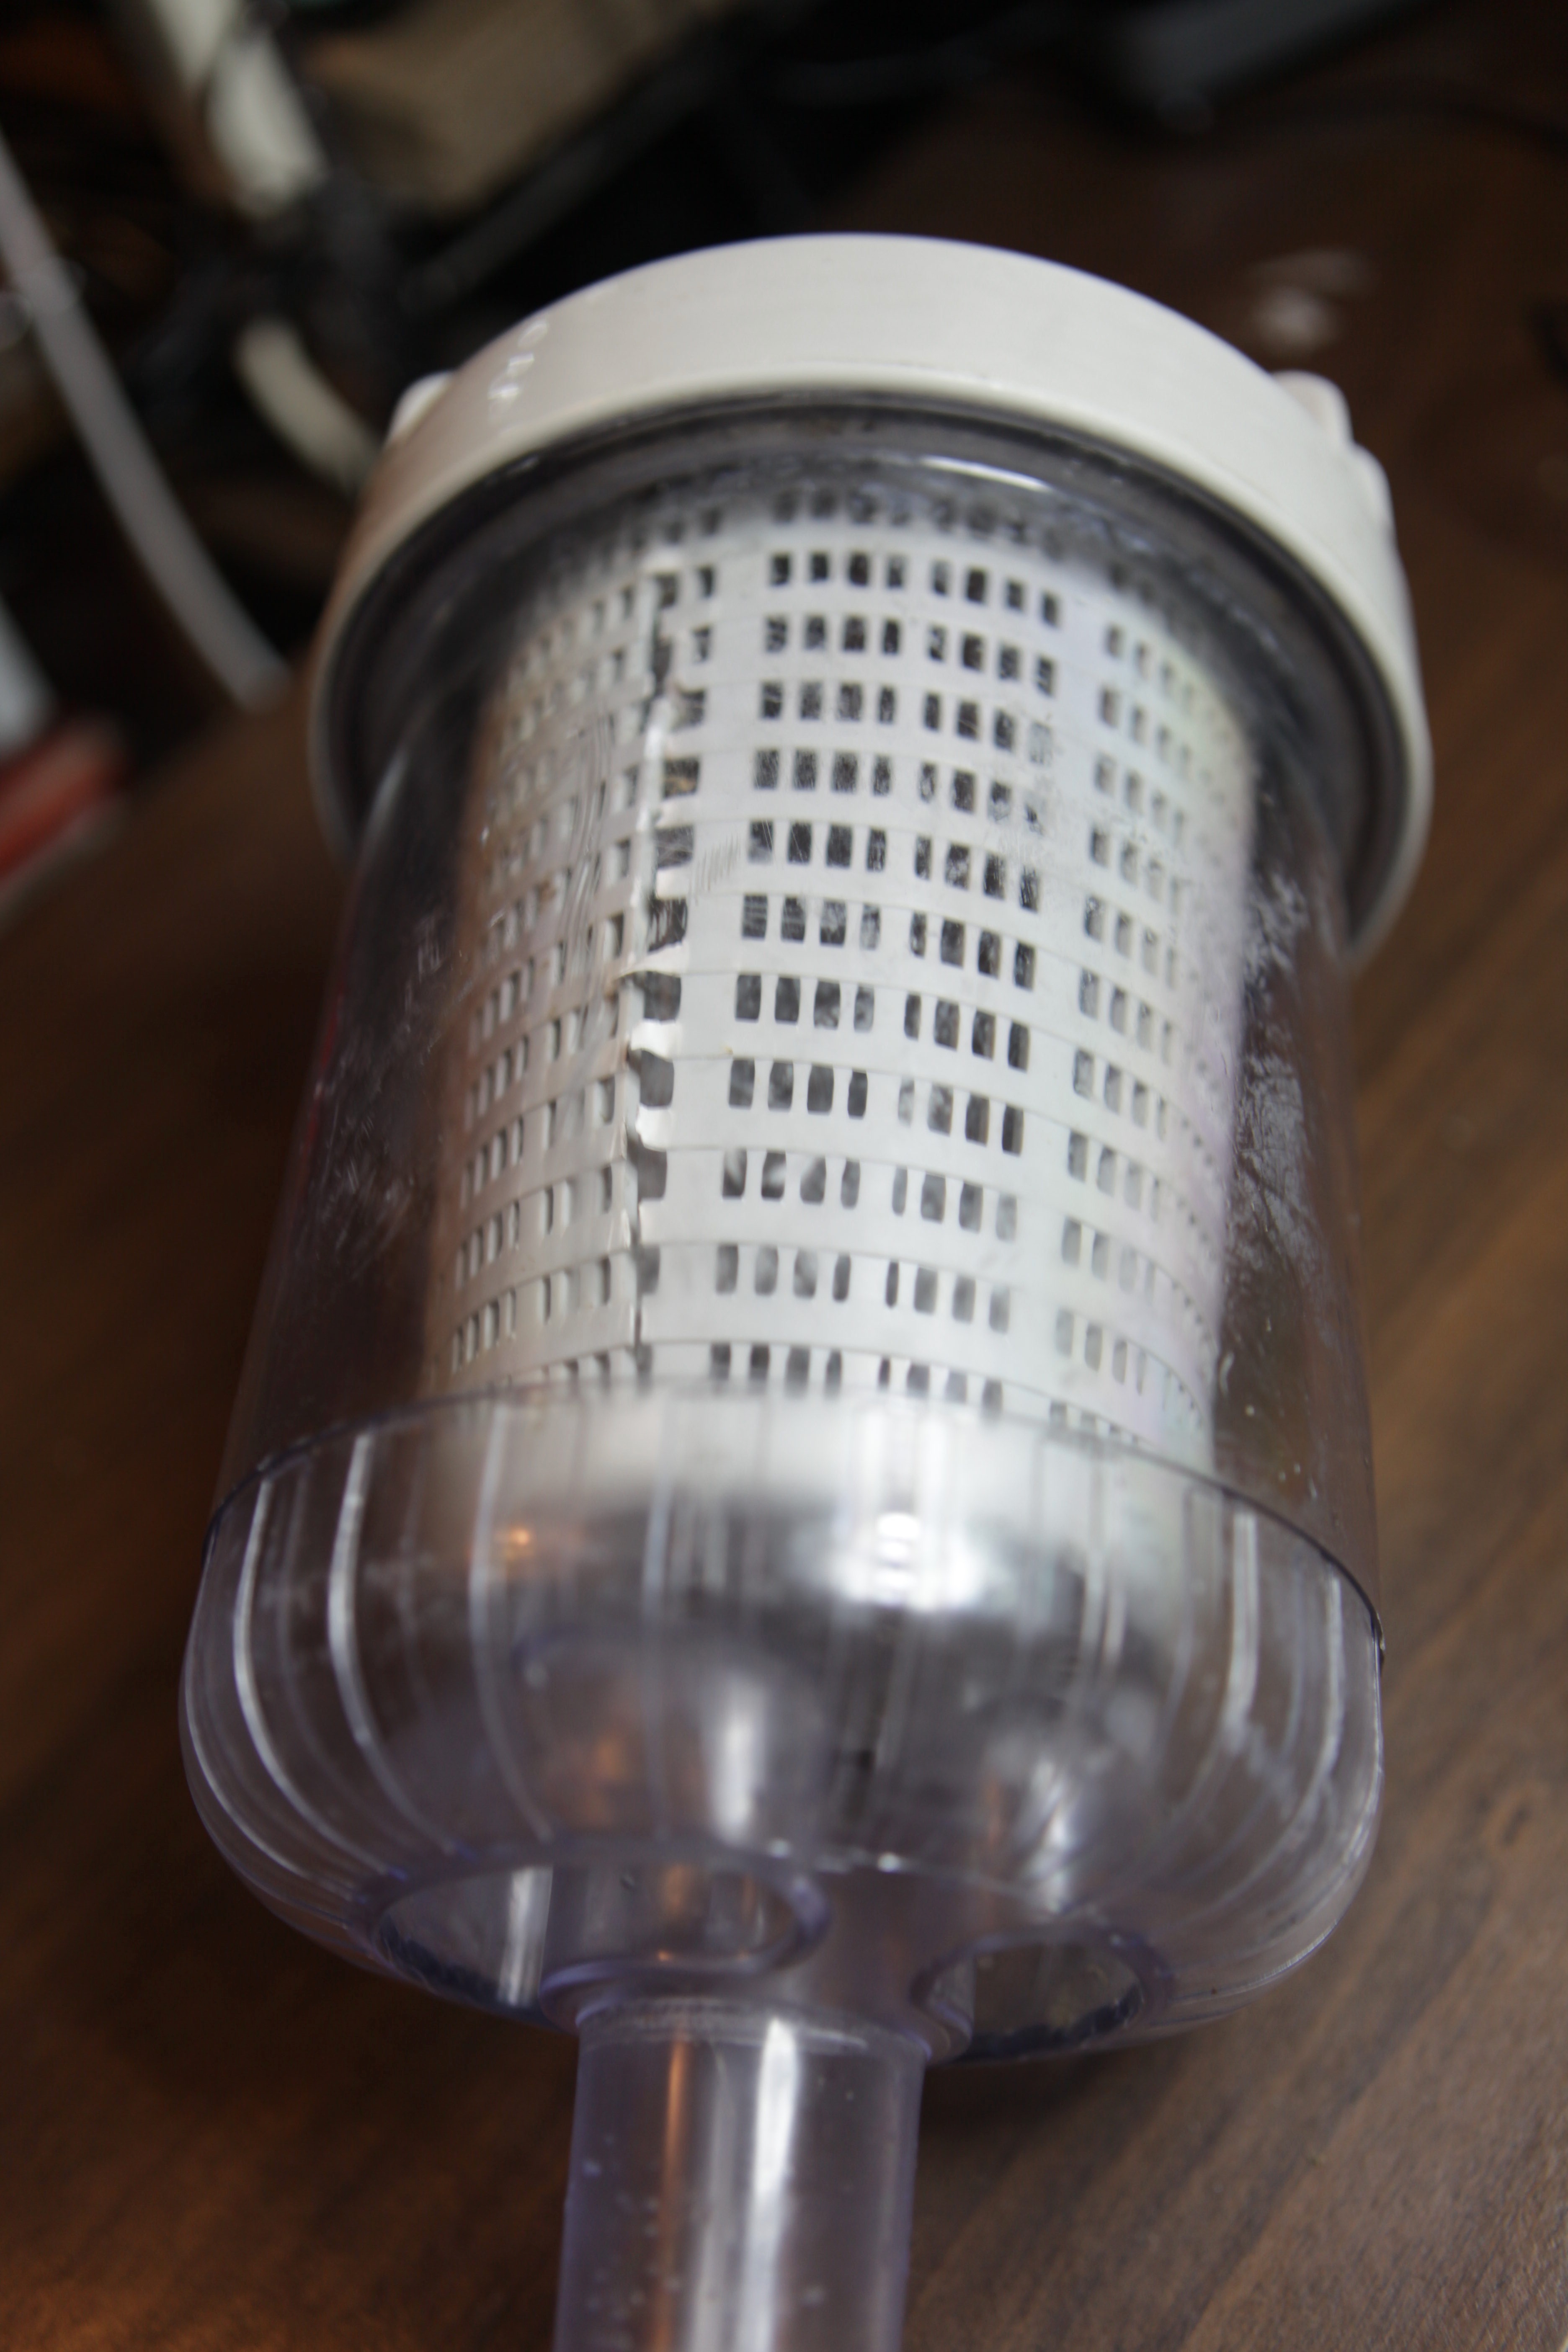
The basket filter lasts a bit longer, typically 6-9 months (again, depending on debris and emptying frequency).
 High-resolution image shot with a Canon EOS 5D MII
Sadly, my local pool supply doesn't carry the net or an appropriate basket to replace the innards of these filters. They expect you to pay $70 (for the small basket-based unit) or $100 (for the larger, net-based unit) to replace the whole thing. Cheap bastard that I am, I've gotten tired of repurchasing these filters over and over again. Although I could probably sew a new piece of netting onto the plastic ring of the larger unit, I've got a 3D printer, why not spend a ton of money and 3D print a solution?
For this project, I chose to create a plastic insert for the larger (net-based) cannister. The smaller unit would have been easier to deal with (for reasons I'll get to in a moment), but I'm lazy and the larger unit allows me to go longer periods of time without cleaning out the filter; so the larger unit it is.
The most straight-forward solution would have been to build a basket like the smaller filter unit and insert that basket into the larger unit. Unfortunately, the larger unit is 14" (36 cm) deep and my 3D printer (Lulzbot Taz 6) can only print objects just under 11" high. I could have printed a 10.8" basket (losing about 3" of space in the filter) but I chose to create a 10.5-inch "strainer" basket that sits over the hole and prevents debris from entering the outtake hole.
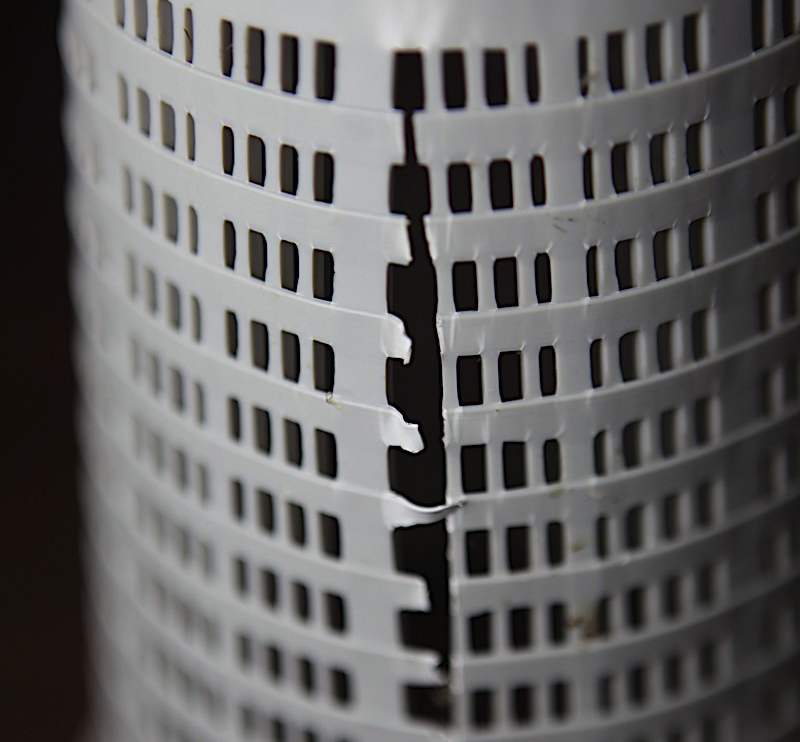
My first attempt, which I printed with ABS plastic, was a complete disaster. As you can see in the picture below, the (large) part suffered from severe warping and delamination.
 High-resolution image shot with a Canon EOS 5D MII
I actually built this unit on its side (hence the flat section rising along the edge of the strainer). Unfortunately, this build required lots of support material -- some of it along the exterior and a whole bunch on the interior (which I was never able to remove):
 High-resolution image shot with a Canon EOS 5D MII
As you can see, ABS was a really poor choice (at least with the settings I used which was a nozzle temperature of 235 C and a bed temperature of 110C). I modified the Fusion 360 file slightly to print it vertically rather than horizontally and used PETG rather than ABS, the result was much better:
 High-resolution image shot with a Canon EOS 5D MII
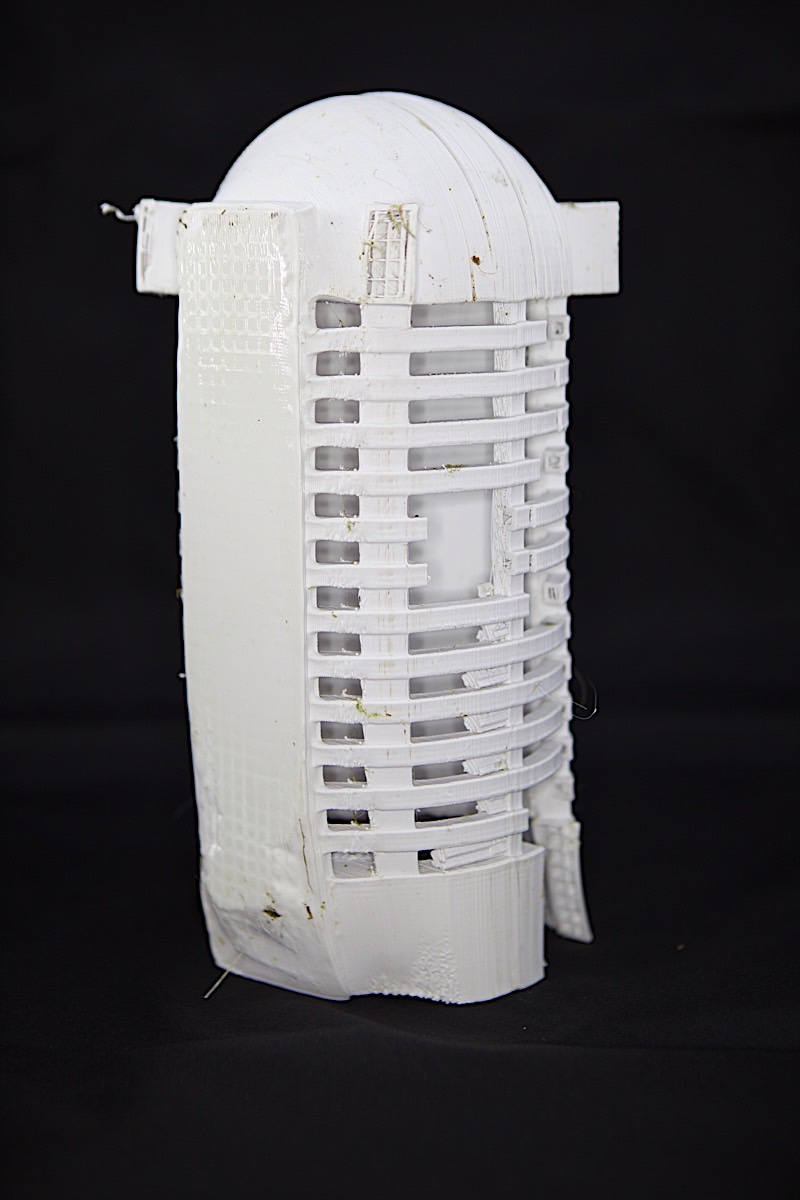
No warping or splitting to speak of. I did make the cross beams (that were supposed to wedge against the side of the cannister and hold the strainer in place) a bit too big and had to cut them down with a Dremel tool, but other than that, the part printed nicely. It still required some support material (in each hole) which was a bit of a pain to remove, but there was no support material internal to the strainer.
Not knowing how well the device would stand up to water pressure, I made the walls really thick and added cross-braces to the whole thing:
 High-resolution image shot with a Canon EOS 5D MII
In addition, to avoid requiring fill material up the middle of the strainer to support the hemispherical top, I created a "cone" at a 45-degree angle starting a few inches down from the bottom of the cap. With the combination of the thick walls, cross braces, solid cap plus solid cone below the cap, this design wound up taking almost a whole spool of PETG filament (about $25) and it took over 40 hours to print. That would have been okay, but there were a ton of problems with the design.
First of all, the thing is huge. It consumes a lot of space inside the cannister, space that could be put to better use holding leaves. Second, I had originally planned for the cross beams to wedge against the sides of the cannister holding the strainer down in the bottom. This failed for two reasons -- the cross beams were too big and I had to cut them down in size which resulted in a less-than-tight fit and the strainer is mostly hollow (15% infill) and bouyant when there is water in the cannister. This caused the strainer to float around in the cannister creating a gap underneath where debris could go into the outtake (and clog it up).
Another problem with this strainer is that the holes were too big, allow medium-size particles to pass through and clog the exhaust hole. Okay, time for the next version.
(As you can probably tell by now, my mechanical design skills are at about the level of a hacker -- just keep tweaking things until it works.)
I Want to Print These Things with ABS!
Although the PETG version printed just fine, I got annoyed that I couldn't print the parts in ABS. The Lulzbot Taz6 doesn't have an enclosure, so I've never had much luck printing large parts (anything larger than about 2" square) without warping or other problems. Unforutnately, I've got a couple hundred dollars in ABS filament sitting on my shelf (which I purchased before I learned about PETG) so I decided to take a break and figure out how to print ABS on my printer.
It is amazing how much bad advice you can find on the internet with respect to 3D printing. It's like people invent all these ideas and post them without ever trying them out. For example, perhaps the most common suggestion with respect to reducing warping was to print using a lower nozzle temperature. This seems intuitive. After all, warping occurs as the ABS cools off and shrinks. Seems reasonable that the smaller the difference in temperature, the less shrinkage (and warping) you'll get. I tried printing parts at the minimum temperature listed for my ABS (215C), I tried printing below that level. It didn't lessen the warping at all, though I started getting lots of delamination problems (because the layers weren't sticking together well with the low temperature).
I tried the maximum temperature listed for my brand of ABS (215 C). I tried everything inbeween at 5 degree increments. Nothing changed.
Then I found a site that recommended printing with a very high temperature (265 C). Everything I'd read up to that point suggested that running ABS at such a high temperature was a bad idea because you'd "cook" the plastic. However, nothing else was working and a lot of people on this particular forum were talking about how this worked well for them, so I tried it.
Unbelievably, it worked great. There was some problem with bridging (when the head goes over empty space between two points) that sagged a bit, but no warping, great adhesion to the bed (even without glue), and no delamination. To deal with the sagging issue, I did another no-no when printing ABS: I turned on my cooling fans (albeit very slow).
So now when printing ABS, here are my settings (note that I use Simplify 3D as my slicer, Cura 3D that comes with the Taz 6 is nearly brain-dead):
ABS print parameters:
- 265 C nozzle temperature
- 110 C bed temperature
- 0.25 layer height (faster and stronger, I don't care about resolution for pool filters)
- 1.5 extrusion multiplier for the first two layers (putting down extra plastic on the first two layers helps with bed adhesion)
- 3 solid layers on the bottom
- 5-6 solid layers on the top (5 is minimum needed for 15% infill, six is better).
- 3 layers on the wall (better than two for overhangs)
- 15% infill, rectilinear
- 10% speed on first layer (standard 3,600 mm/min draw speed for ABS)
- Fan at 6% speed after the second layer
Note that in Simplify 3D you need to create two processes in order to change the extrusion multiplier during the print. The first process covers the first two layers (at 1.5x extrusion multiplier) and the second process covers the remaining layers (at 1.0 extrusion multiplier). See www.simplify3d.com for more information about the Simplify 3D slicer application. Of course, changing the print width on the first layer has a similar effect, but I prefer the two process method as it gives me more control.
On to the next version
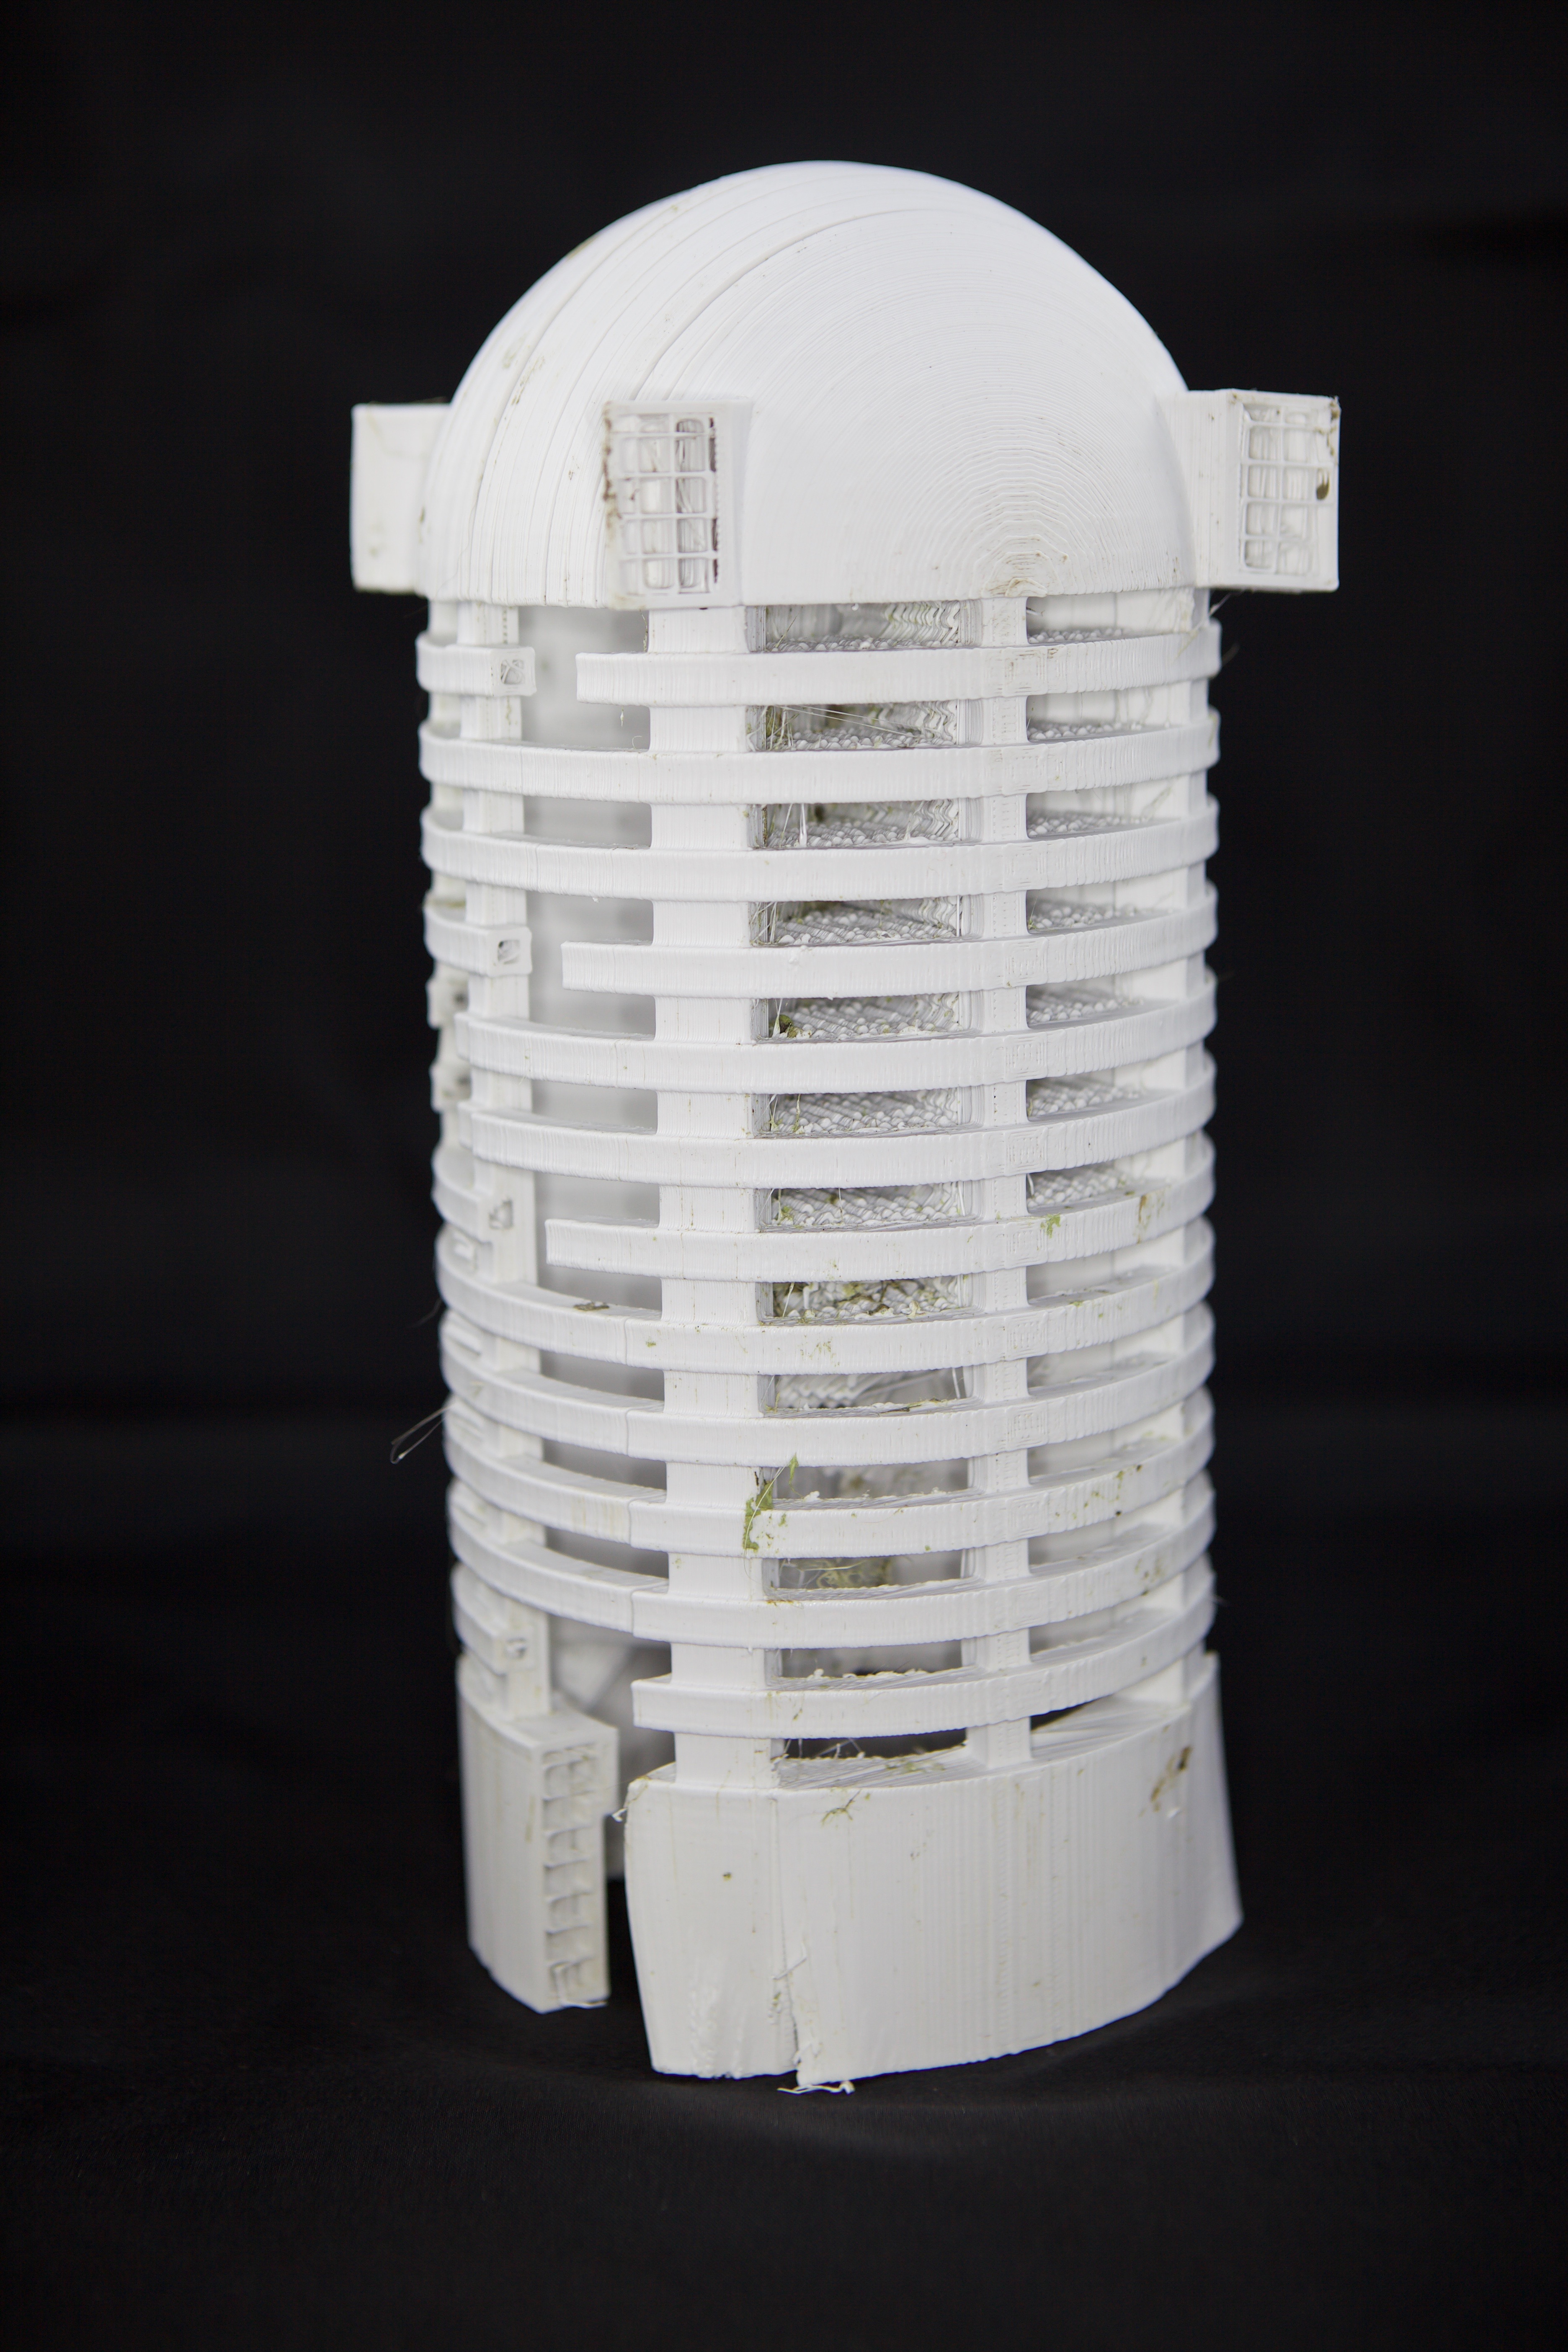
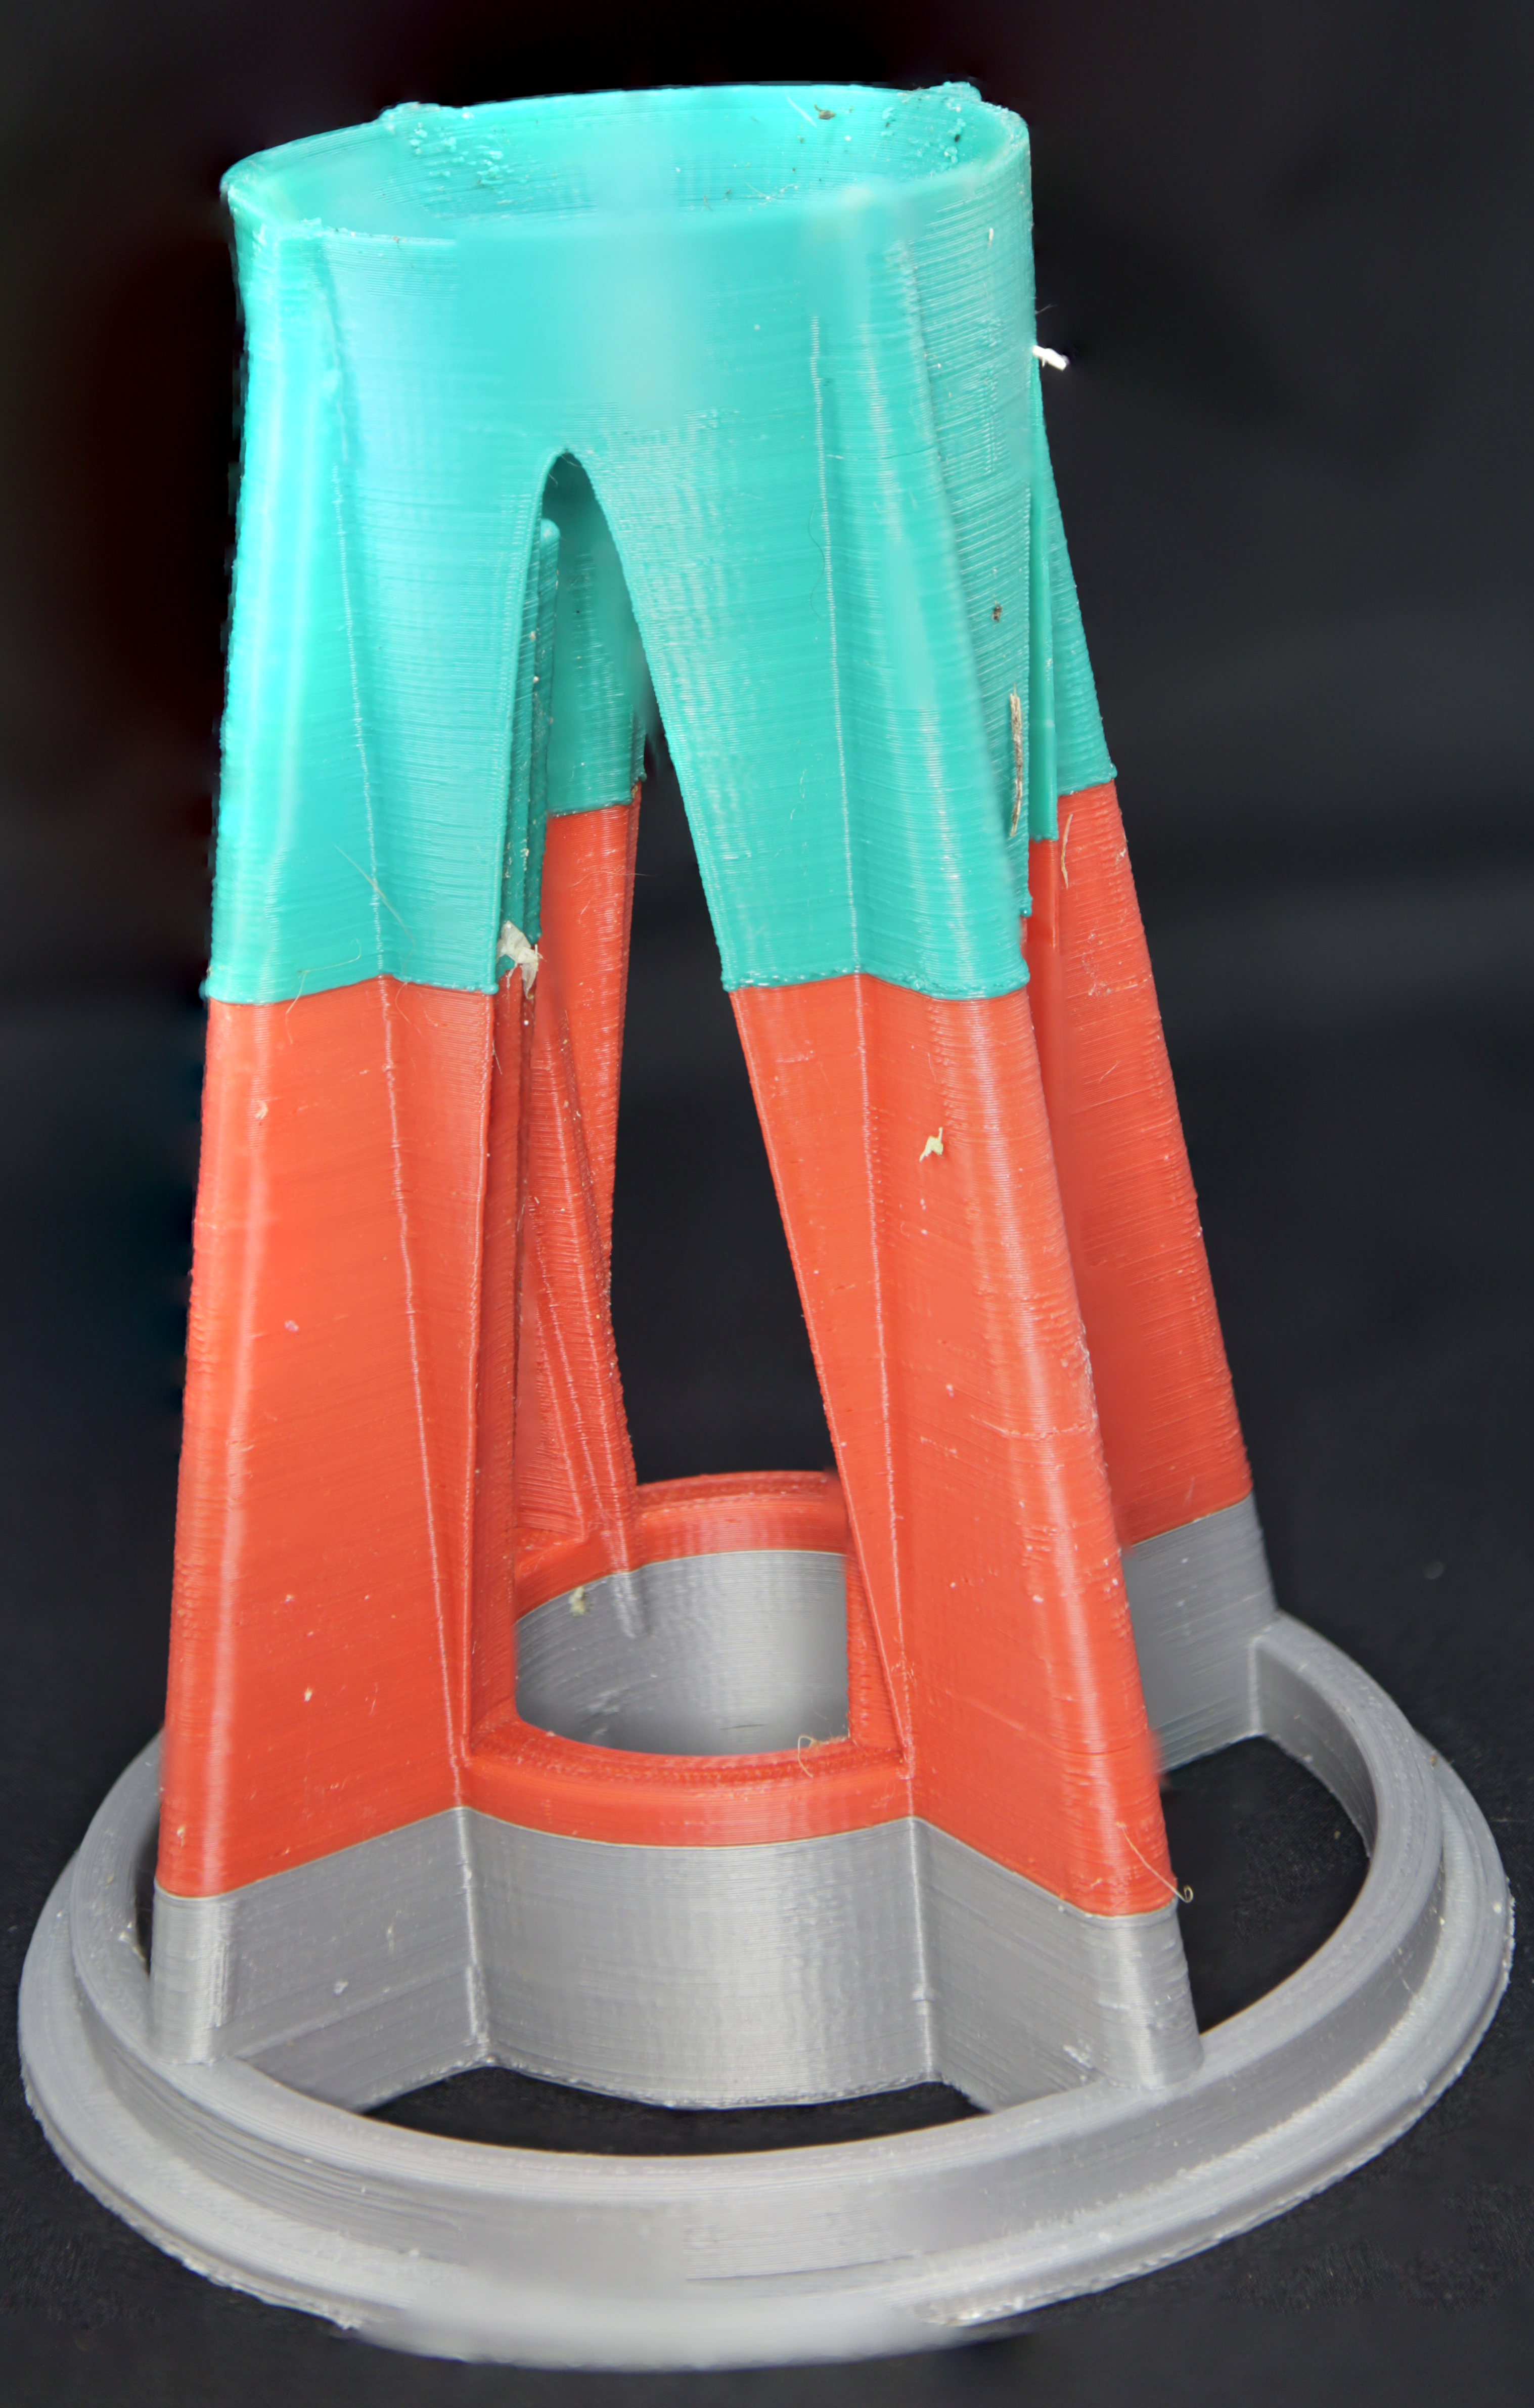
The next (working) version I created started with a brace that fit in the top of the cannister to hold the strainer down against the bottom (note: the tri-color scheme wasn't an attempt to be artistic, I simply had two spools of filament with only a little left on them, so I used up those short spools first to be done with them).
 High-resolution image shot with a Canon EOS 5D MII
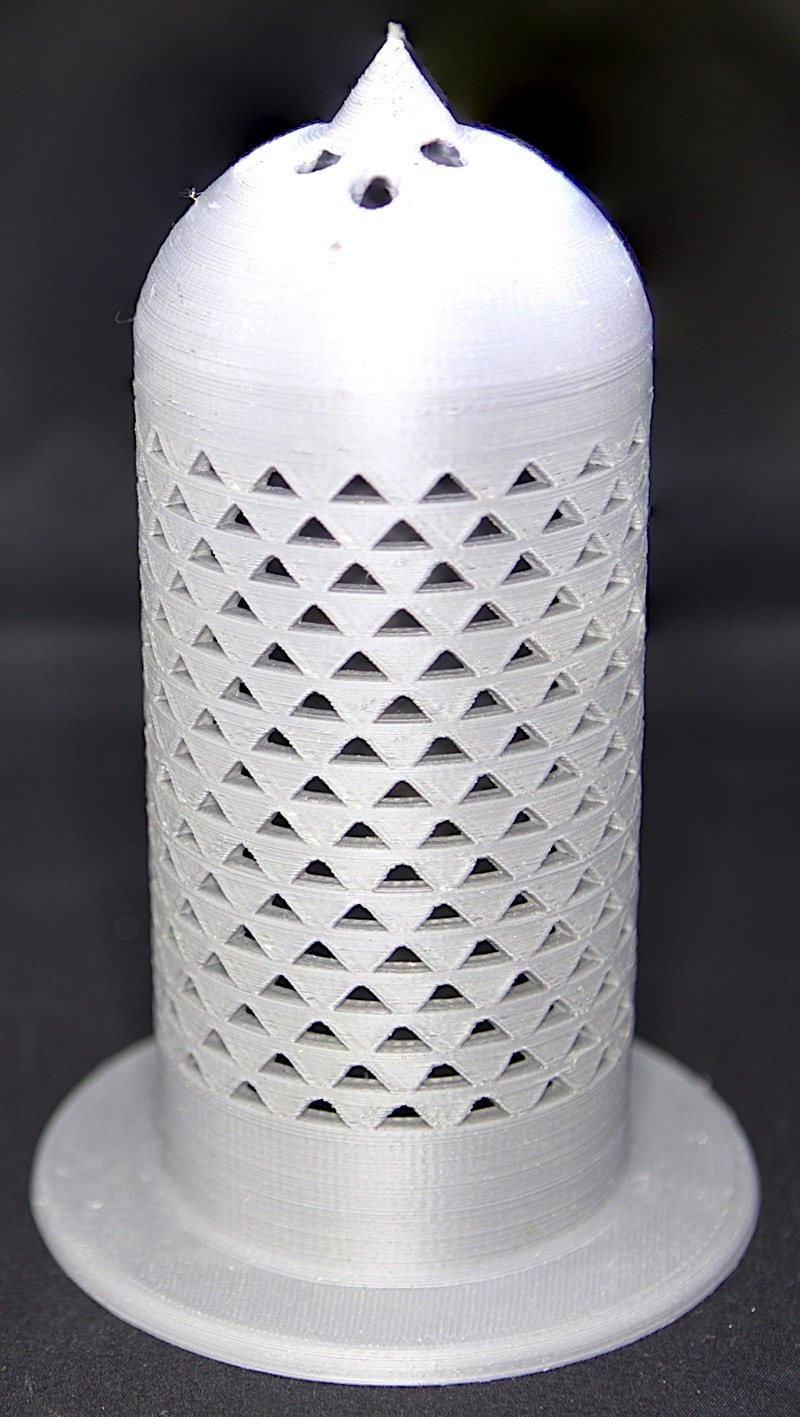
Next, I printed the strainer component:
 High-resolution image shot with a Canon EOS 5D MII
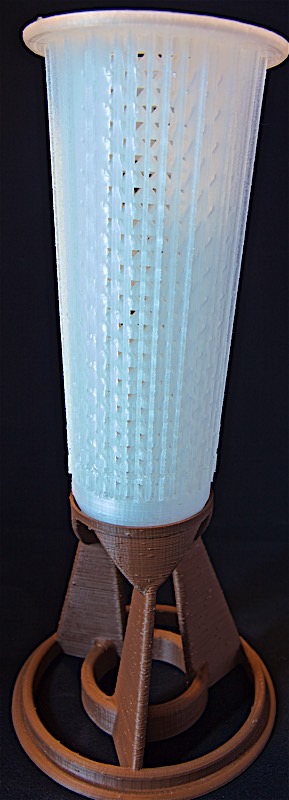
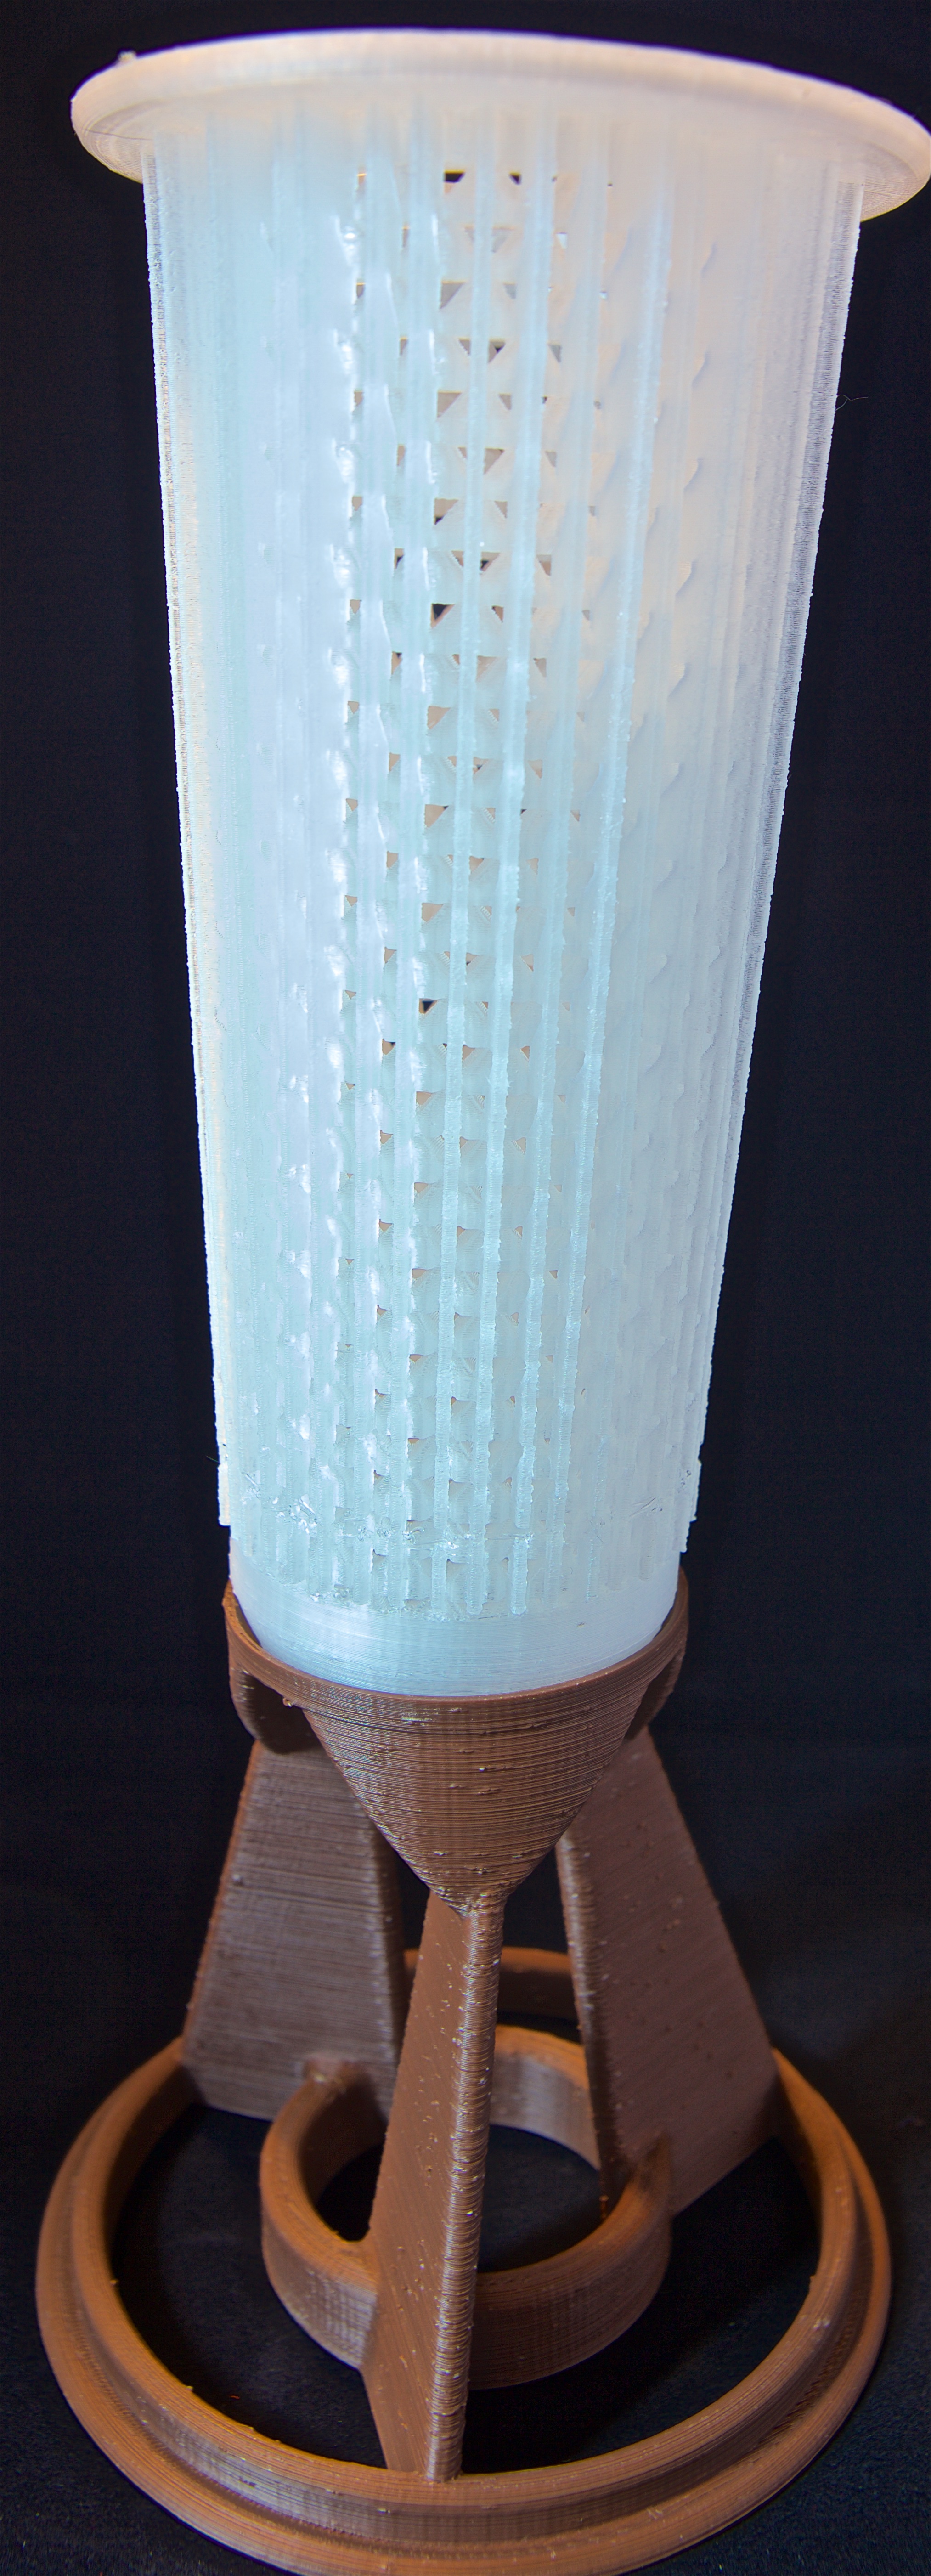
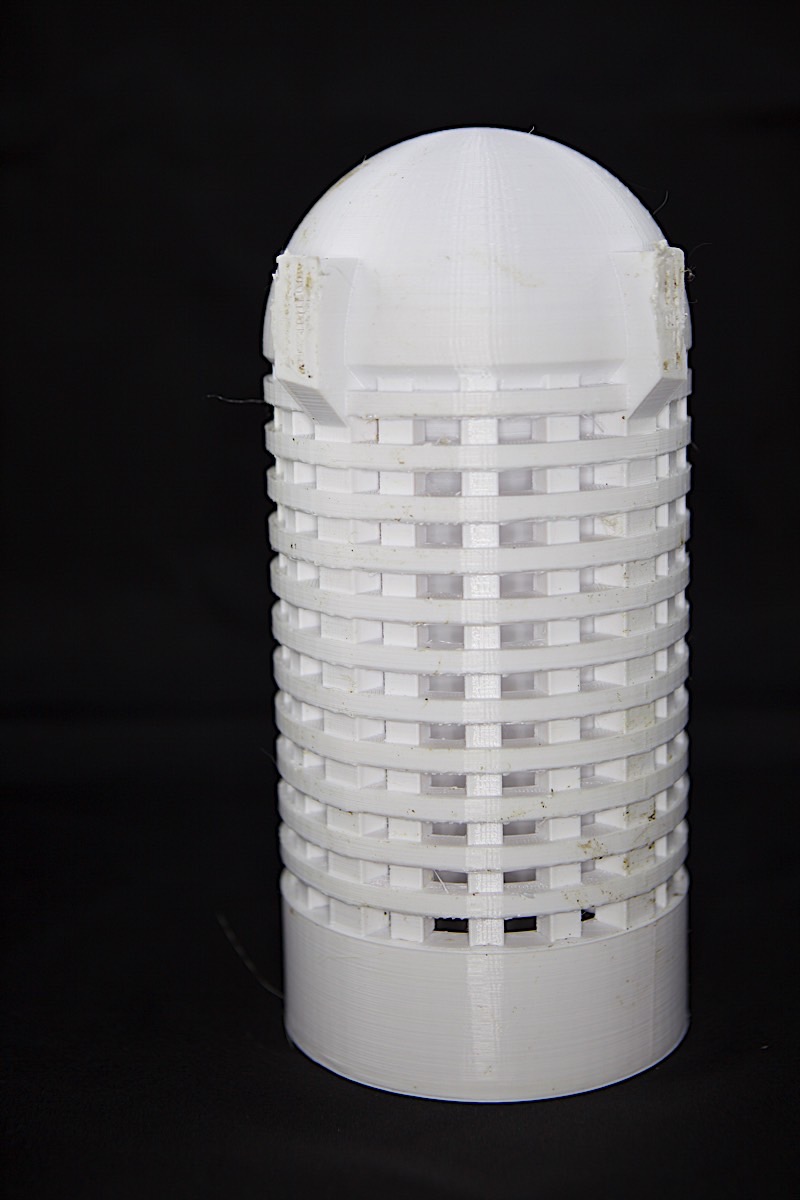
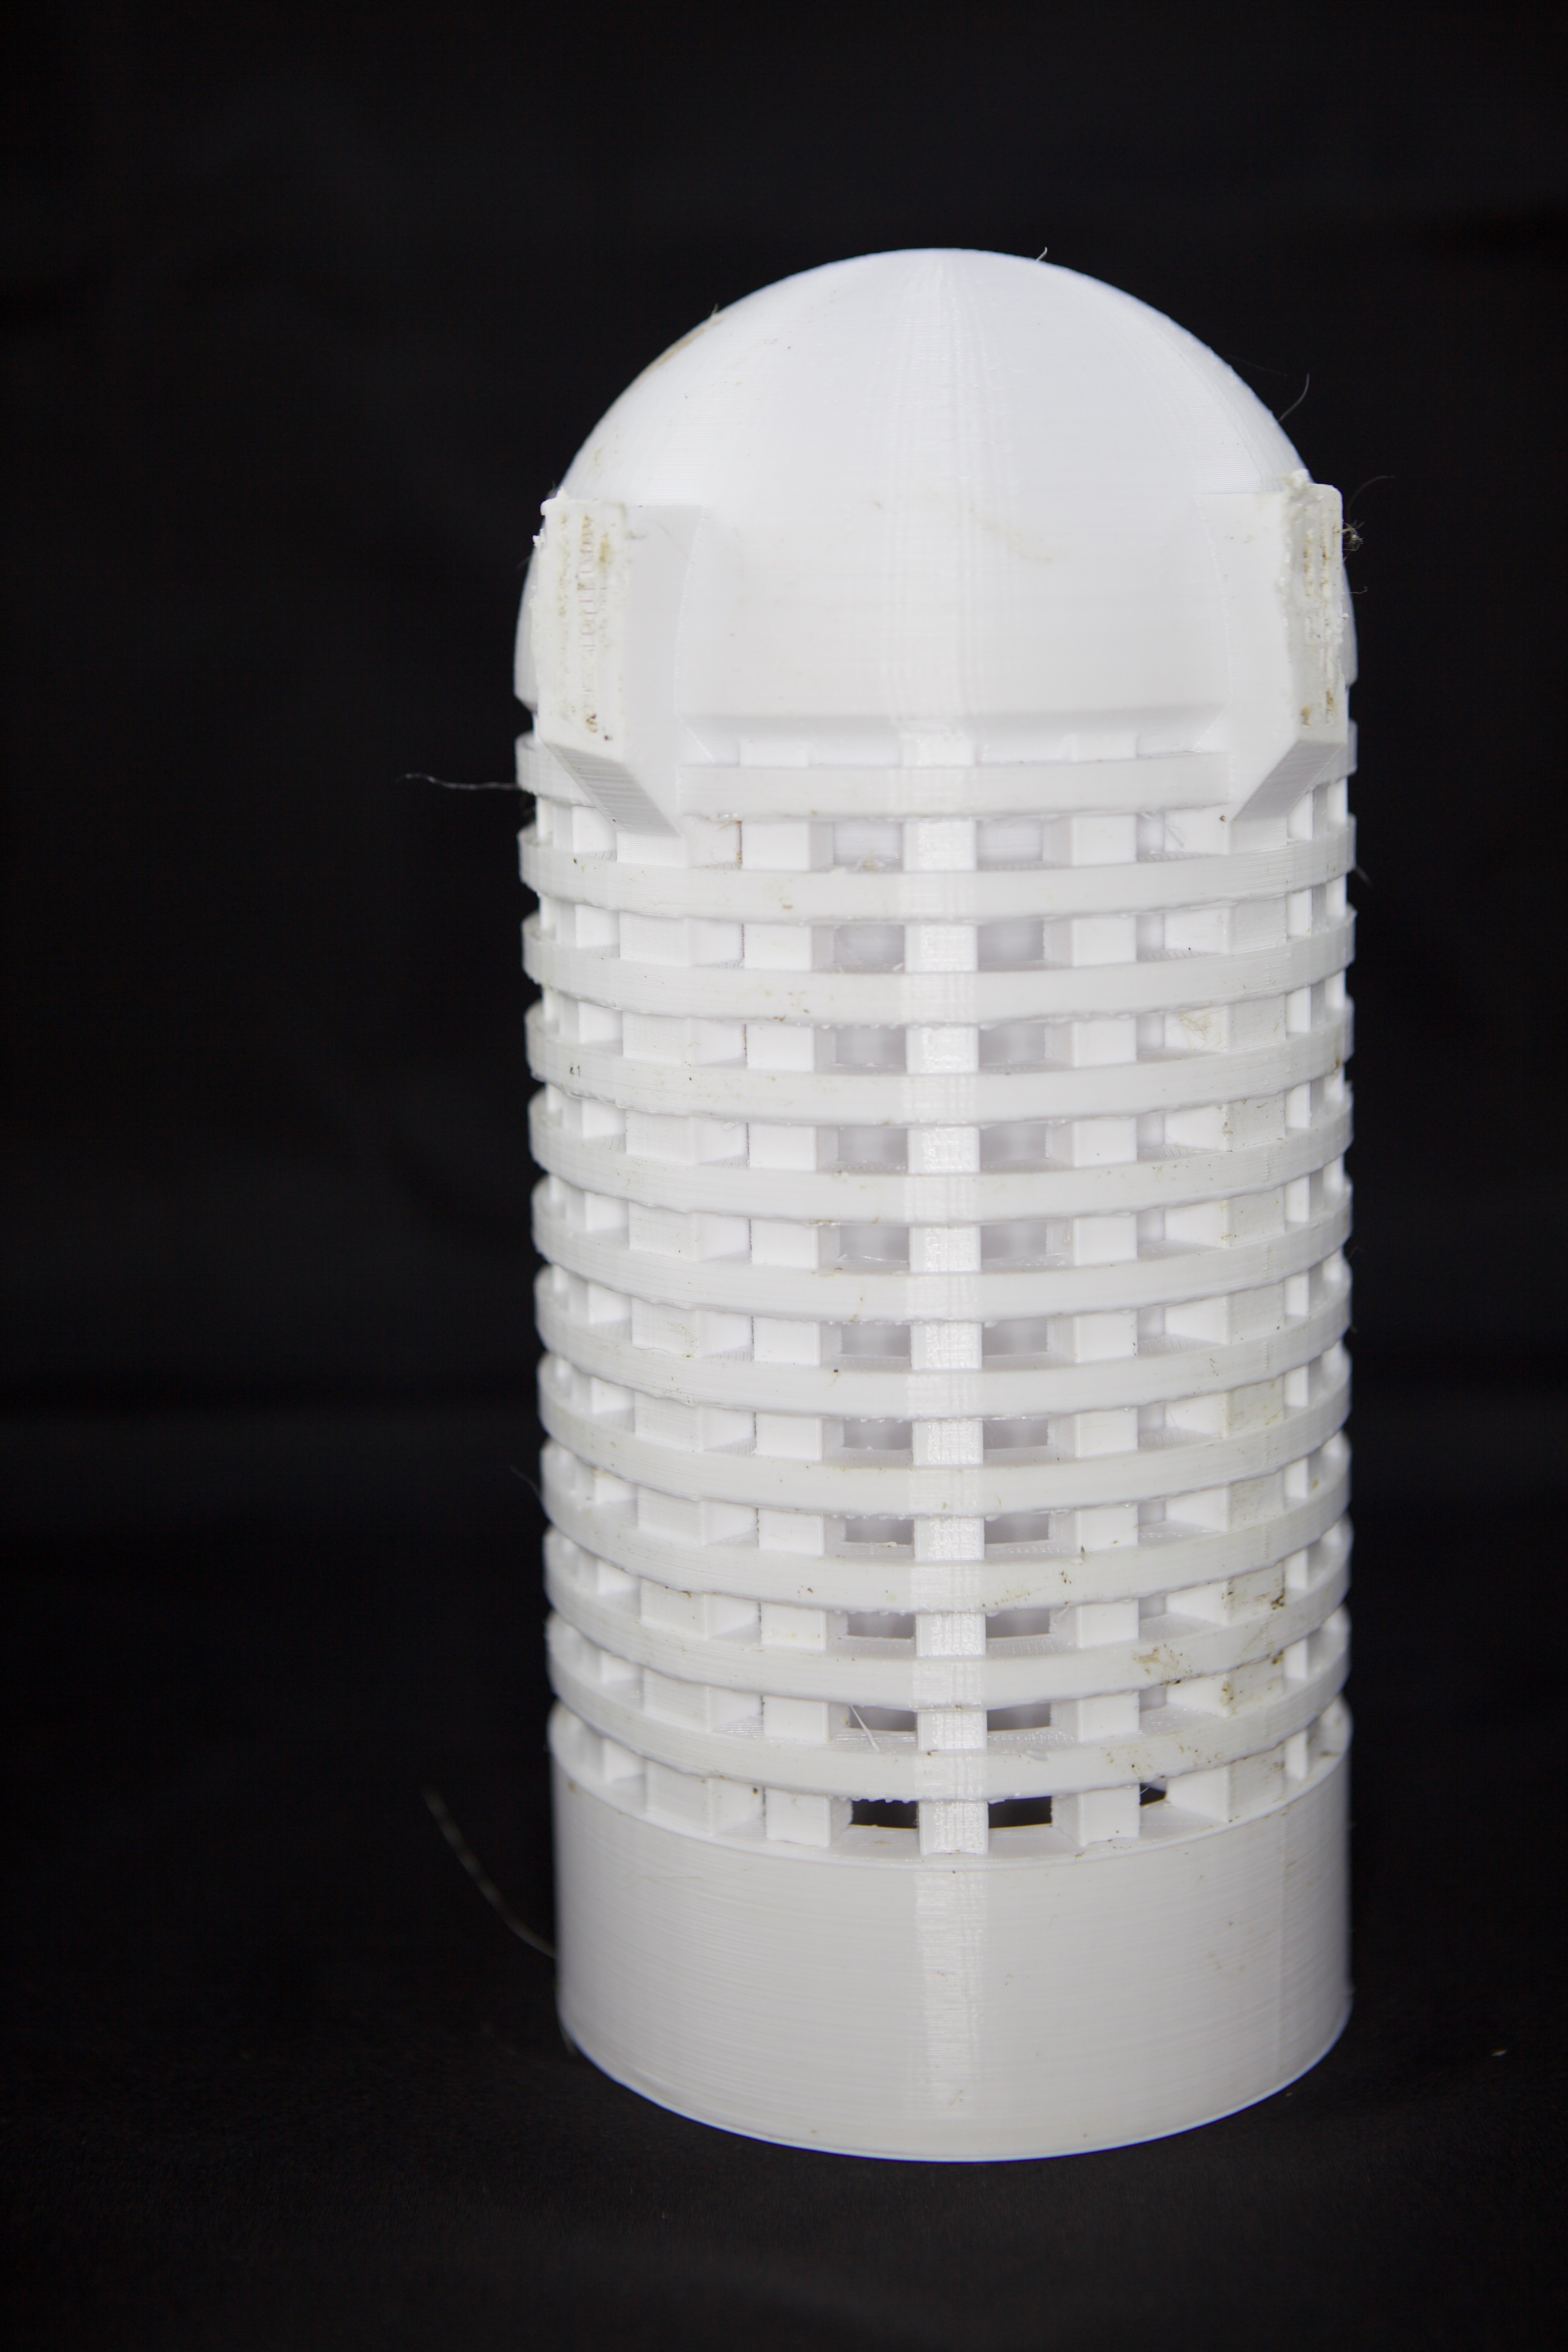
There were several improvements made to this strainer:
- The diameter was much smaller than the original strainers to leave more room for debris in the cannister.
- The holes were much smaller than the original design to block more trash from entering the cannister exhaust area.
- The wholes were designed as triangles rather than rectangles. By doing so I eliminated all the support material in each of the holes of the original design.
- Like the second version, I used a cone-shaped interior to avoid the need for support material inside the strainer. In order to prevent a large hole appearing in the top (while also maintaining a 45-degree [or better] angle and consuming as much plastic as possible from the cap) I had to extend the cone above the cap (hence the "pointy hat").
- I made the walls much thinner (1/4") and eliminated the cross beams inside the strainer. This reduced the amount of filament to about 1/4 the amount used in the original design and reduced the print time to about 12 hours.
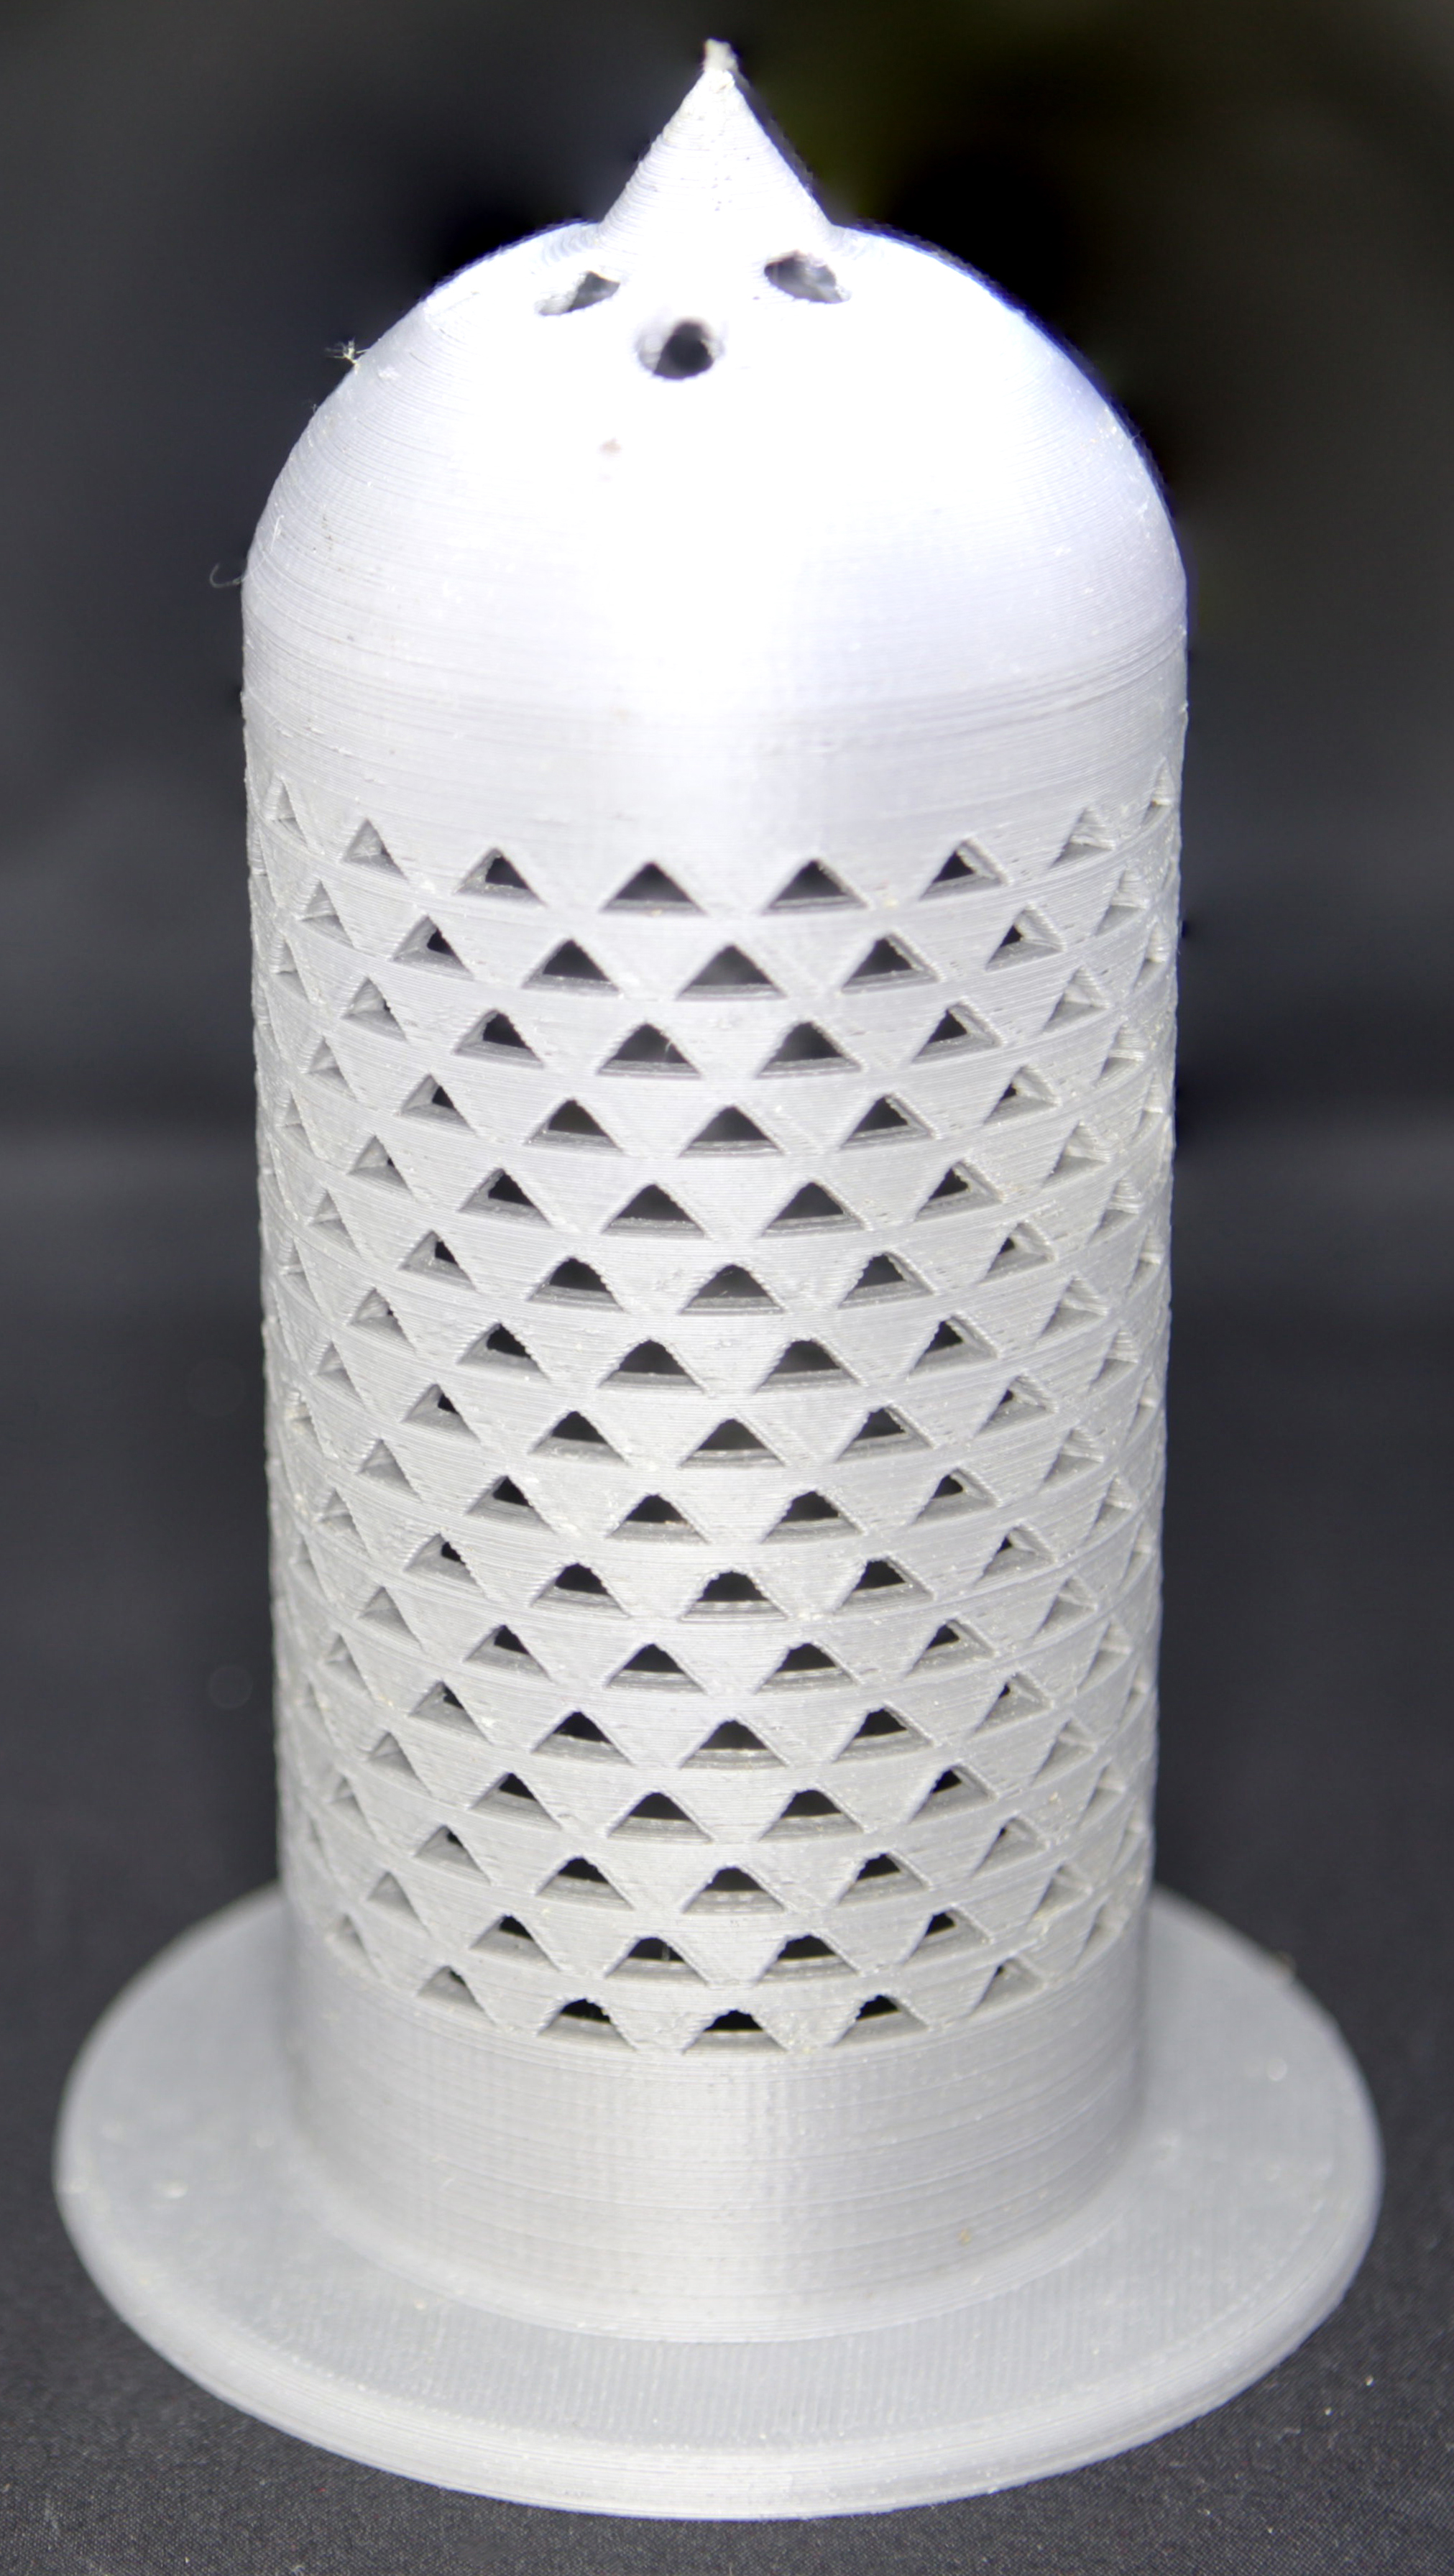
Here's the final combination:
 High-resolution image shot with a Canon EOS 5D MII
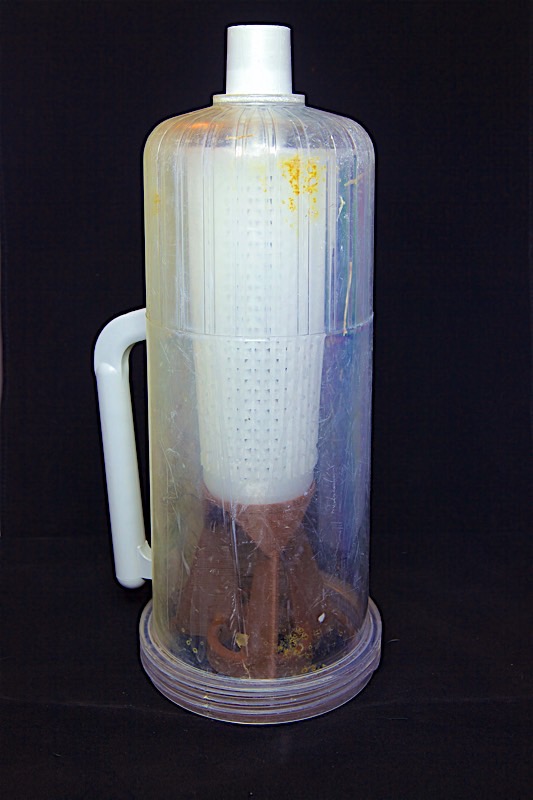
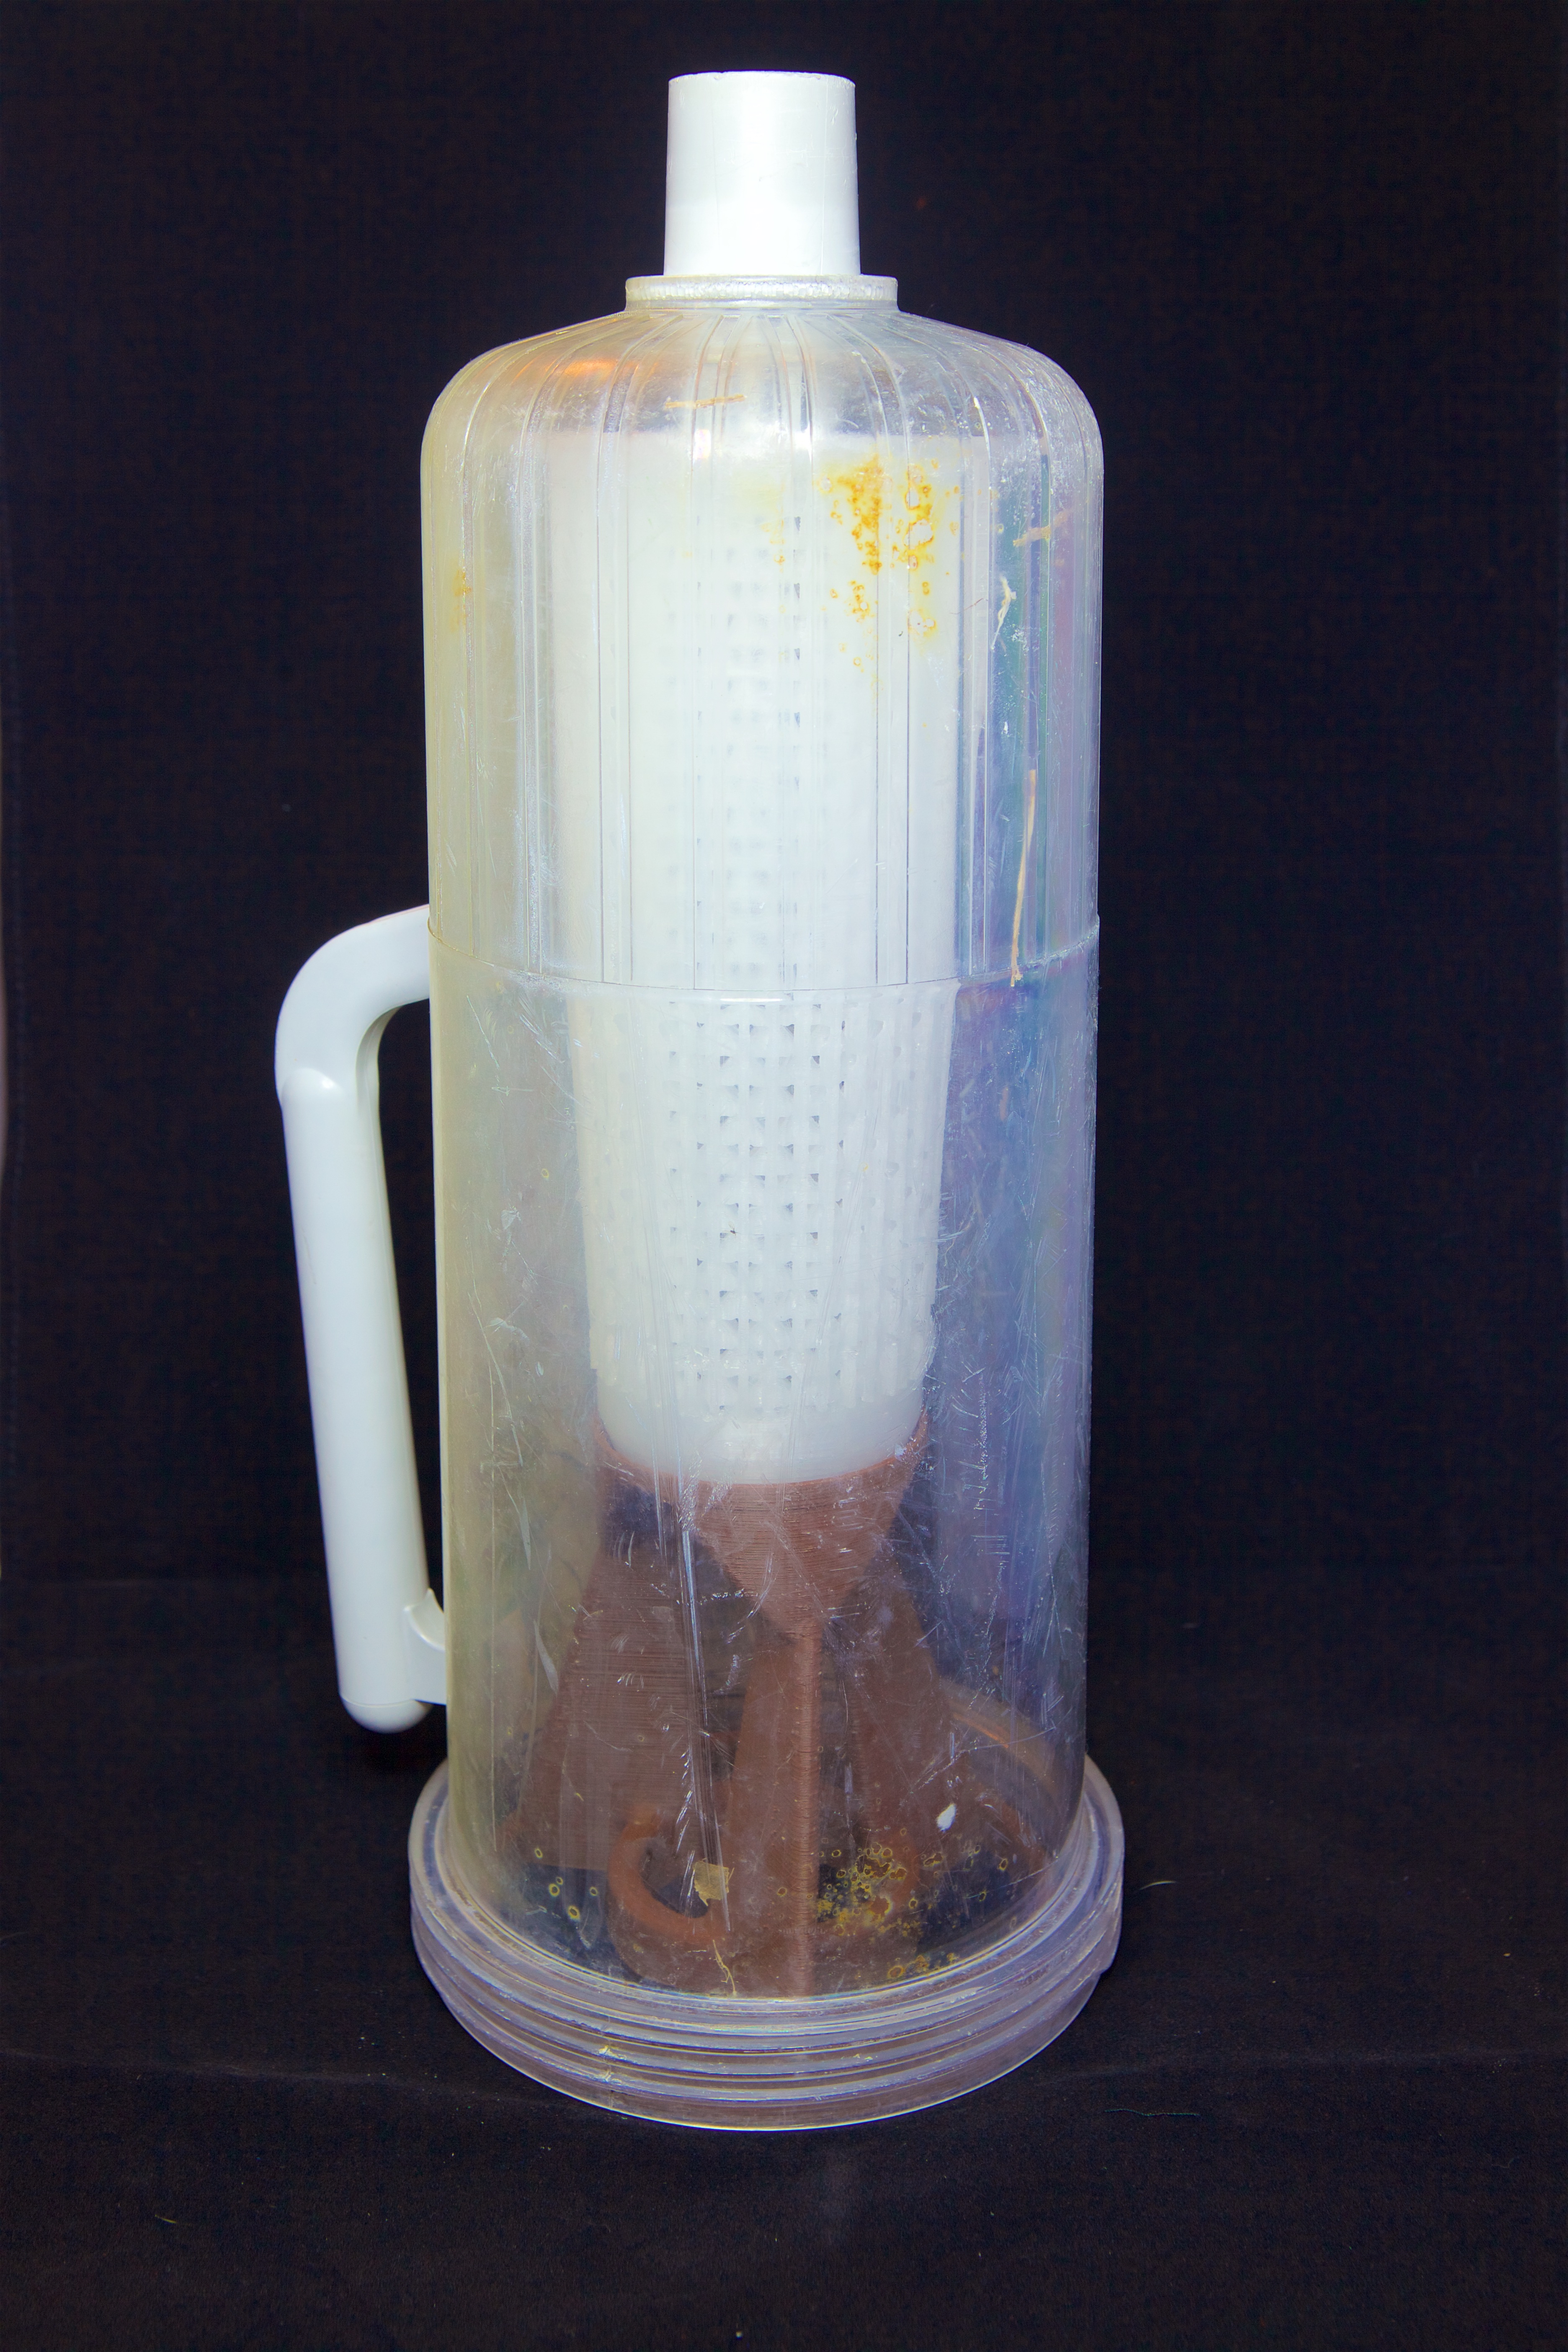
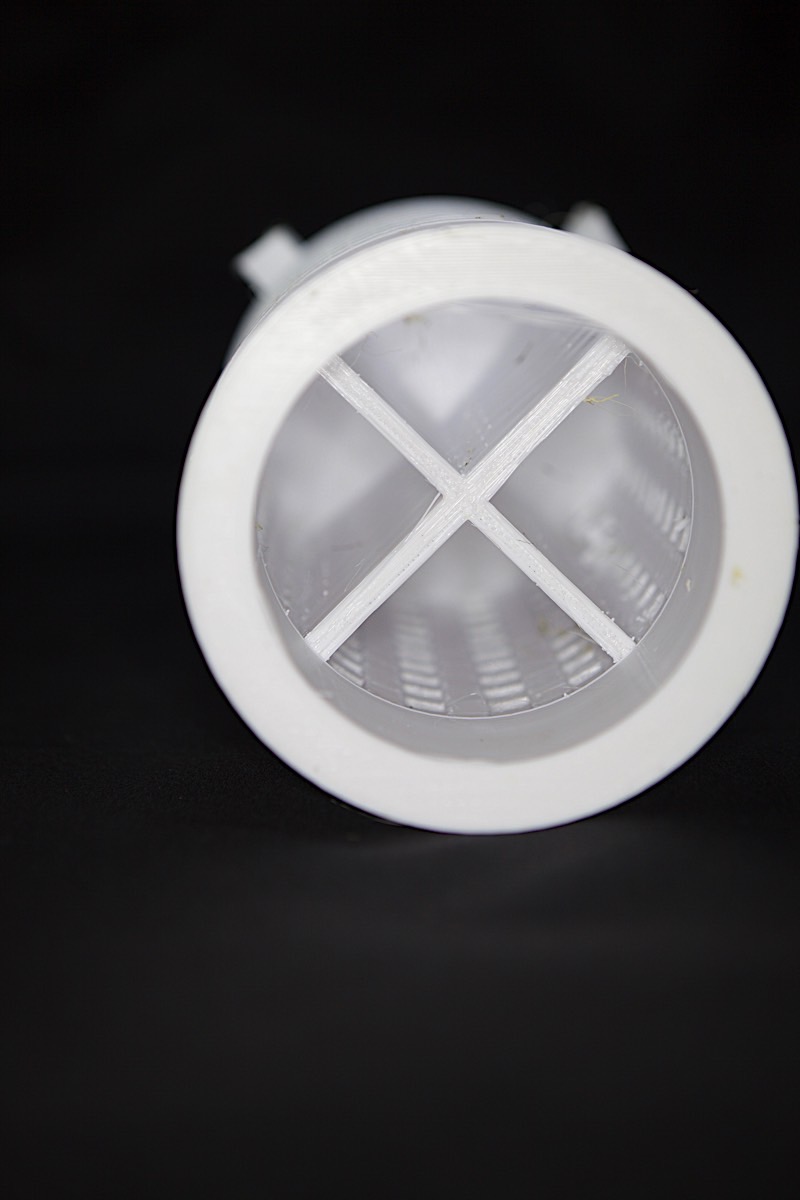
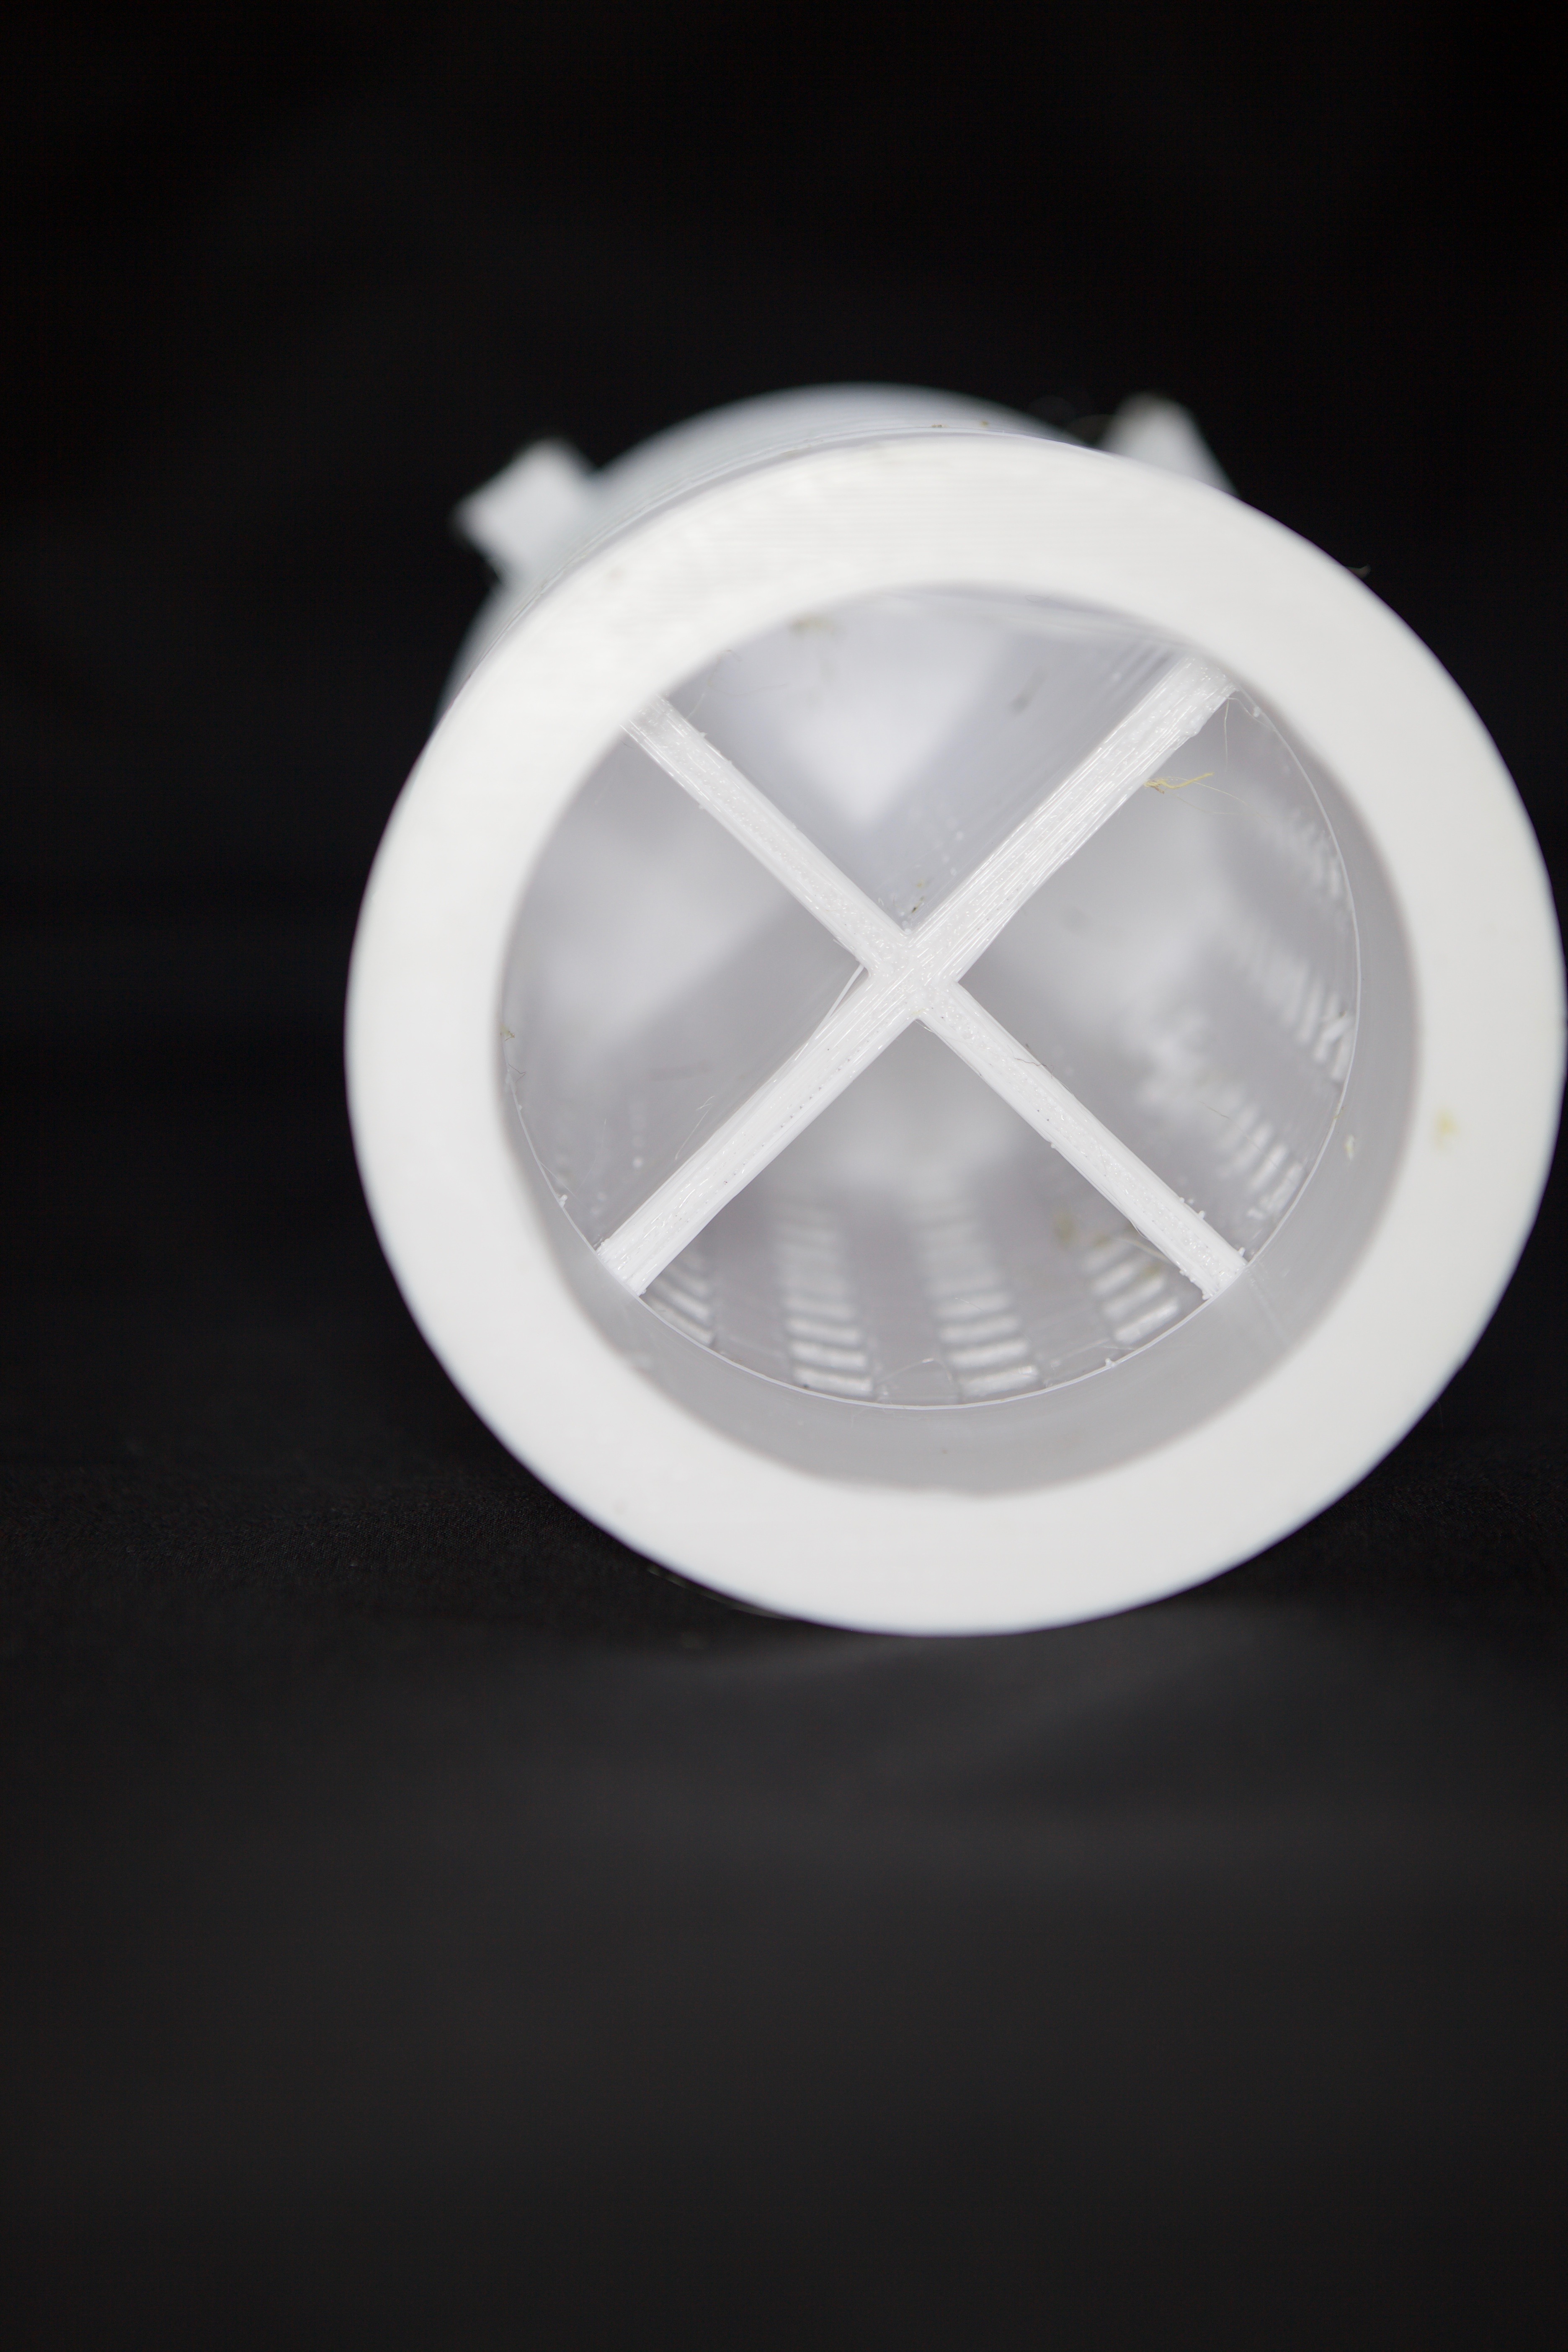
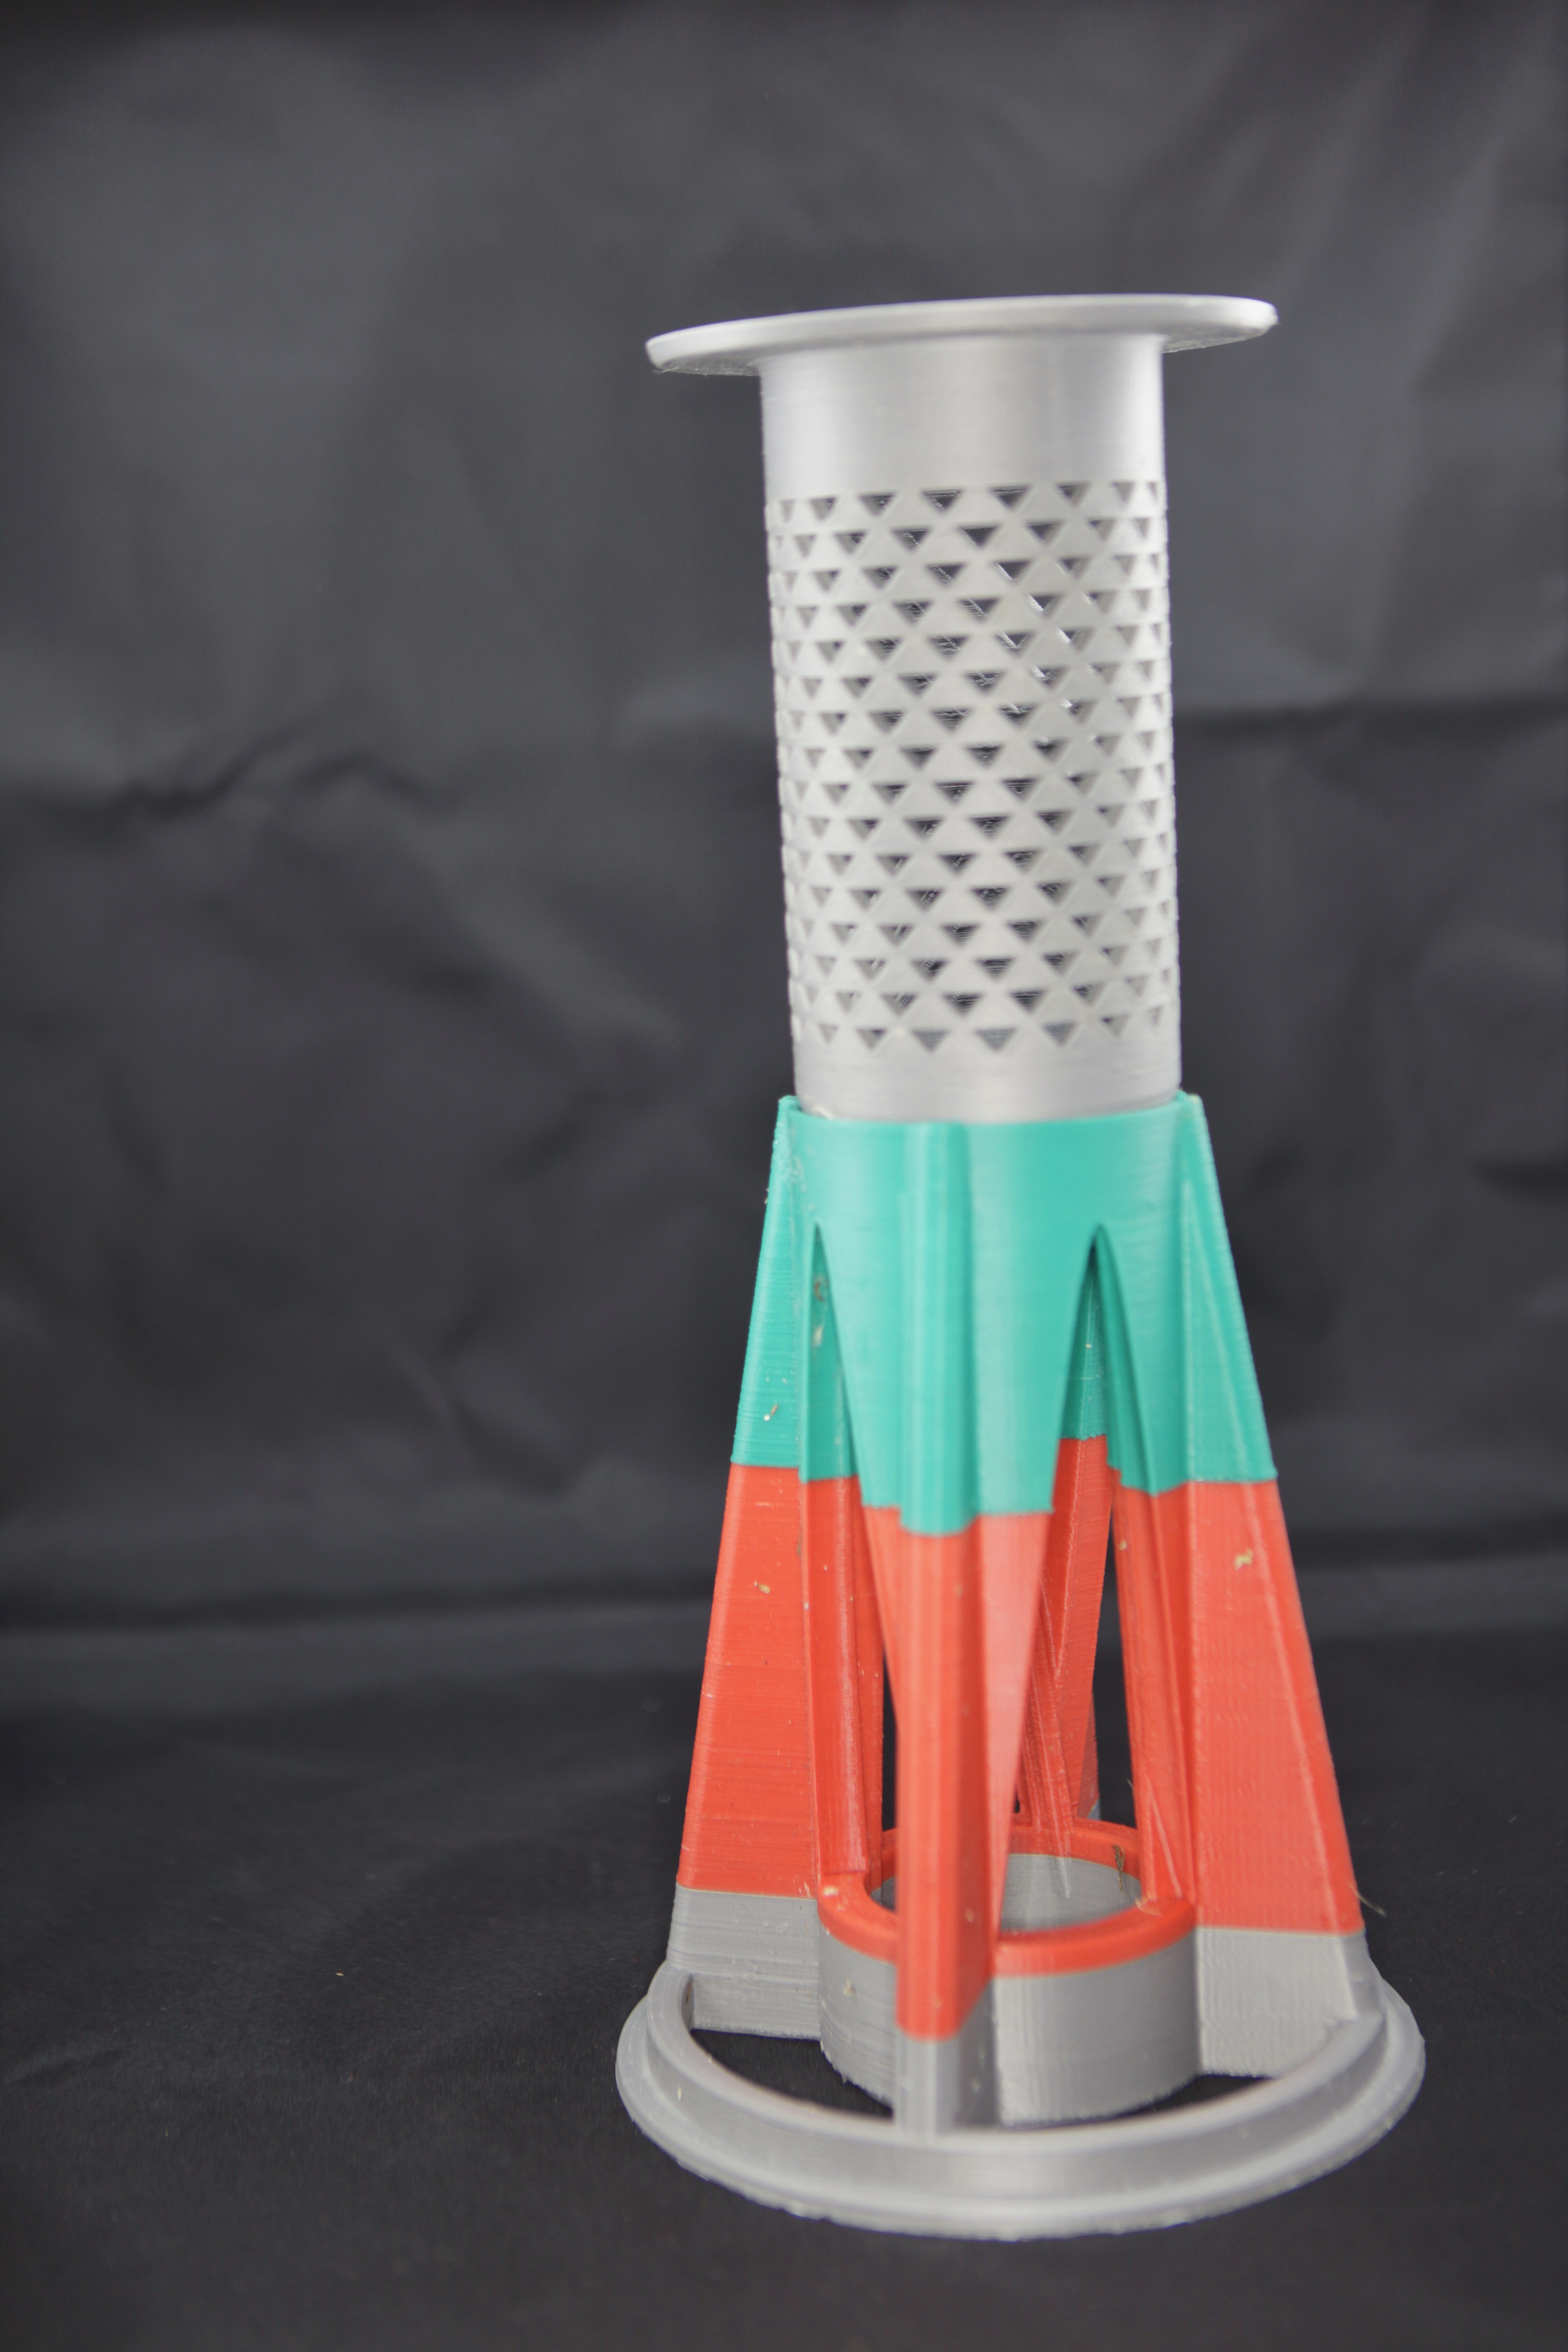
Here's the filter installed in an old filter cannister:
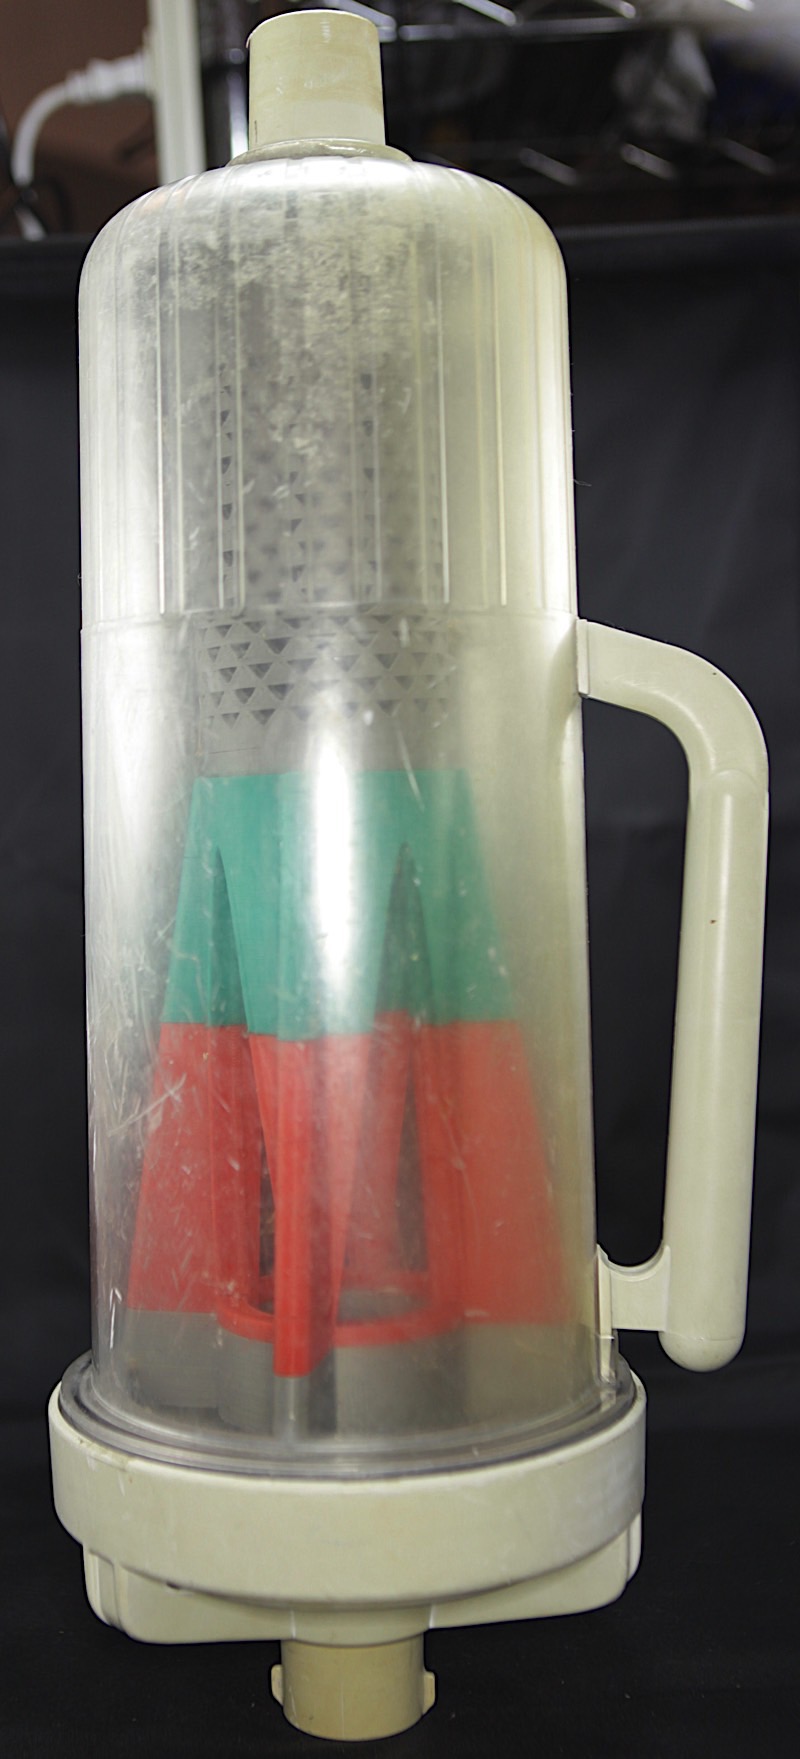 High-resolution image shot with a Canon EOS 5D MII
Unlike the previous attempts, this one actually worked. I actually had the combination in the picture above working in my pool for about a week.
However, the design could still use some improvement, so on to versions 5, 6, 7, and 8...