CBU Theater Port Hole
A 3D Printer/Vacuum molding project

Note: All photographs appearing on this page are freely usable for any purpose. Links to high-resolution versions of the pictures appear below each picture.
Page Two: Vacuum-Forming Component
The major part of the port hole prop is a vacuum-formed piece of styrene. To create this object I used a decorative mirror that had a ship port hole likeness as a frame. The mirror was removed and the frame was modified to serve as a "buck" (the opposite of a "mold" -- Molds are "negative space" while bucks are "positive space").
There are a couple of modifications that needed to be made in order to use the mirror frame as a buck.
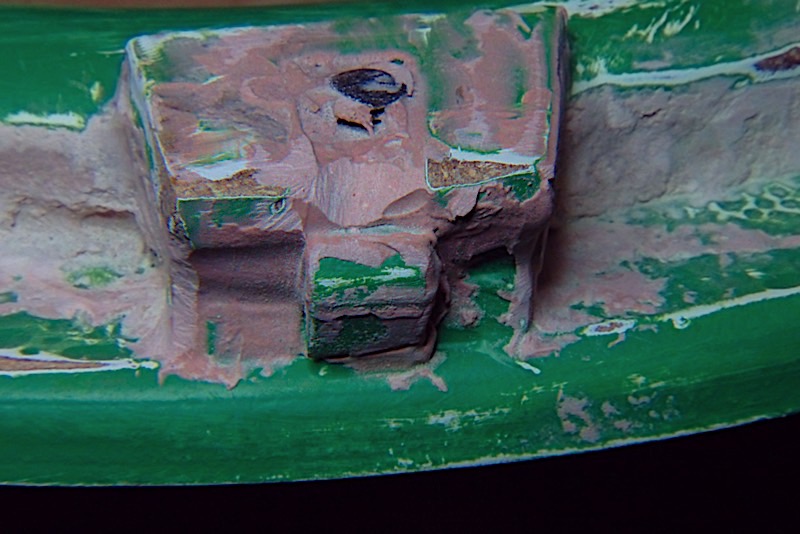
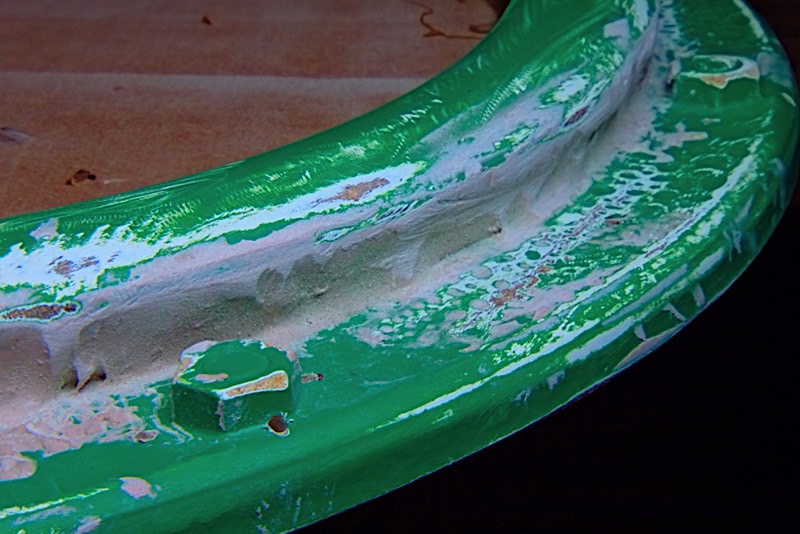
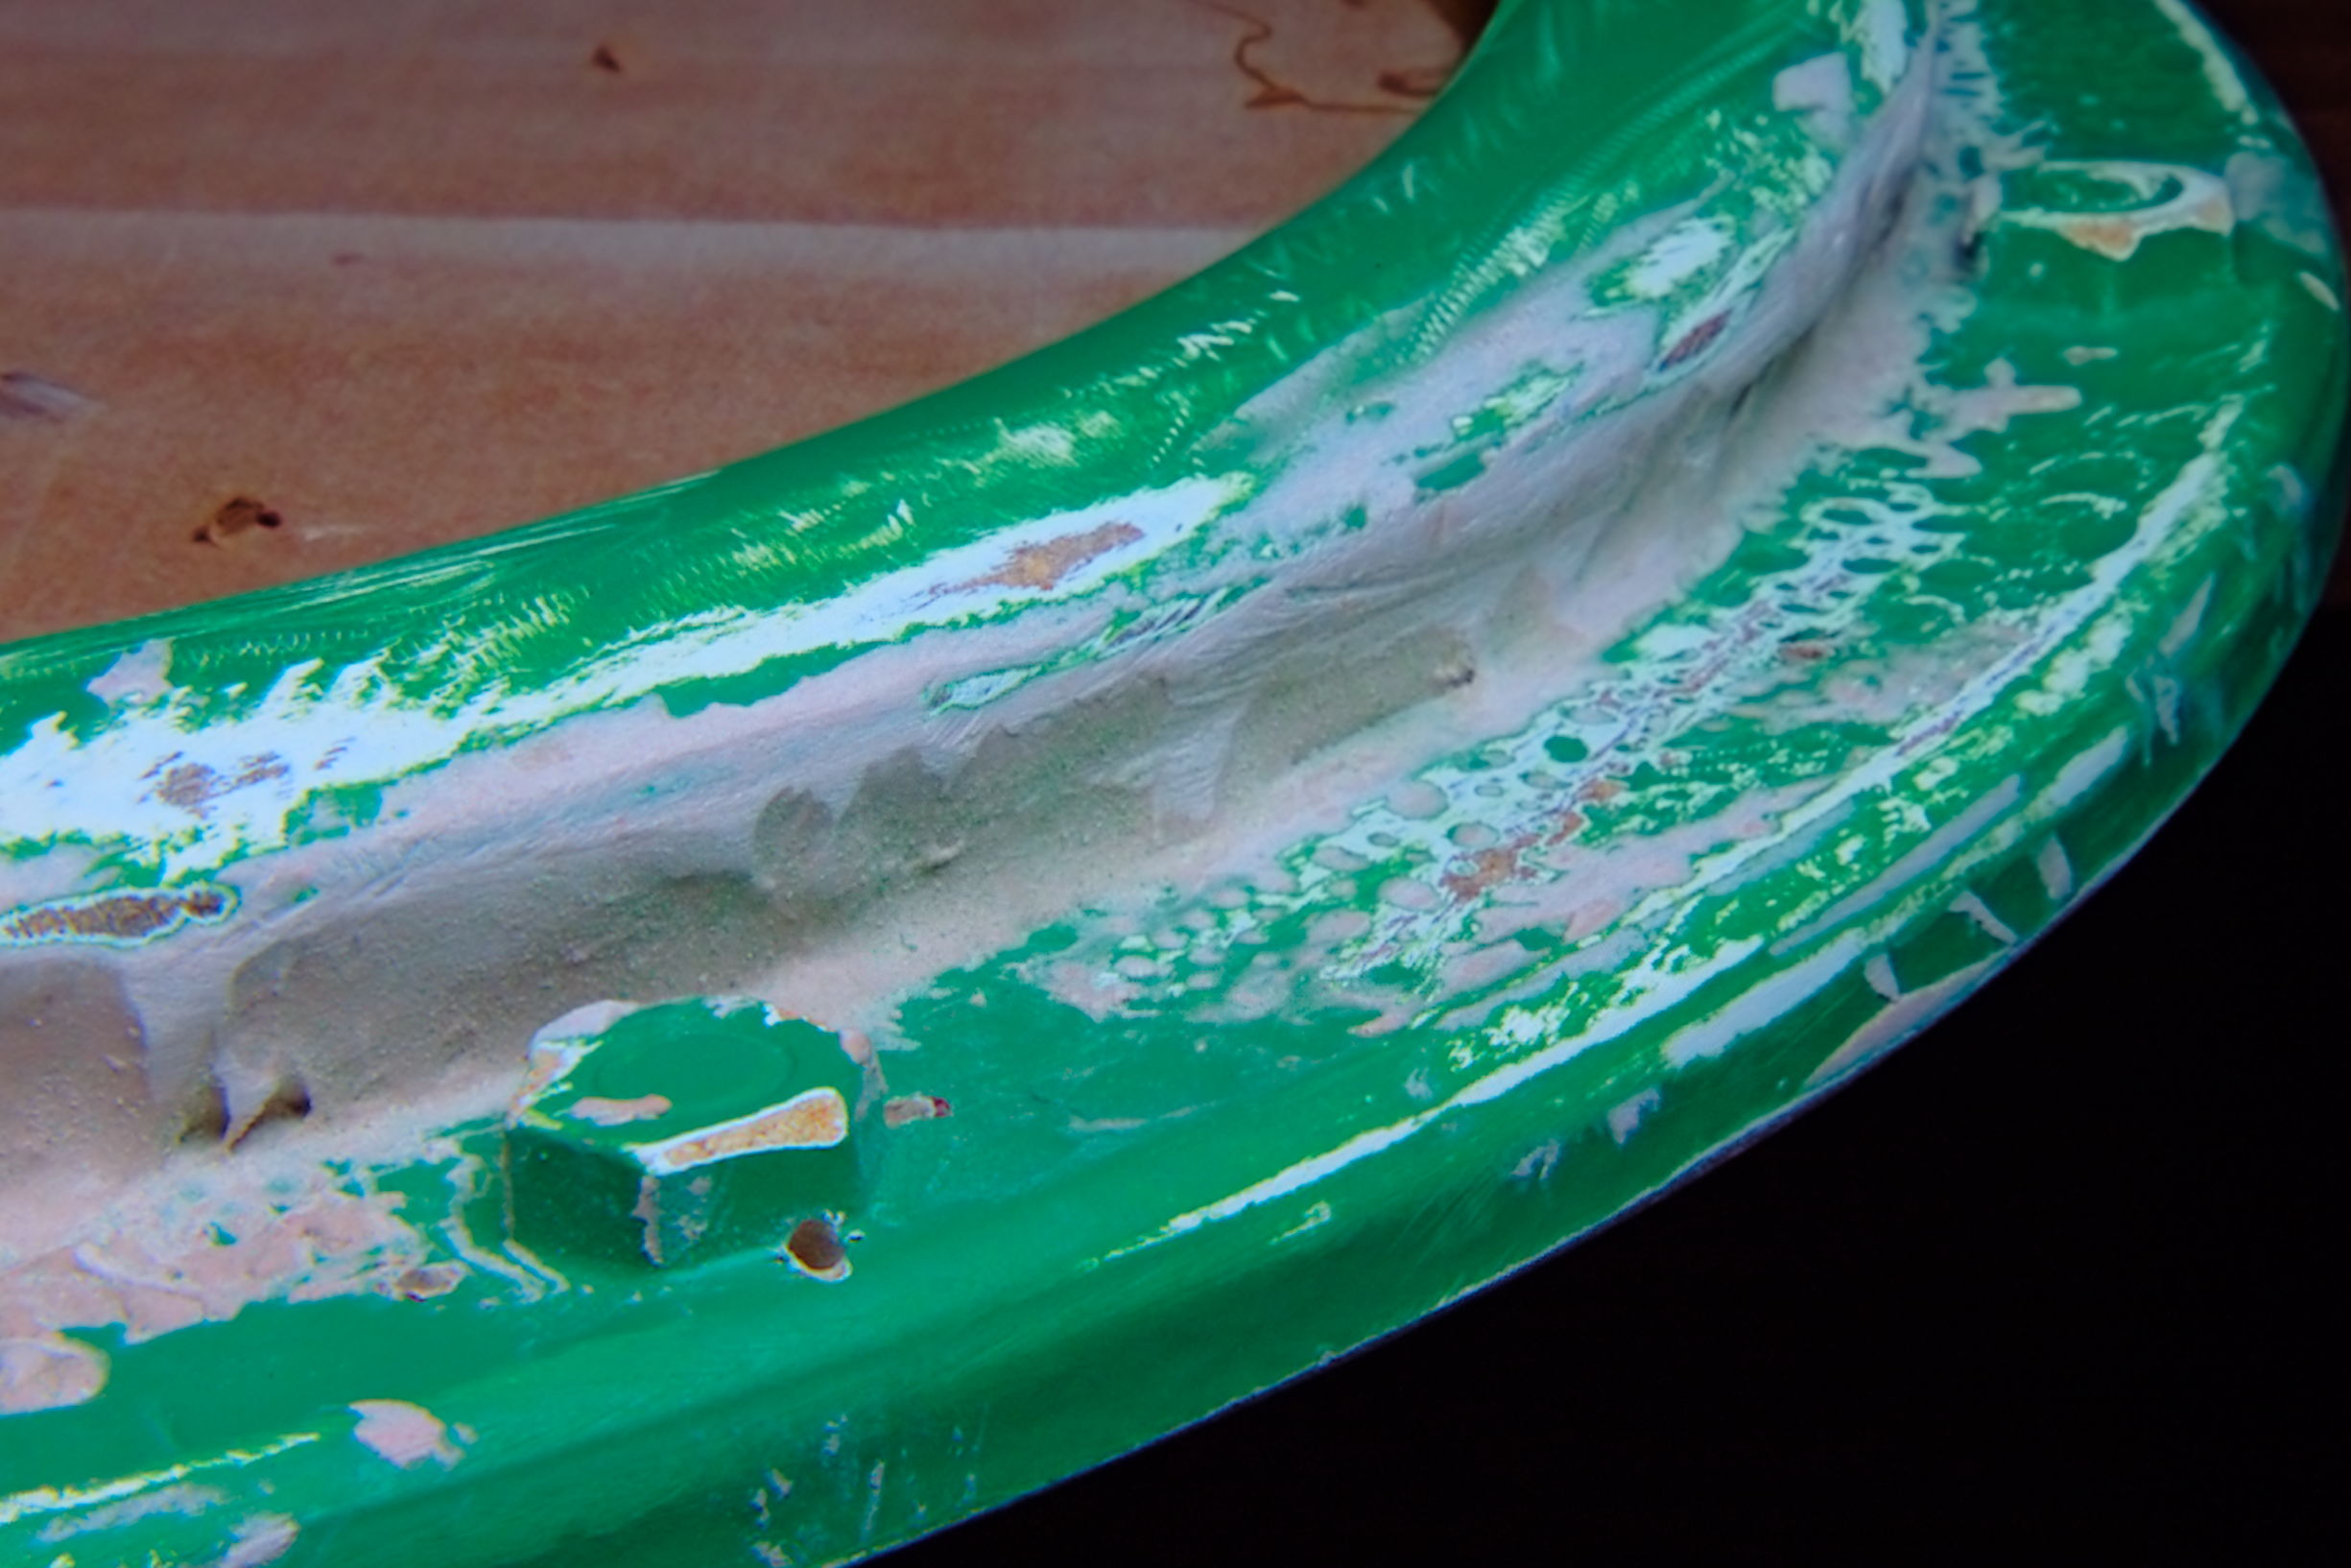
Rule #1: No overhangs. When viewed from the top, the plastic cannot go underneath an edge of the buck. Sadly, the mirror frame contains several such overhangs. I had CBU fill in these overhangs with Bondo to eliminate them. The following two pictures show the overhang being filled with Bondo:
High-resolution image shot on a Lytro Illum
High-resolution image shot on a Lytro Illum
The following picture shows the overhang being filled with Bondo. Note that there was a faux bolt sticking out on the side. The students at CBU working on this project filled in the side to match the faux bolt and eliminate the underhang underneath the bolt (actually, I would have simply ground the bolt off, but this works almost as well, though some sanding will be required to clean up the side of the object).
High-resolution image shot on a Lytro Illum
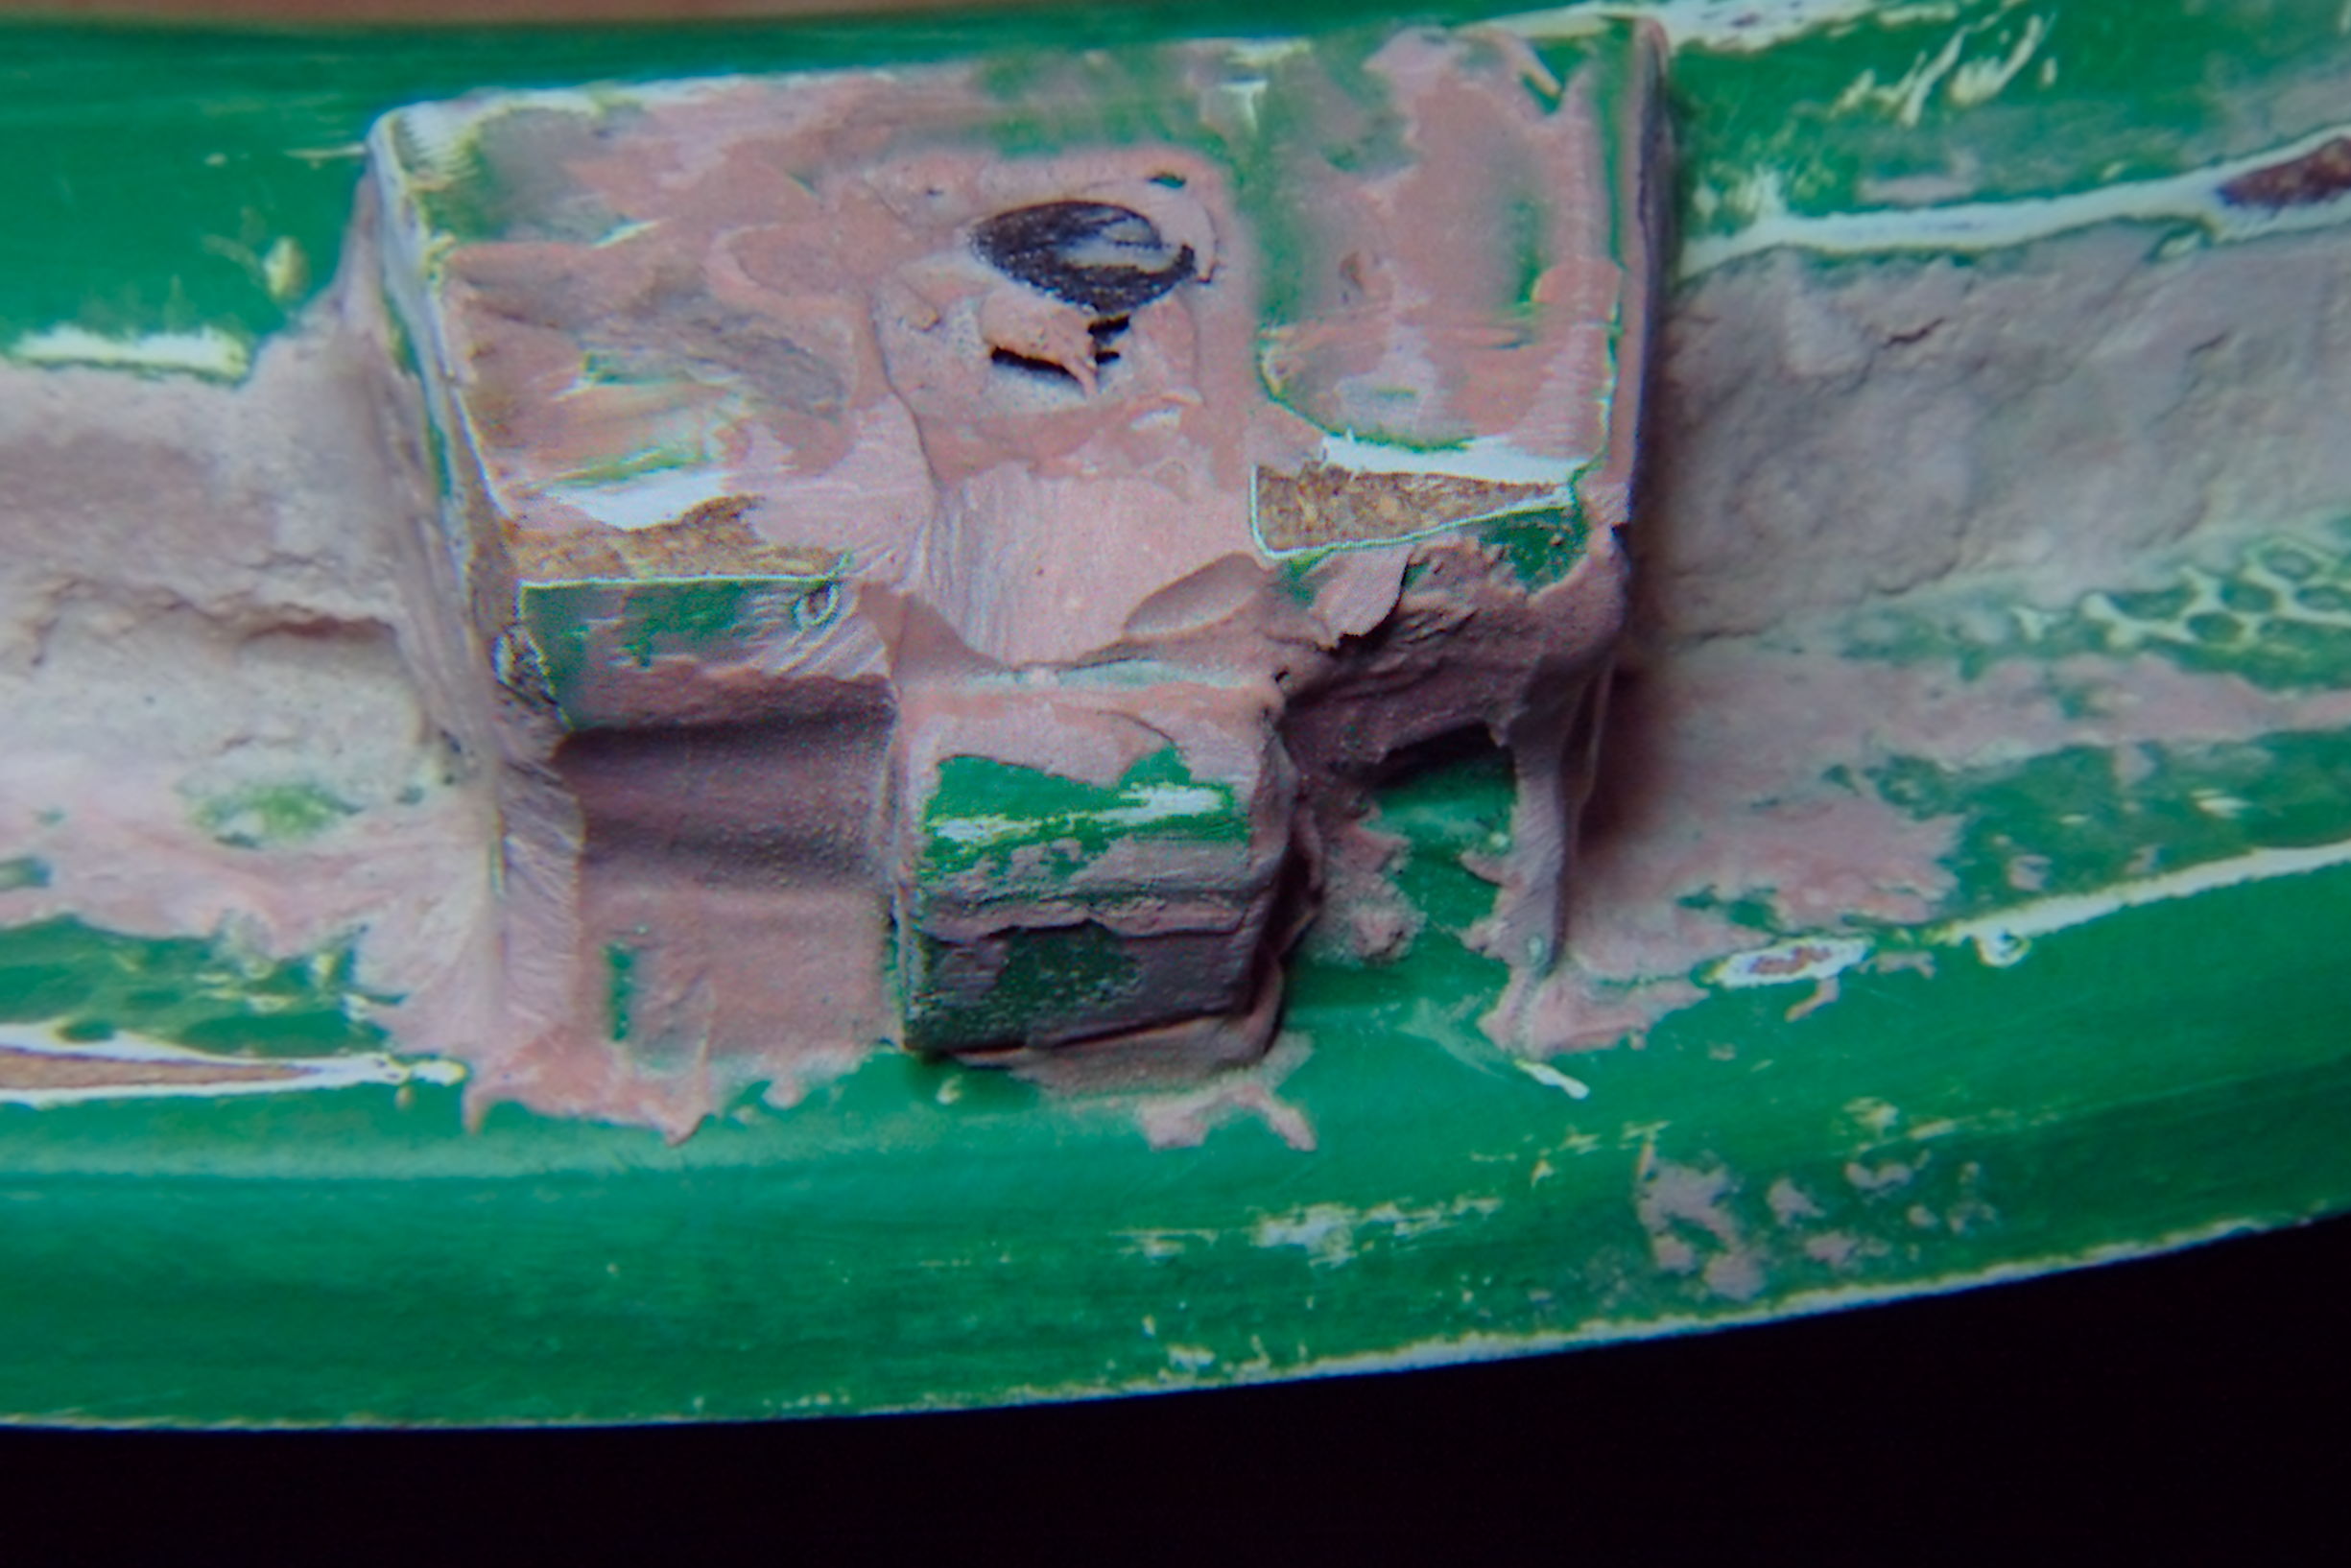
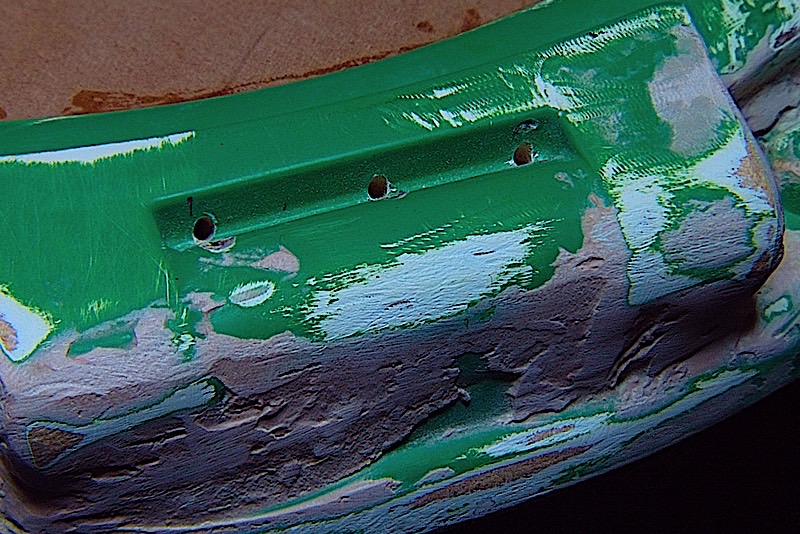
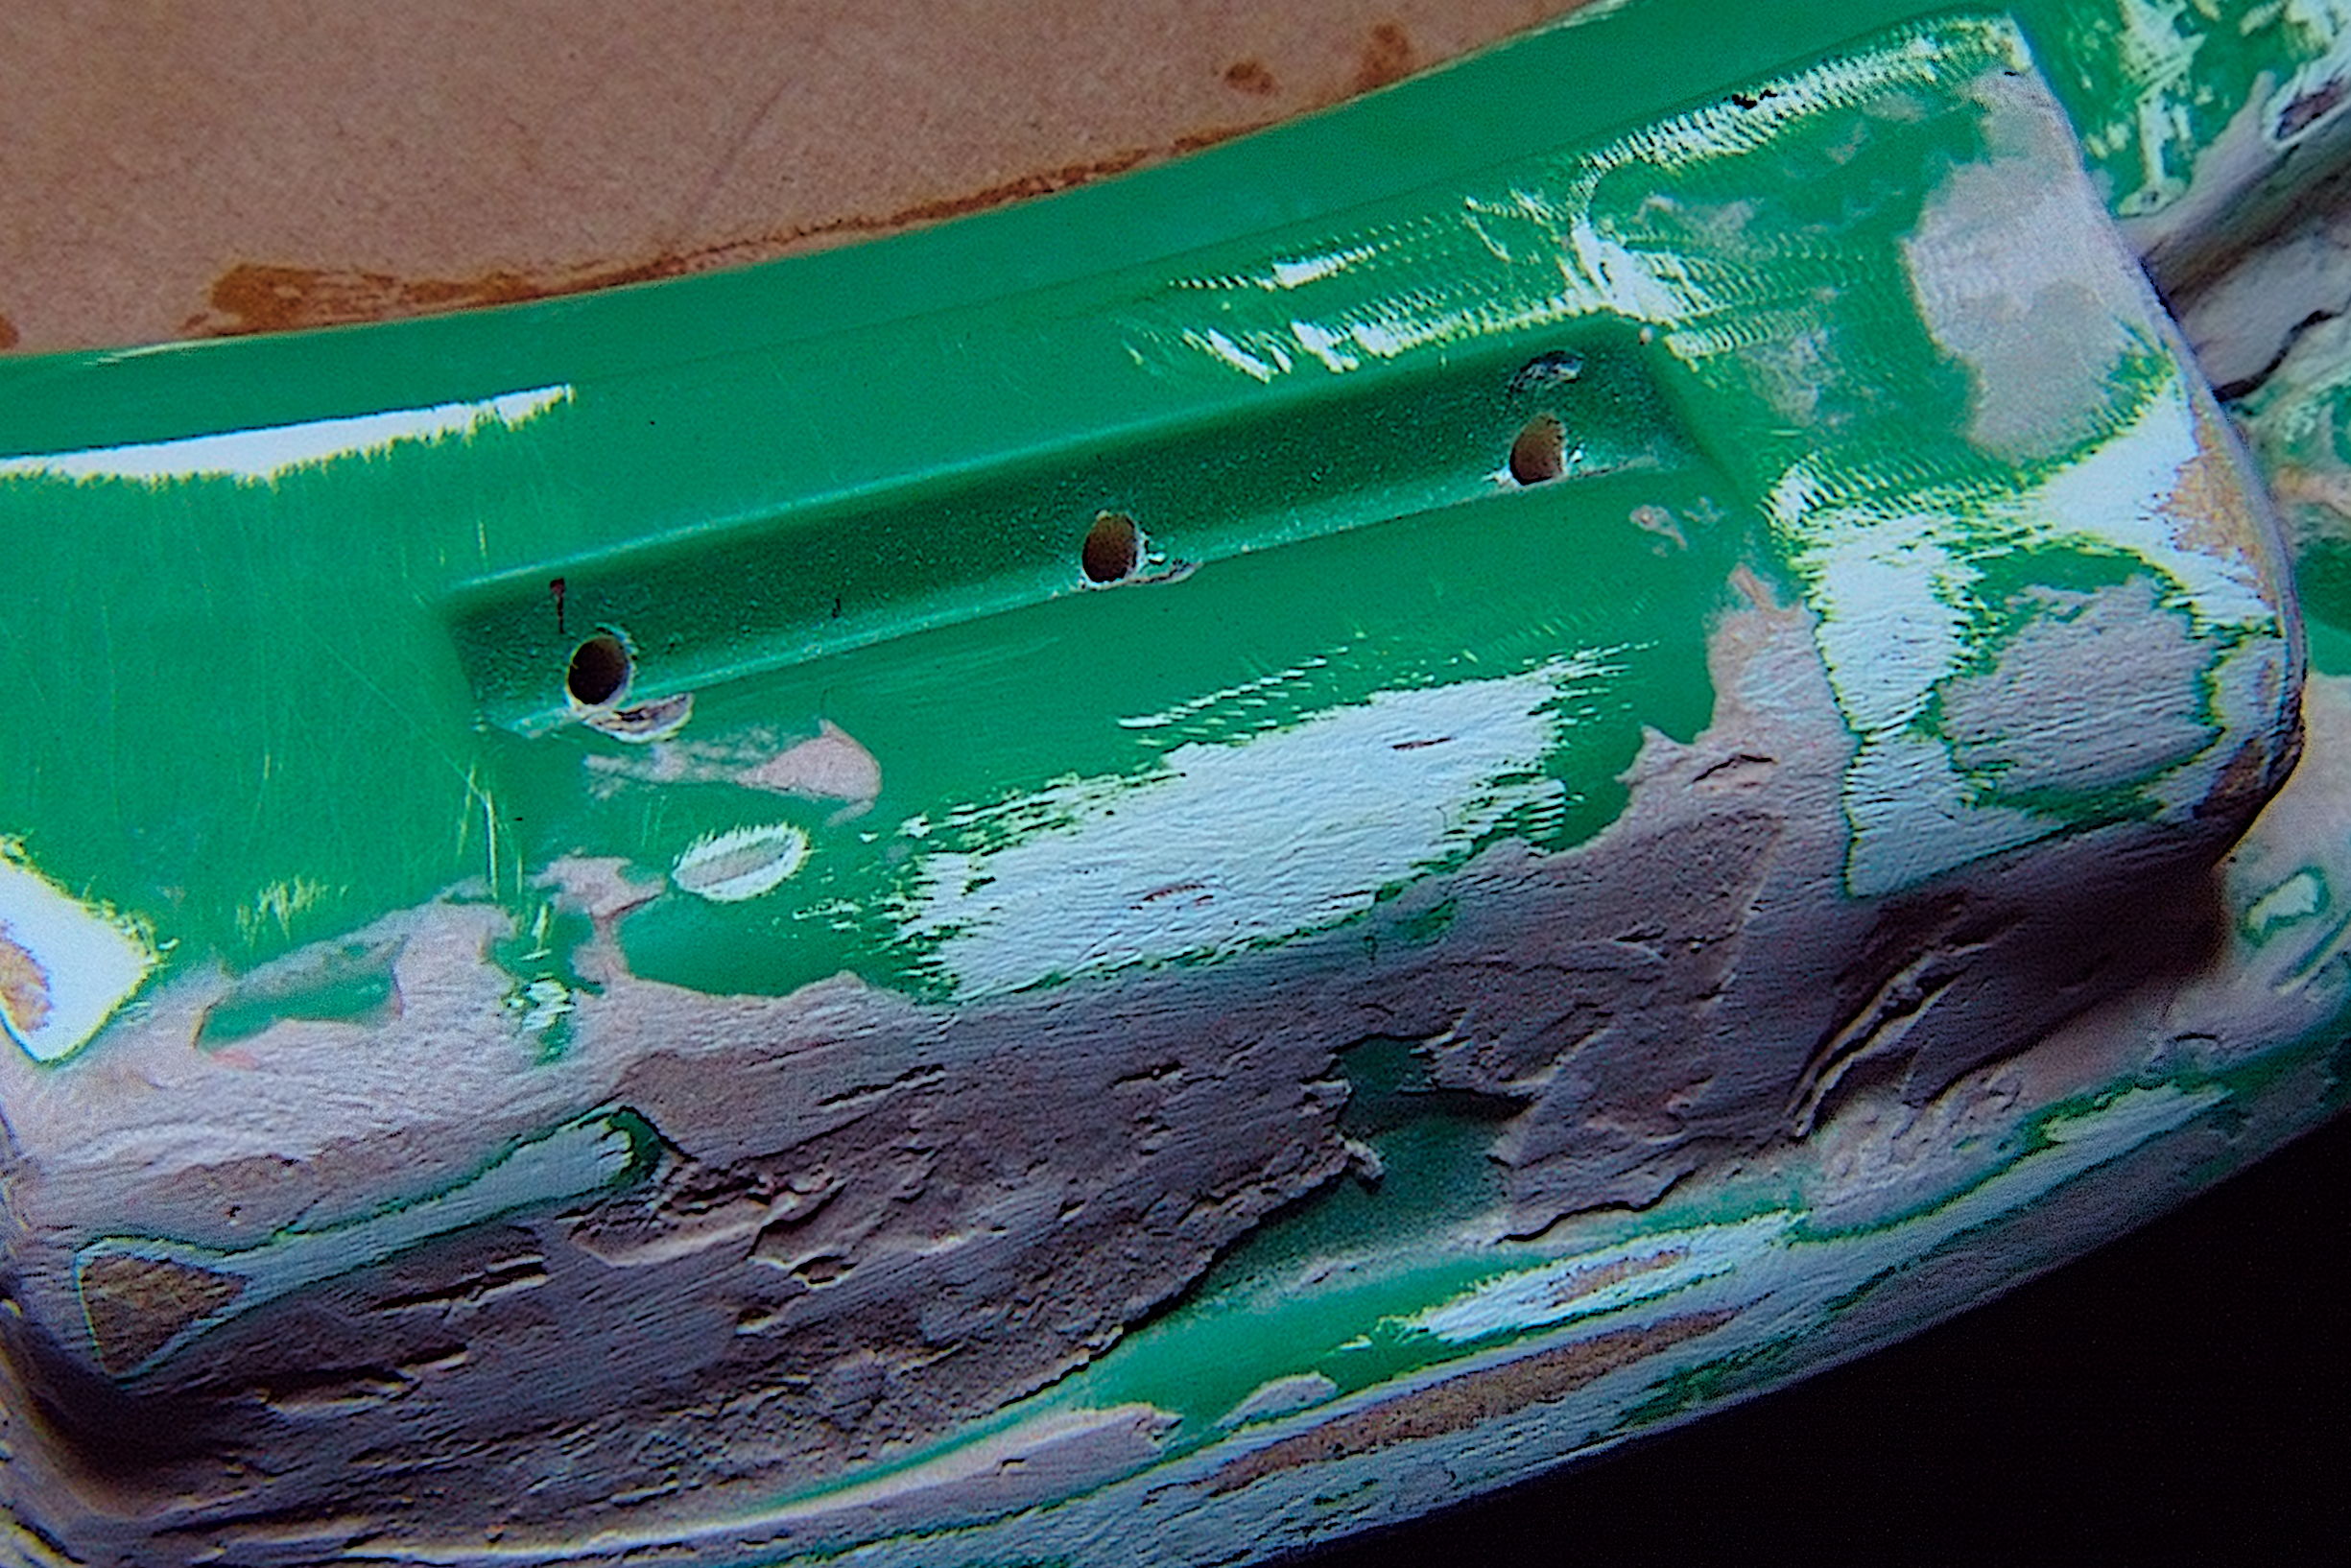
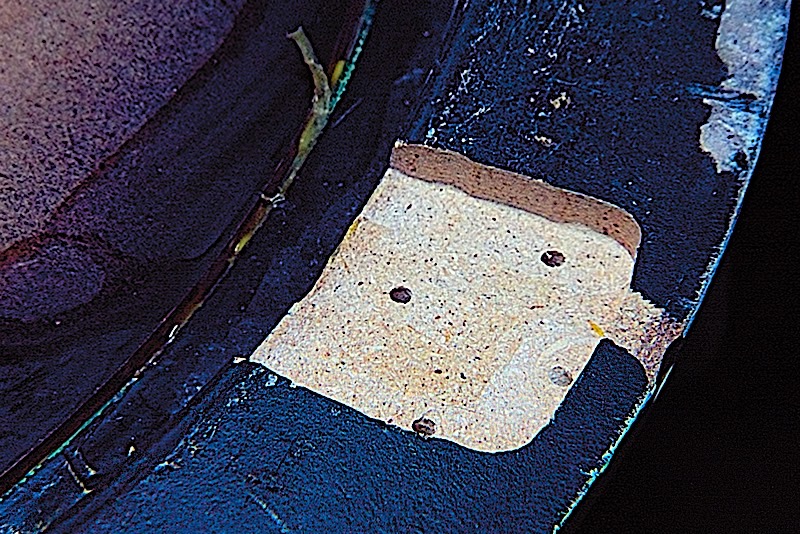
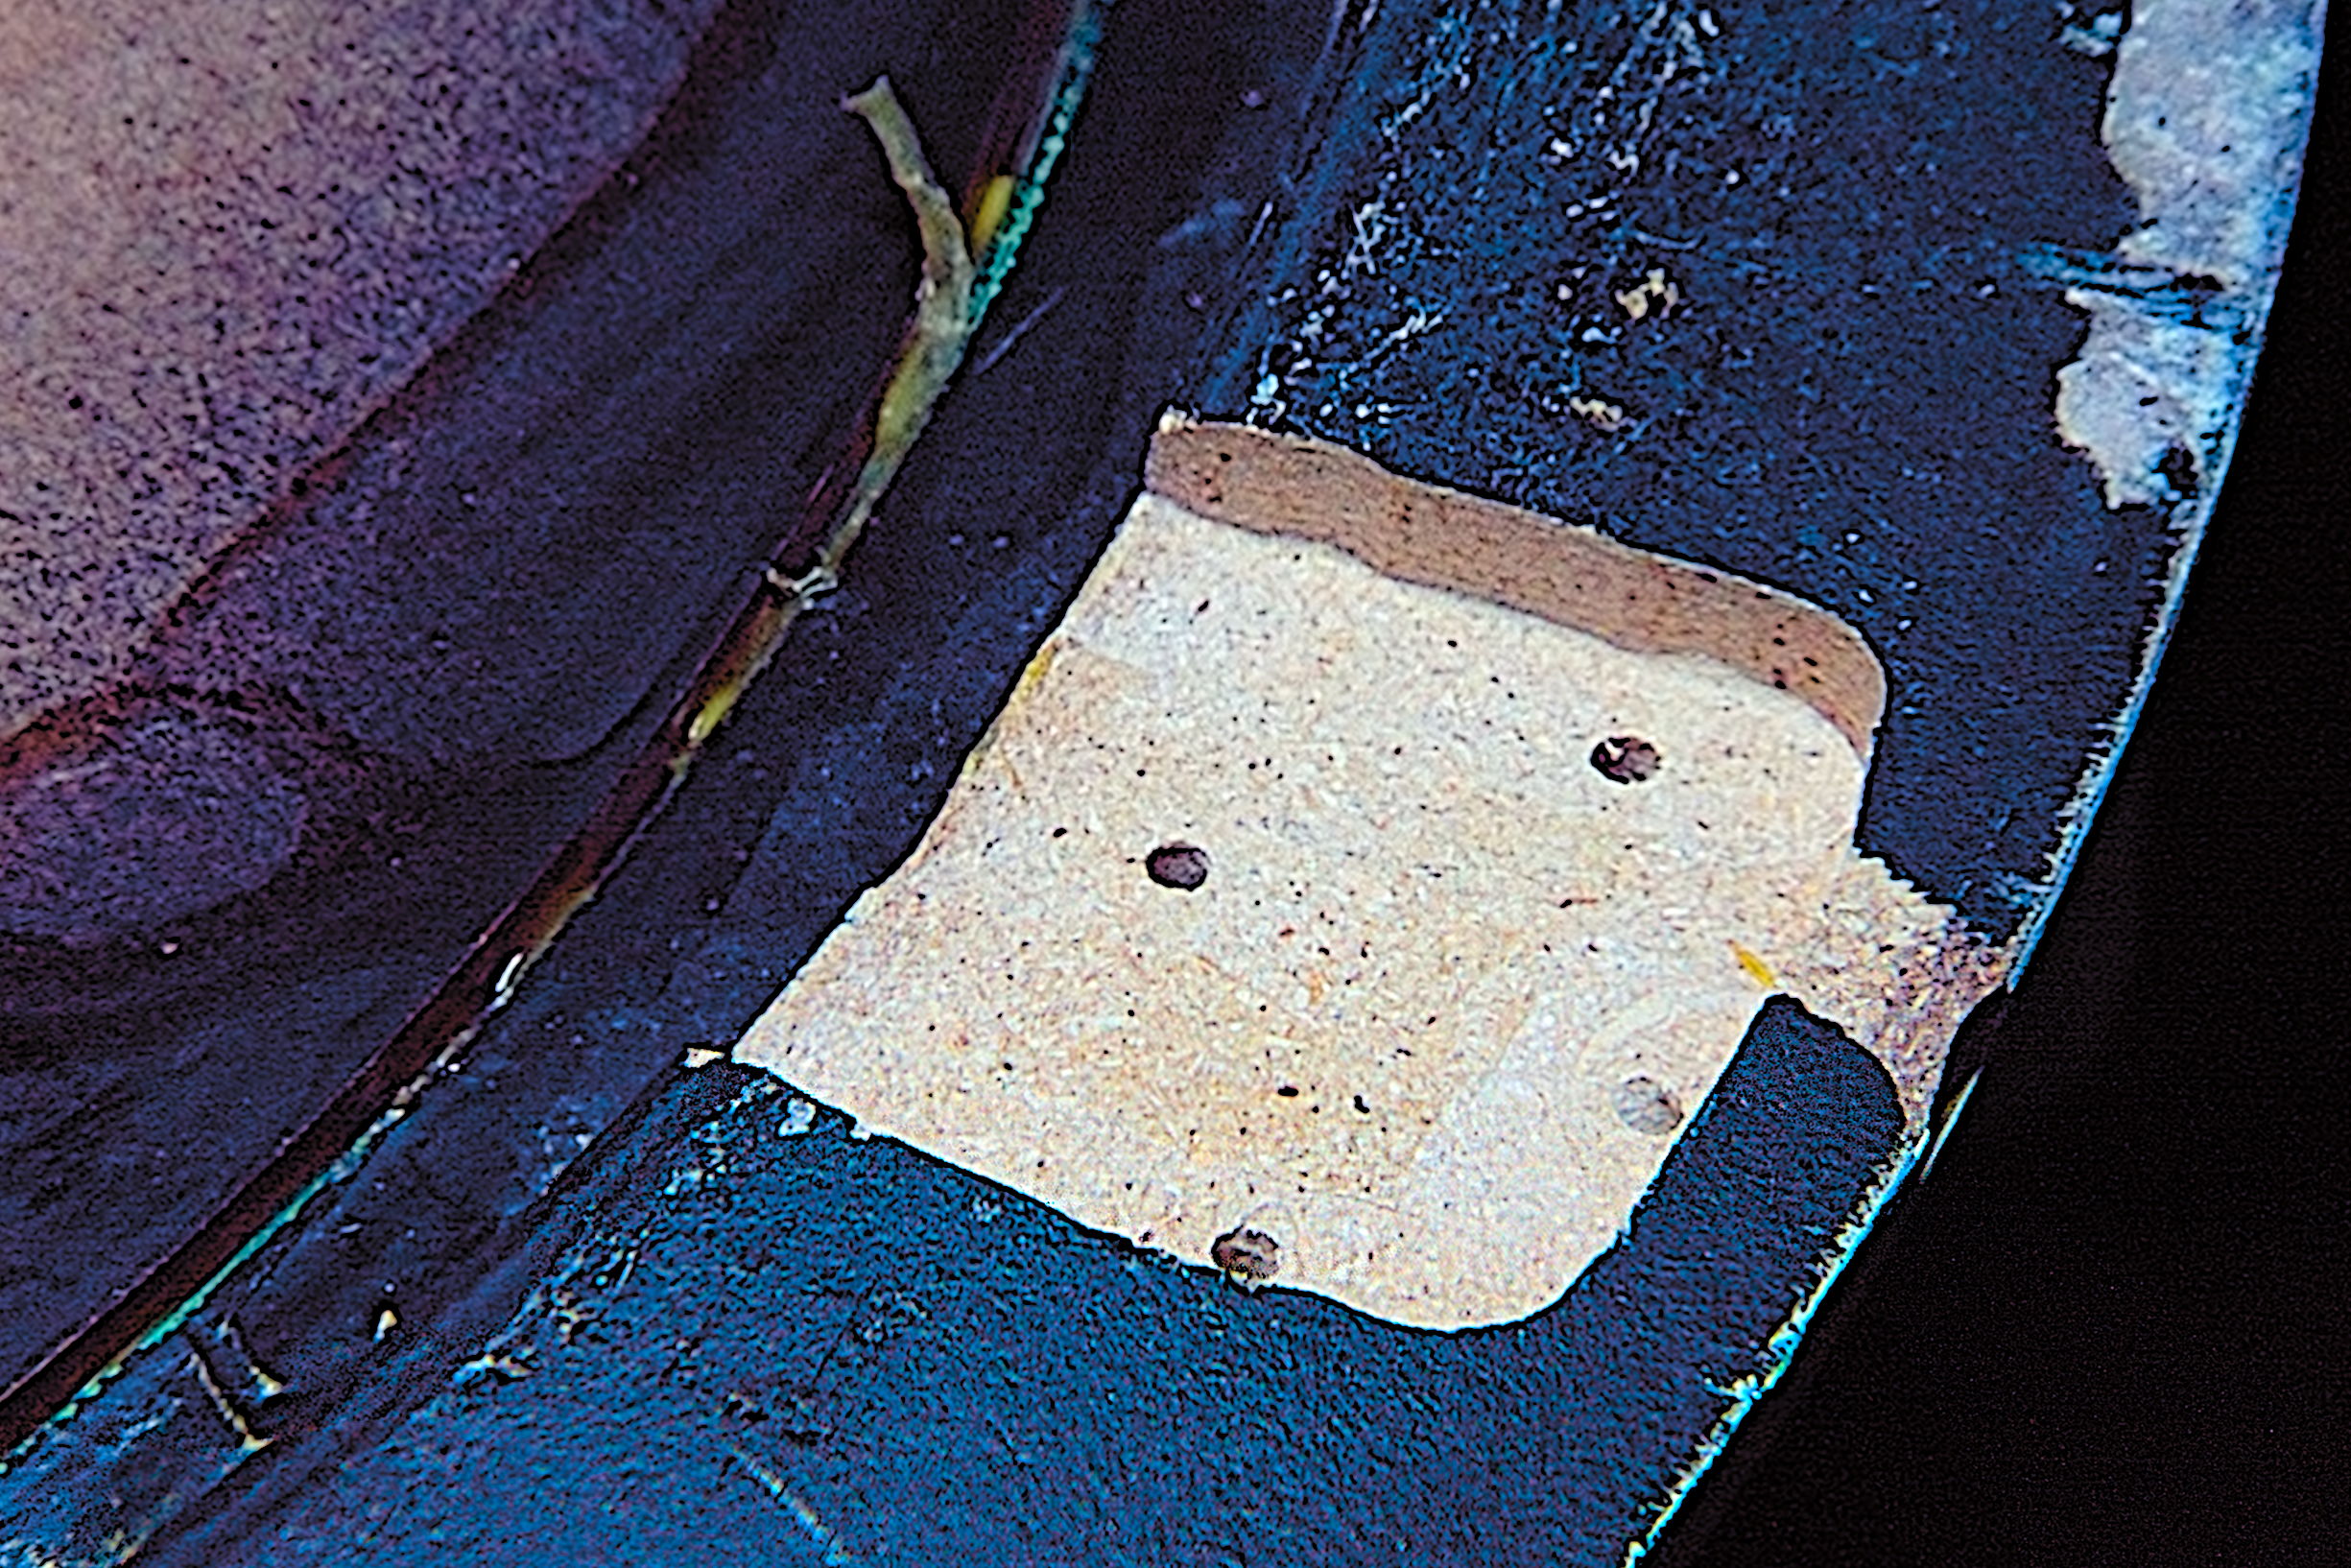
Rule #2: Cavities and other depressions into the buck require a small pinhole to outside the buck so a vacuum can such the plastic into the cavity. The pin hole must be as small as practical to avoid sucking plastic into the hole, bursting the plastic, and ruining the pull. The following picture shows three holes drilled into the faux latch to suck the plastic into the cavity:
High-resolution image shot on a Lytro Illum
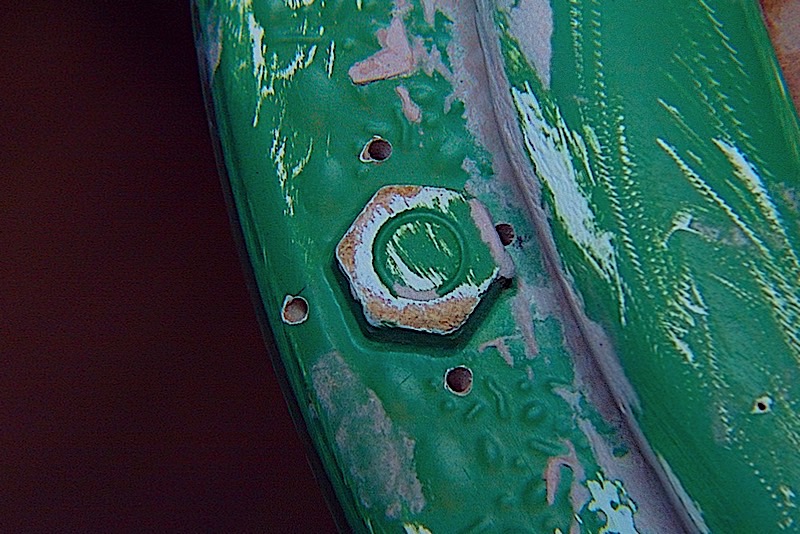
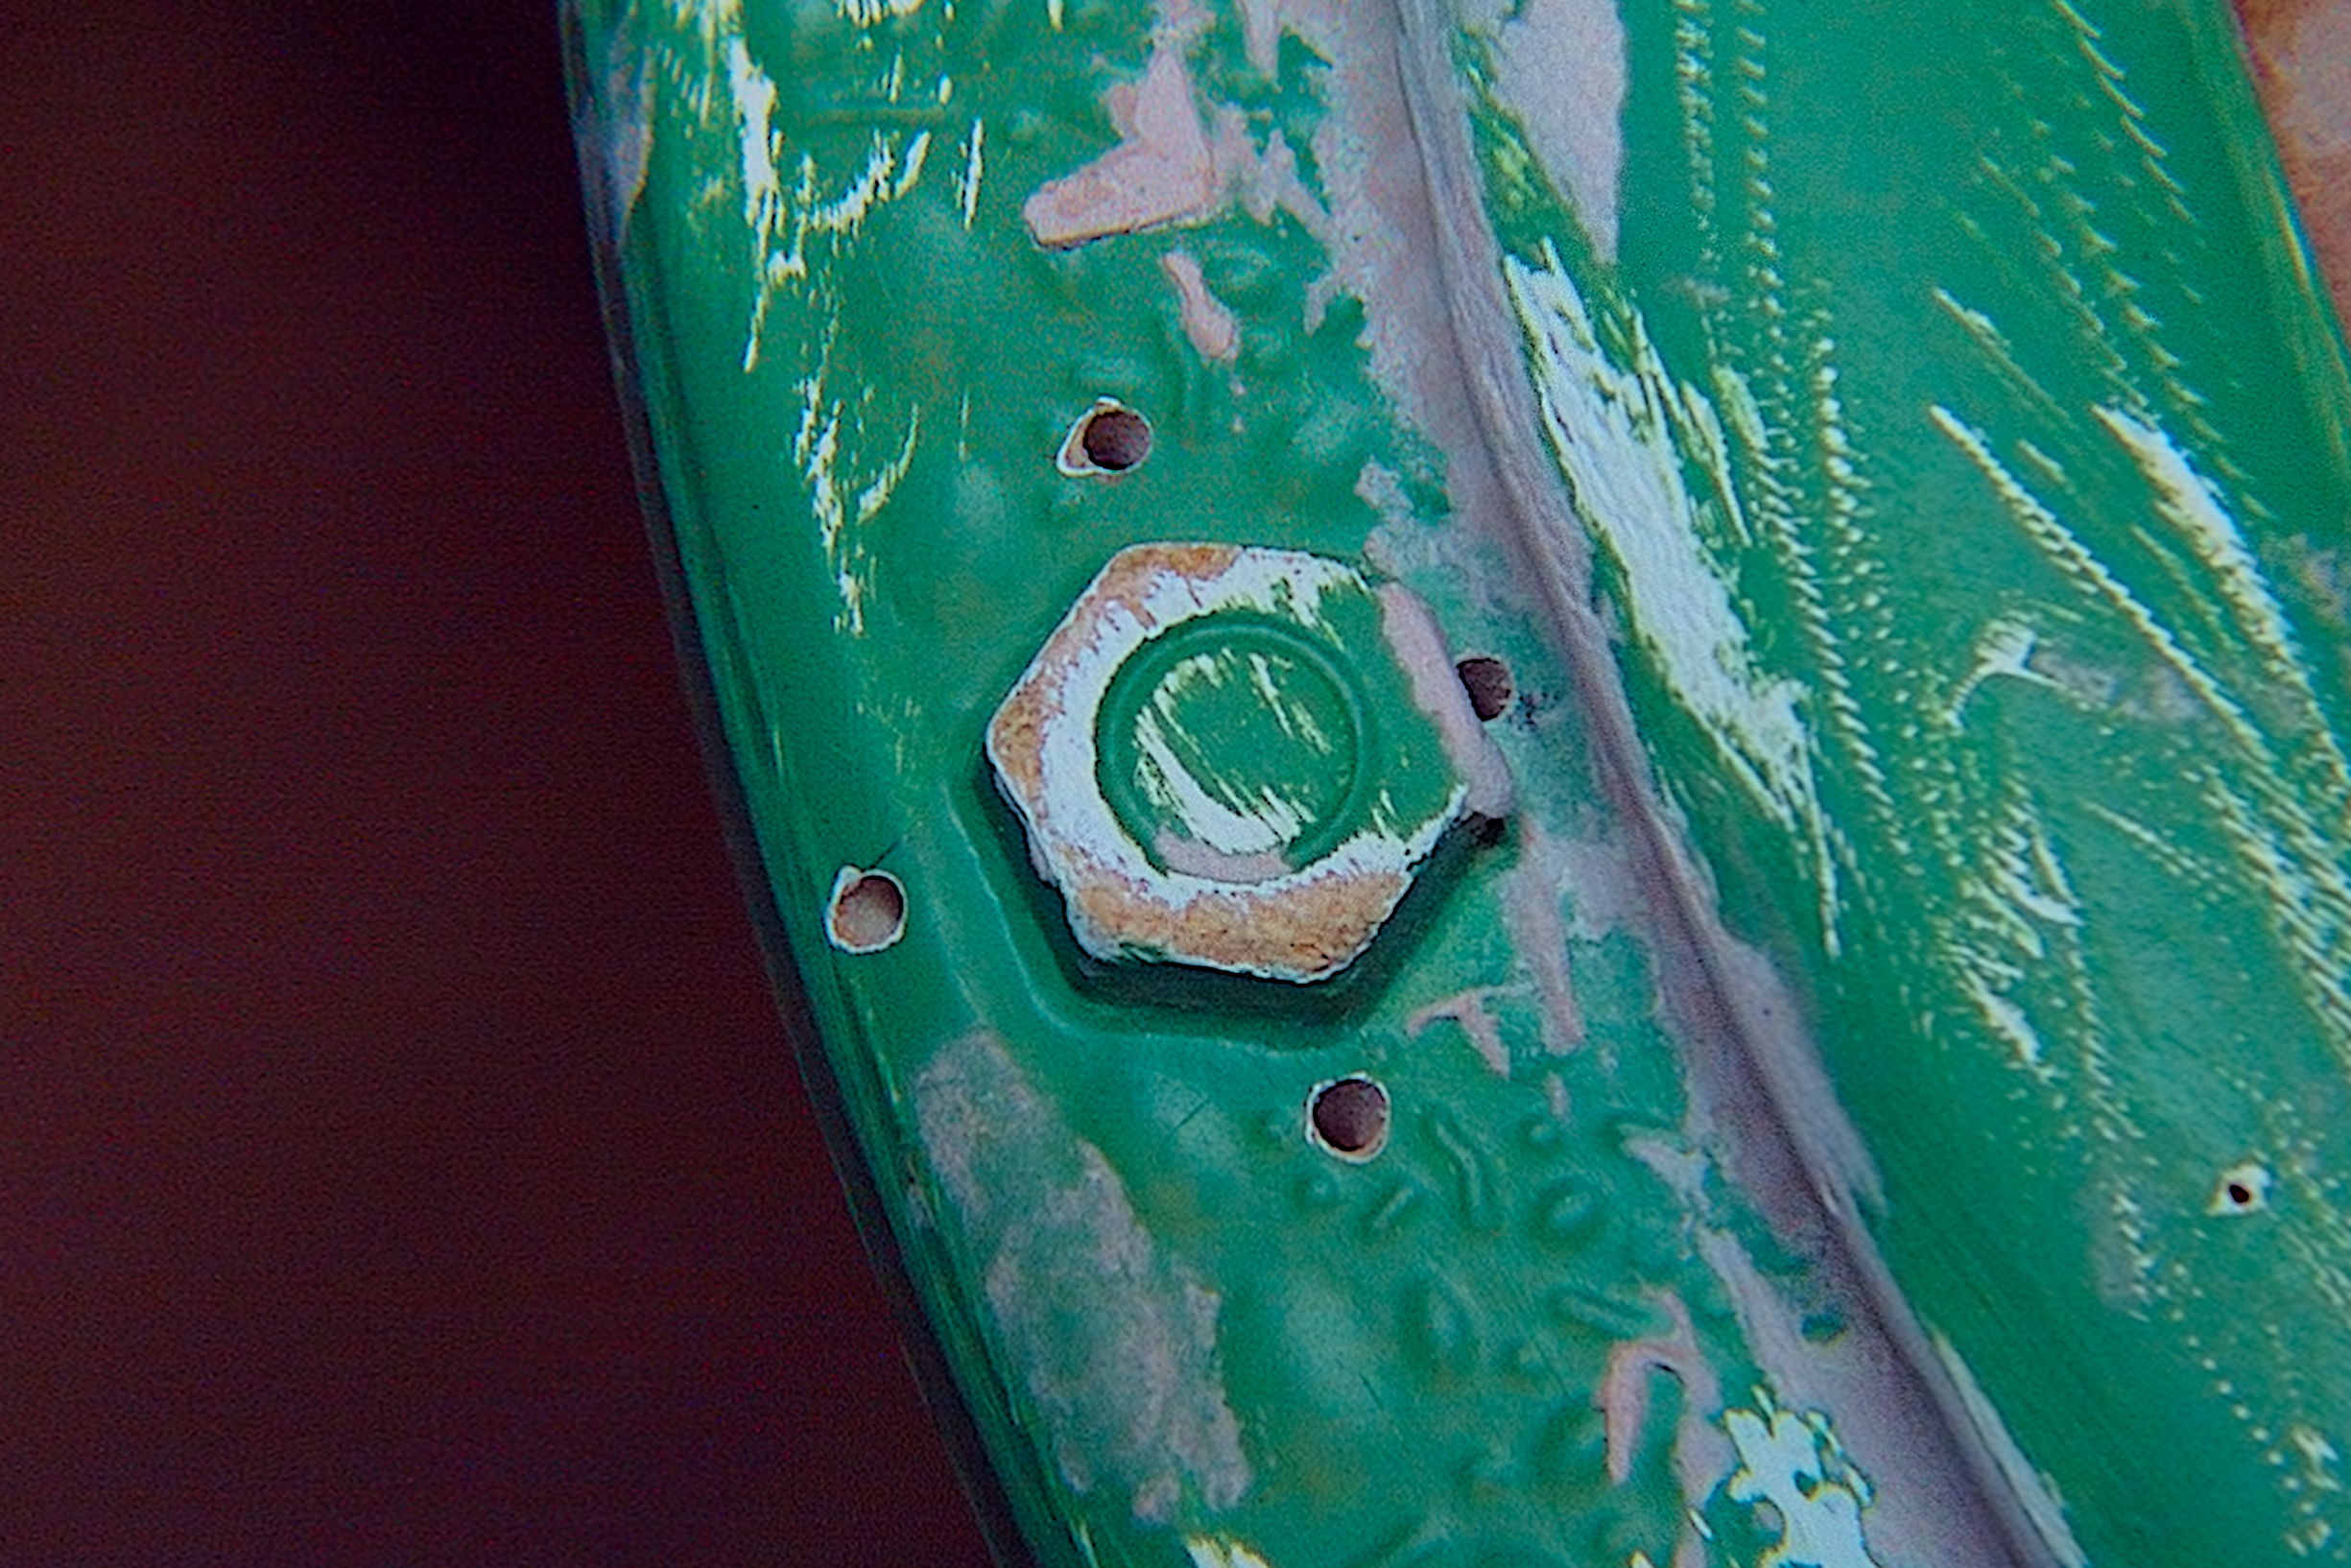
There were some faux nuts around the perimeter of the frame. Holes were added around each nut in order to improve the suction around the bolt so it will be better formed. The hole between the nut and the inside of the frame is especially crucial! Sadly, as it turns out, the styrene was a little to thick and there was insufficient vacuum pressure to fully form the nut in the stryene, but the result was okay (though not great).
High-resolution image show on a Lytro Illum
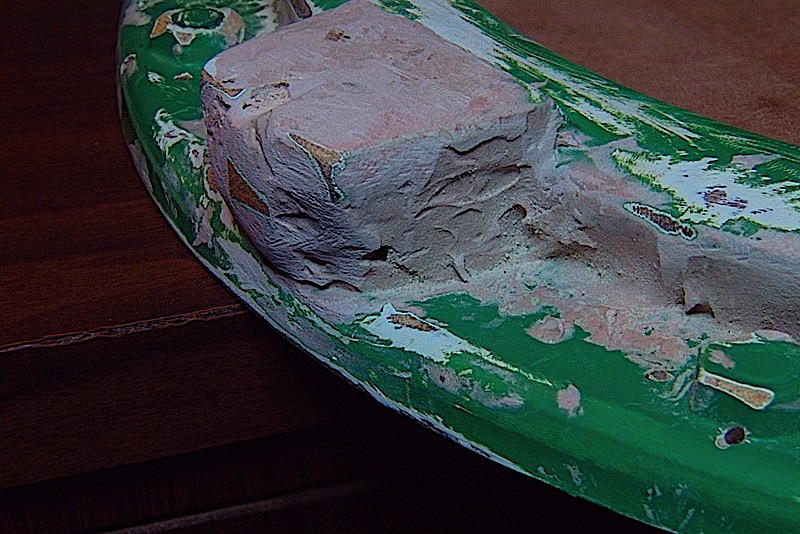
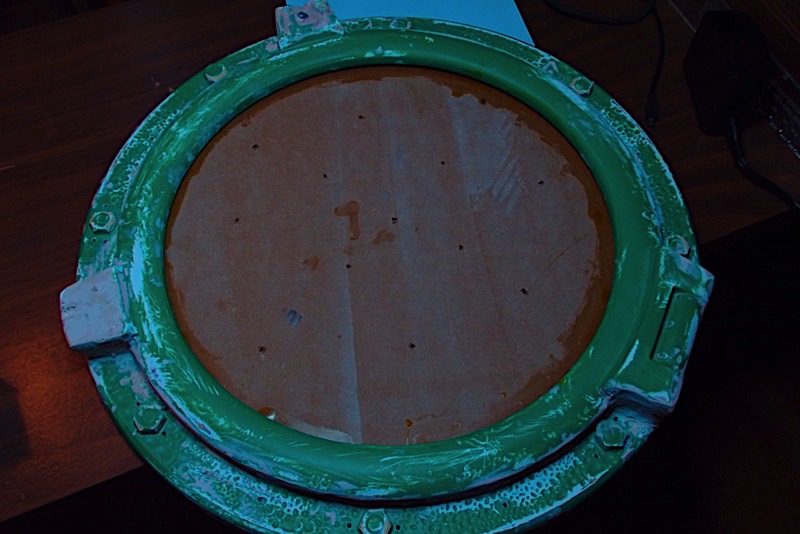
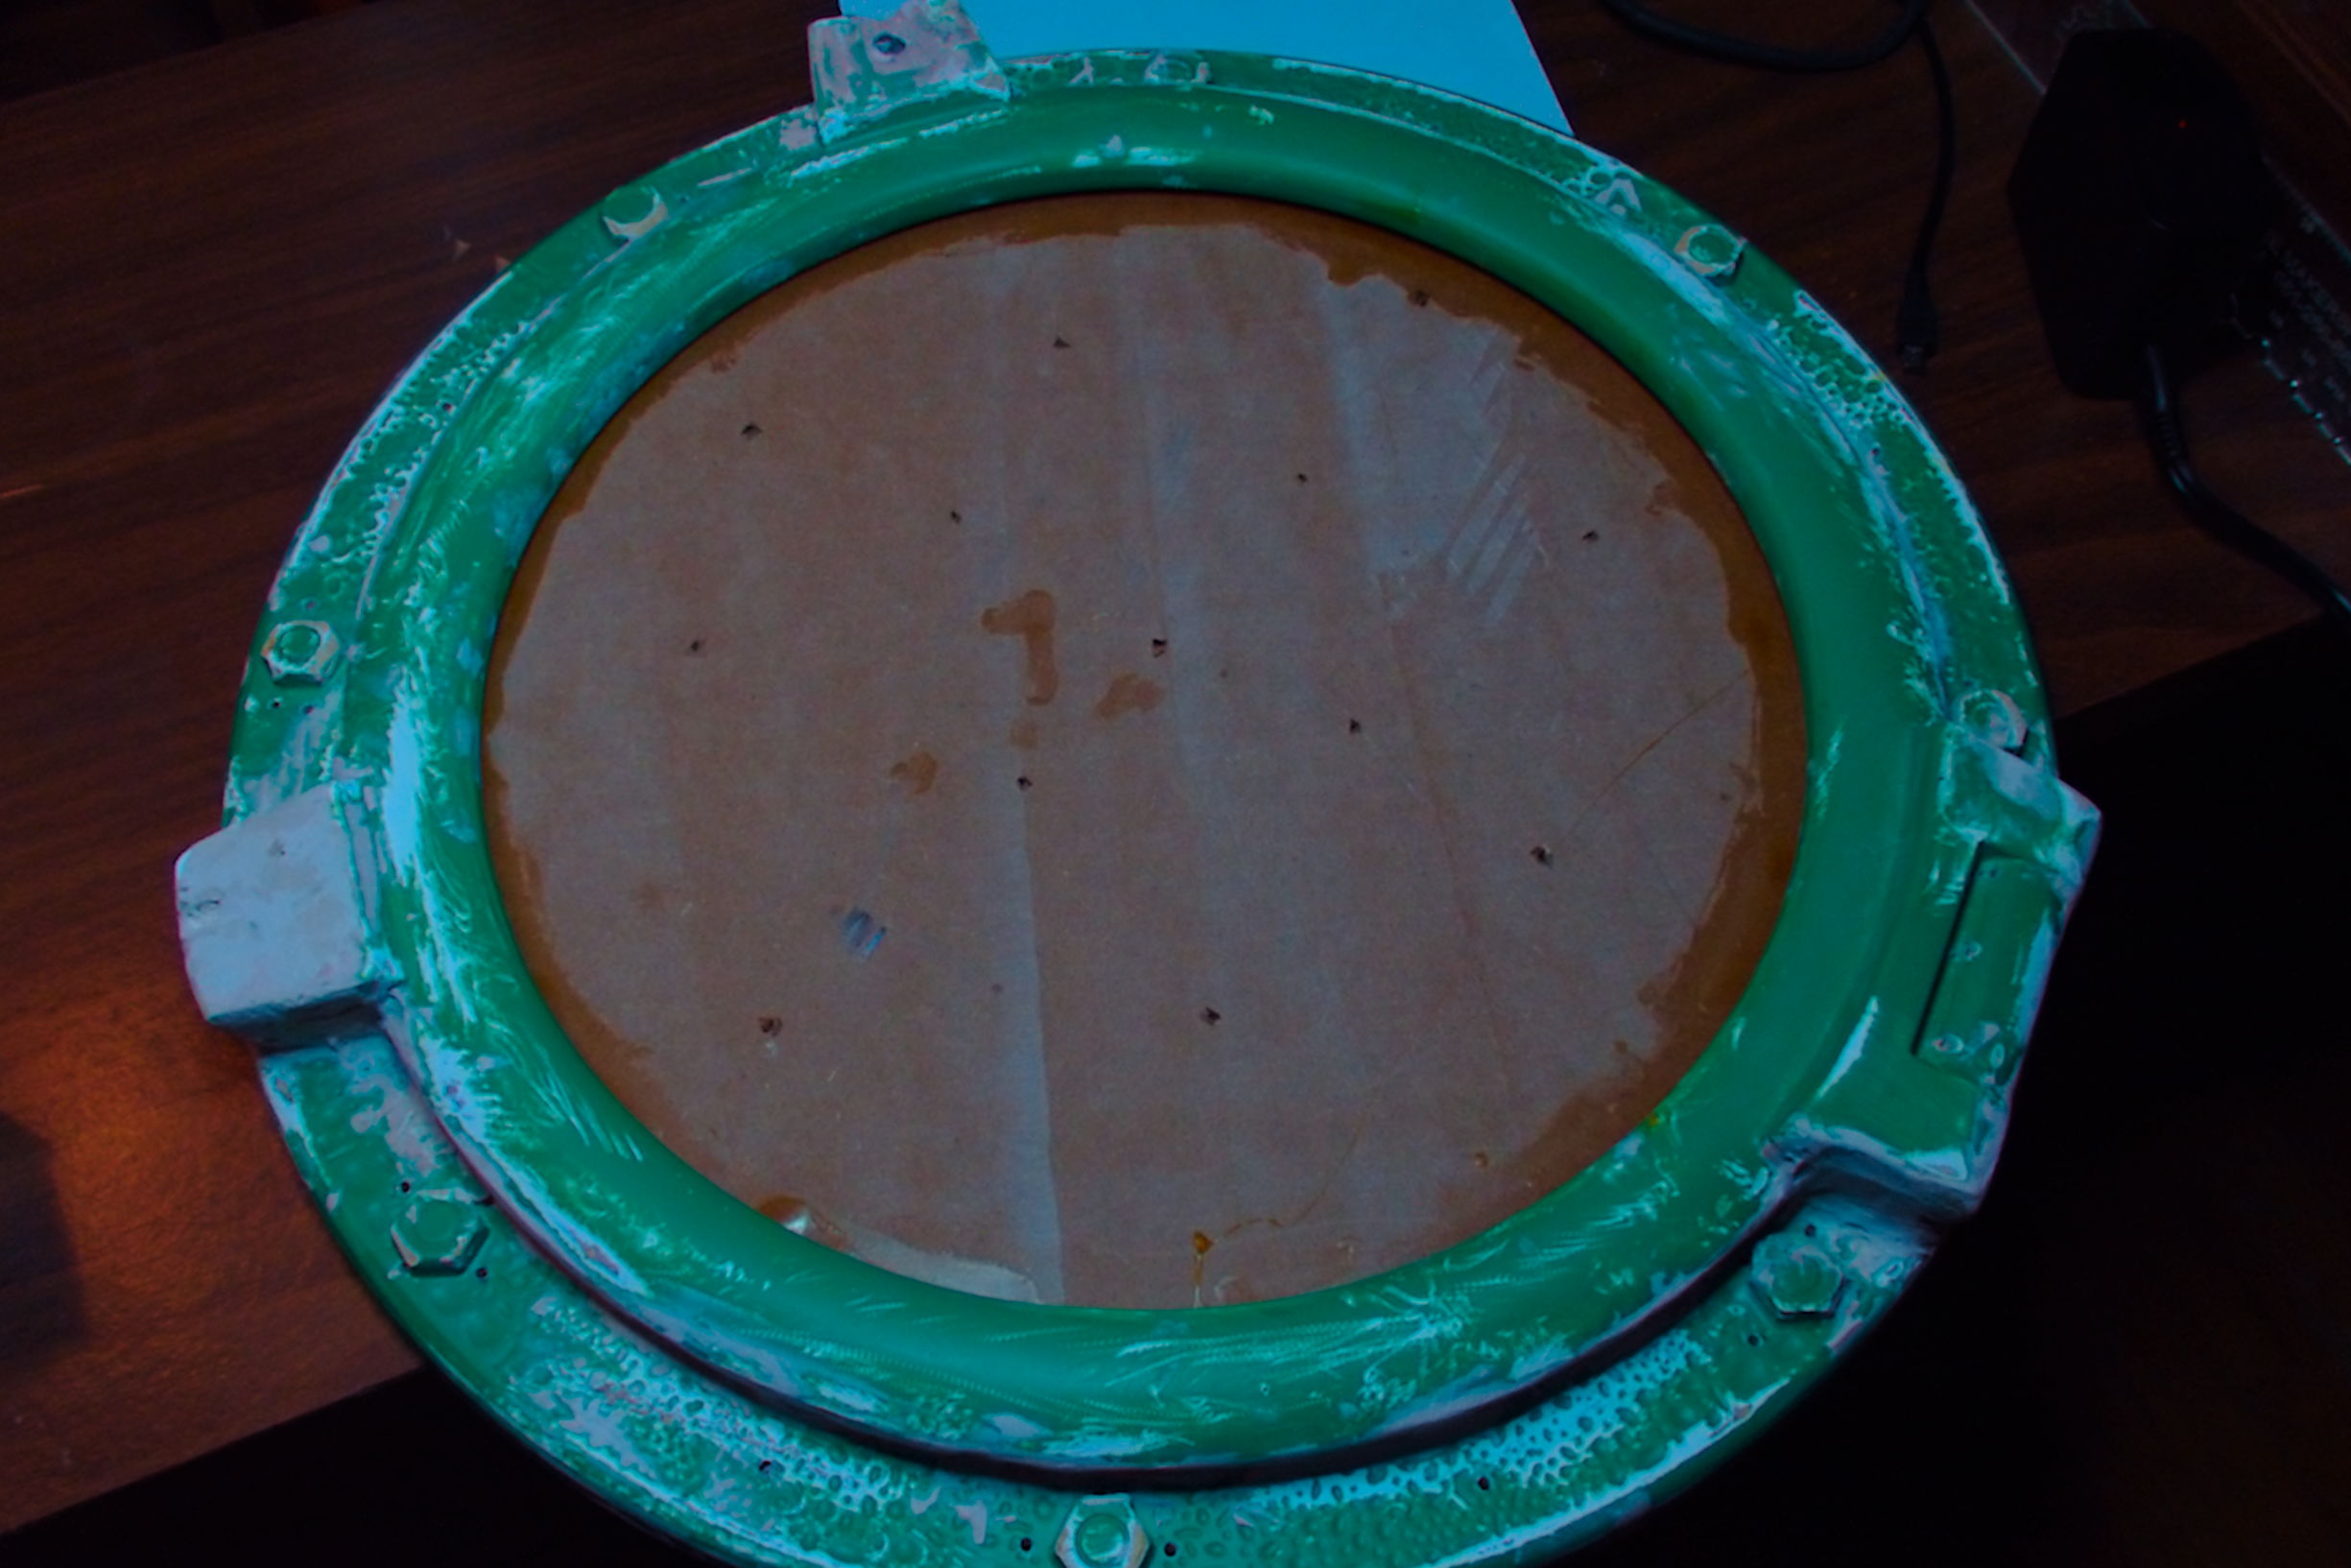
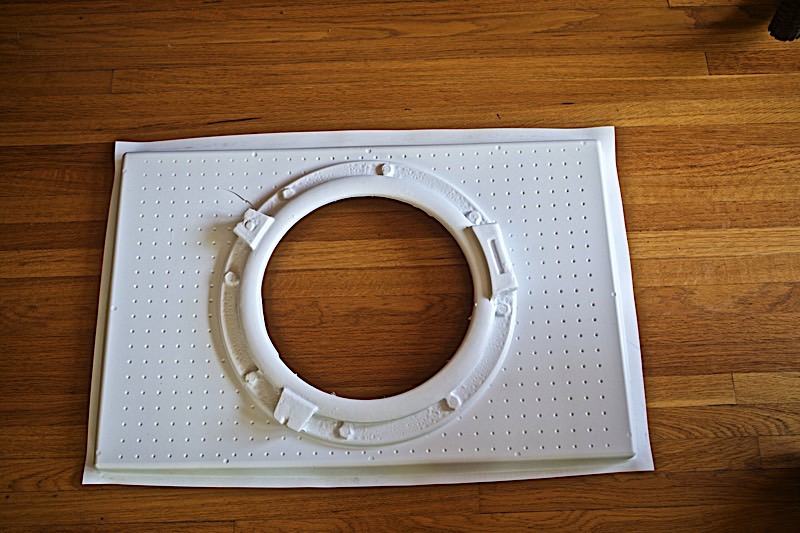
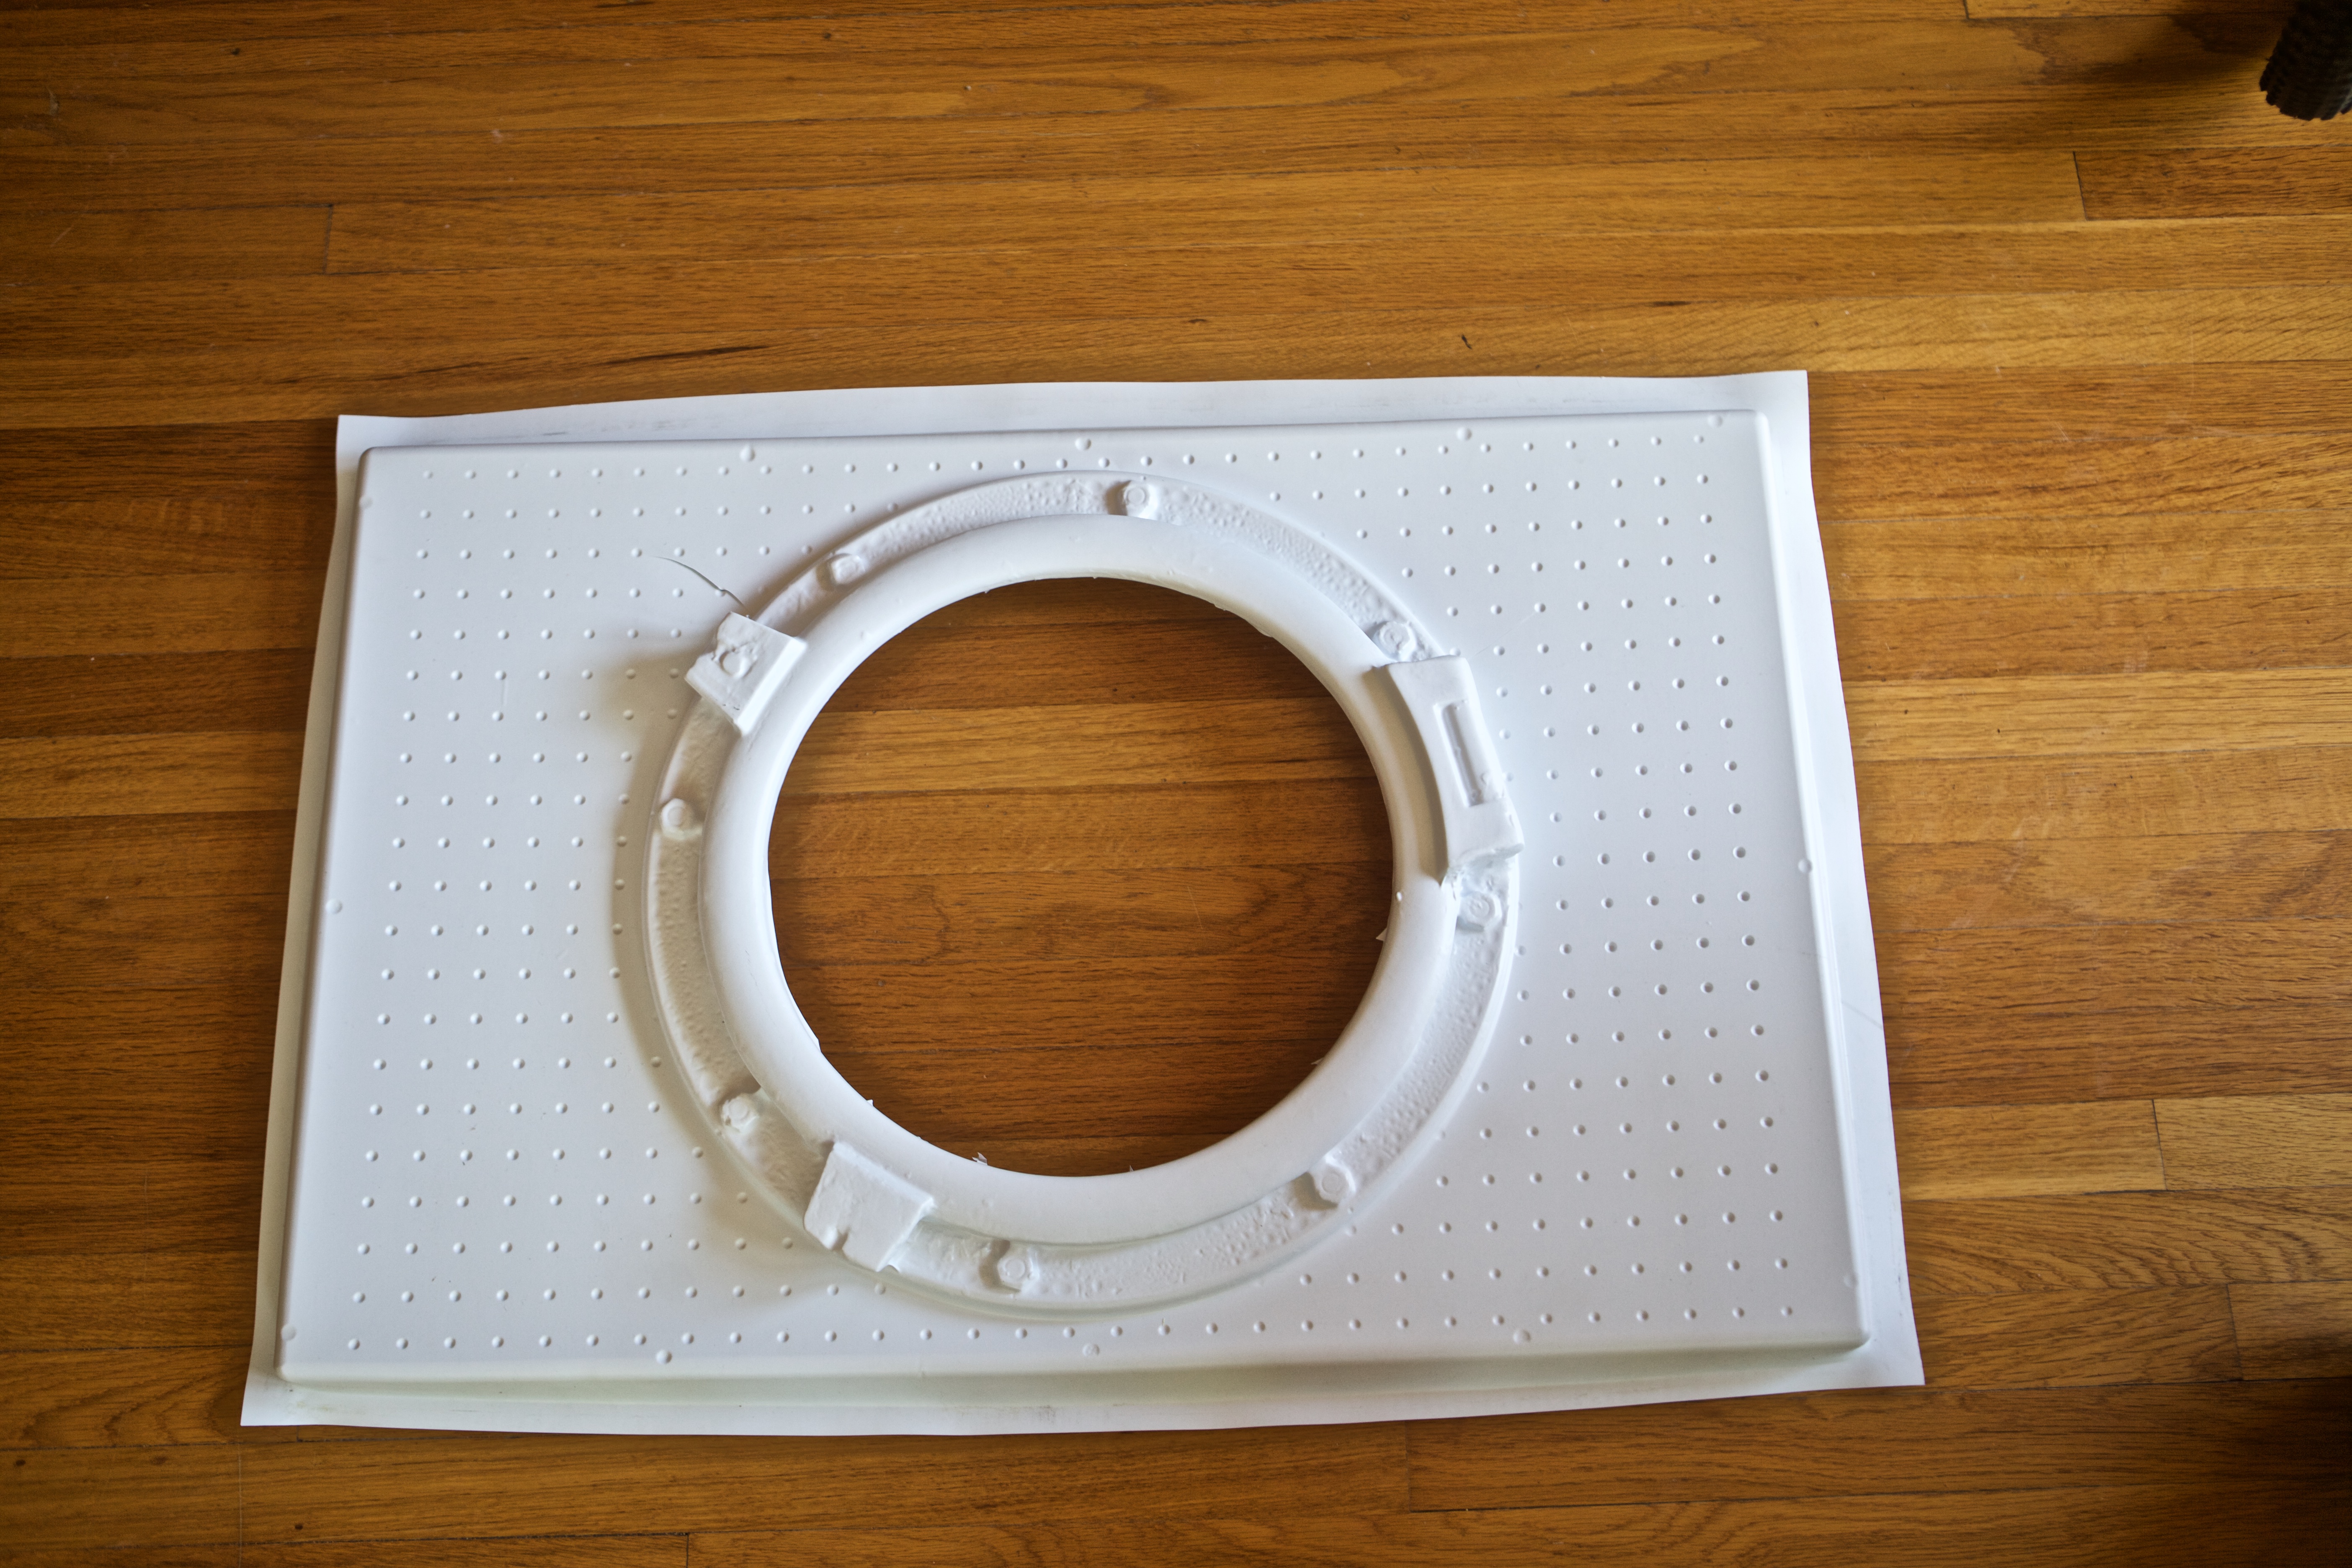
The holes drilled into the frame need to lead to a source of vacuum. If they simply drop down onto the Thermo-forming machine's pegboard without aligning with one of the holes on the pegboard, then then hole does little good. To ensure a vacuum occurs at each pin hole, the bottom of the frame was routed out into a large cavity area underneat the buck:
High-resolution image shot on a Lytro Illum
As a first attempt, the interior of the mirror frame was filled with the mirror's backing board, which was glued in place. Holes were drilled on this board to provide a vacuum to suck the plastic down to the level of the board.
High-resolution image shot on a Lytro Illum
I also printed some little cylinders on my 3D printer (about 11/16" high) to support this board as it was not flush with the bottom of the frame. Though glued in place, a vacuum pressure of several negative PSI (I believe it's -15 PSI), when spread across the entire surface, could suck the backing board out of the frame. I thought that placing four supports underneath the backing board would solve this problem. I was wrong.
On the first "pull" I made, the vacuum pressure immediately sucked the backing board down (breaking the glue bond) and, in fact, the vacuum was so strong (15 PSI spread across about 60 square inches is a lot of pressure!) the supports punched a hole through the backing board.
Oh well, I did the pulls without the backing board in place.
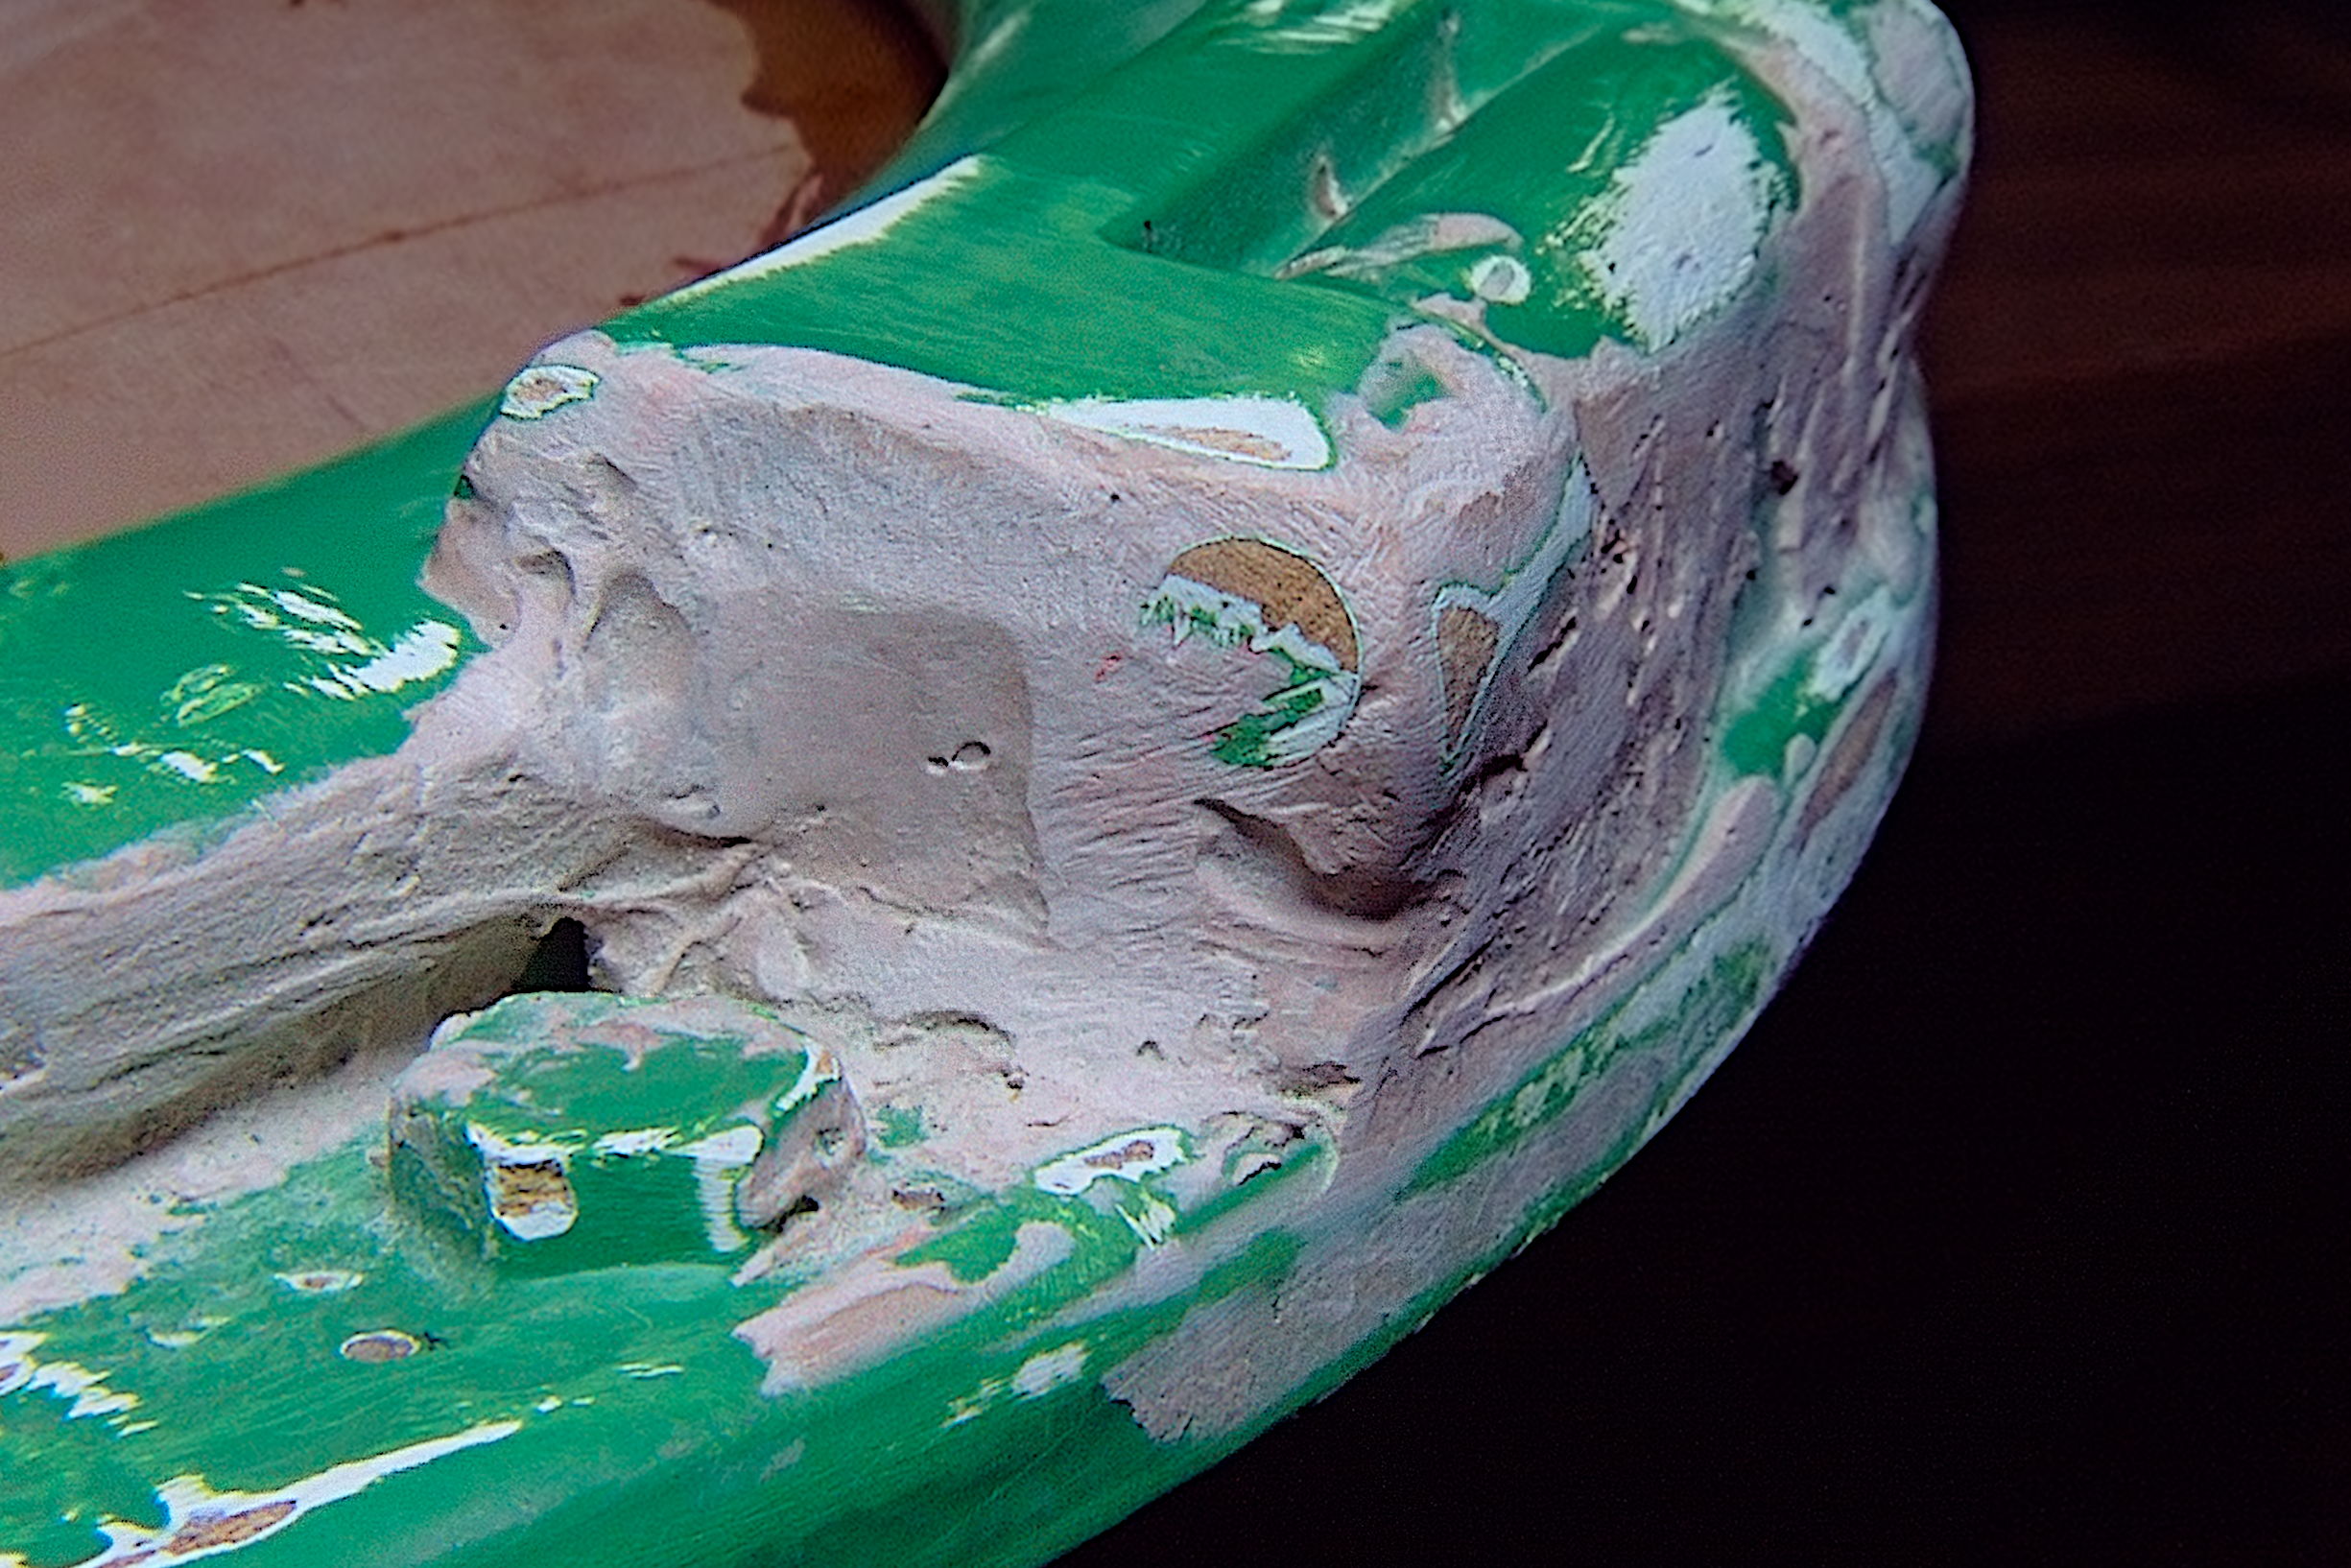
Finally, the frame had considerable overhang around the top ring. CBU students mostly filled this with Bondo:
High-resolution image shot on a Lytro Illum
As it turned out, there was still considerable overhang. For vacuum-forming you really want a six degree or better angle away from the top of the buck to the bottom. As you can see in this picture, that just wasn't happening.
As it turned out, making pulls within the backing board created a huge overhang. The vaccum-forming machine sucked the styrene completely underneat the interior of the mirror frame. There was no way to easily remove the buck from the intact styrene. No problem, I didn't need the interior piece of plastic so I cut it out while the buck was still in place:
 High-resolution image shot on a Canon EOS 5D MkII
Even with the center cut out, I still could not release the buck from the plastic without tearing the plastic (notice the tear mark in the upper left hand corner of the port hole shape). Therefore, I preemptively made a straight cut across the port so I could control the tearing. Once I made the cut, it came apart fairly easily. When the port hole was assembled and painted, the cut was barely noticeable (and certainly not noticeable from audience viewing distances).
 High-resolution image shot on a Canon EOS 5D MkII
The Vacuum-forming machine at Vocademy works with 2'x3' sheets of plastic (Styrene in this case). As the mirror frame is about 22" in diameter, the machine is capable of producing exactly one plastic molding of the object per sheet of styrene. Styrene comes in 4'x8' sheets. When cut down to 2'x3' you get five sheets plus a 1'x2' sheet (which cannot be used in the Thermo-forming machine).